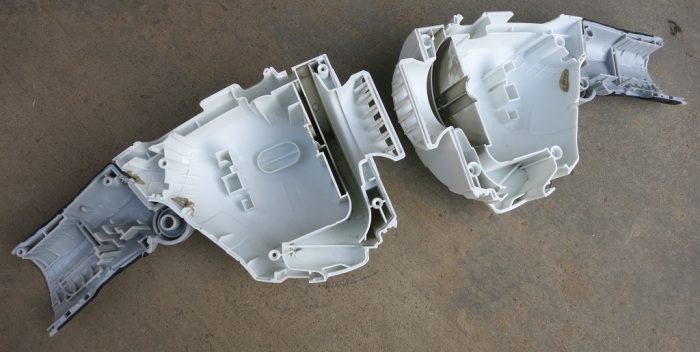
After waiting 24 hours, the adhesive should be fully cured. First the clamp holding the trimmed Dustbuster body to the NEXTEC battery compartment was removed. Then the screws holding the two halves together were removed. Finally the big moment: try to pull the two halves apart. If they were accidentally glued shut, it’ll be difficult to put all the components back inside the case.
With a soft pop, they opened up. The pieces that we’d want to stay together stayed together, and the parts that we want to separate separated. Whew!
From there it was straightforward to reinstall all the necessary components back in. Then the soldering iron was warmed up to make the electrical connections. The new wires are thicker gauge than the original wires, but it makes sense to upgrade the wires due to the increased battery voltage.

As a cleanup task, the former charging port’s connection to the motor frame were severed. This avoids any accidental charging of the new lithium battery pack at nickel cadmium battery voltages. We’re keeping the charging connector plate solely for cosmetic reason of not leaving an empty hole in the bottom of the enclosure.
Before putting the two halves back together, it was wise to perform a quick test with the battery to verify the switch functioned and the motor is turning in the correct direction. The final step is to put the two halves back together and reinstall all the screws.

This old Black & Decker Dustbuster is now powered by the Sears Craftsman NEXTEC battery system. It is definitely far more powerful than a week ago on weakened Ni-Cad battery cells. And likely far more powerful than when it was new. It may even be more powerful than its modern successors, as a search indicated they are running on two-cell lithium-ion batteries instead of our three-cell upgrade.
This concludes a fun upgrade project with a practical end result.
(Cross-posted to Hackaday.io)
