
I just bought the top-of-the-line Xbox One X in order to play Forza Horizon 4 in 4K HDR. I’ve also reclaimed my old Xbox 360 Halo 4 Edition, which I loaned out to a friend’s family but the children had lost interest in the older console. I got the console itself back, plus my old game library and all accessories. This all started when I went looking for my old Kinect sensor bar, but that’s a story for another time. (UPDATE: “another time” had come.)
Physically, the biggest thing in this package was the Xbox 360 Steering Wheel. Built to offer realism through force-feedback and take severe physical punishment, it was big and beefy and takes up entirely too much space. A problem that almost certainly drove its retirement and replacement by a much smaller controller. Since it is not compatible with my new console, where I can play all four Forza Horizon games, I see no reason to keep it around in running condition.
Which means it is time for some fun!
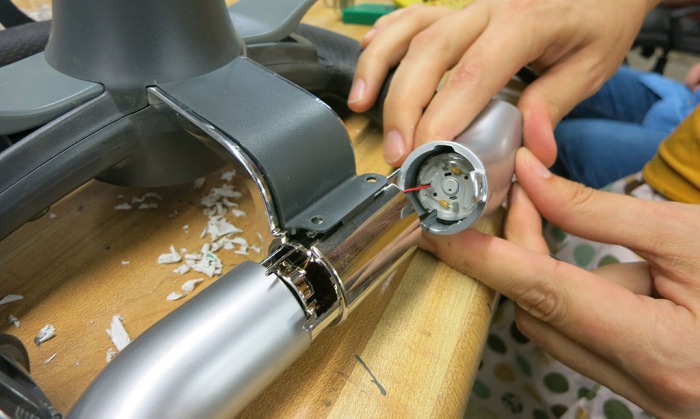
I brought it to our weekly maker meetup where we can tear into this relic of the past. The big wheel is set aside for now, we’ll start with the pedals. These are designed to sit on the floor and take the force of frantic game players stepping hard on them. They are made of extremely sturdy plastic with surprising heft.

It was straightforward to open up, where we can see it is fairly simple inside.
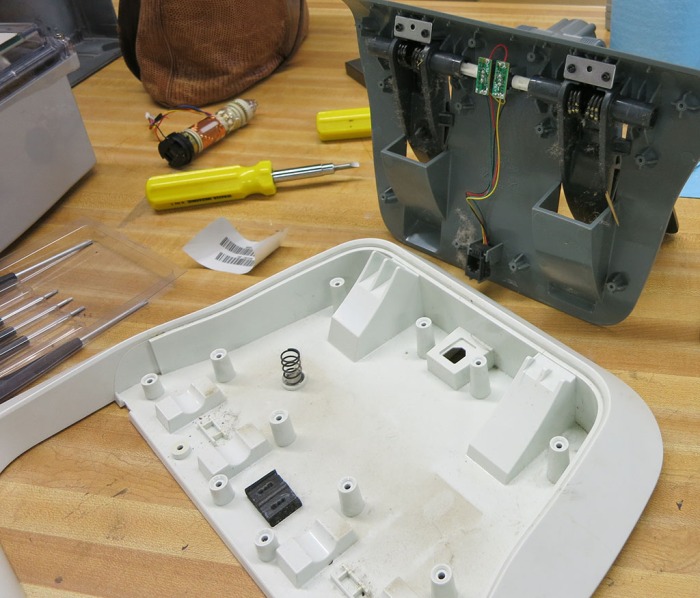
All the force gets dissipated by heavy duty springs and metal brackets into the beefy plastic, leaving only the rotational motion to be read by simple position encoders which are likely just inexpensive potentiometers.
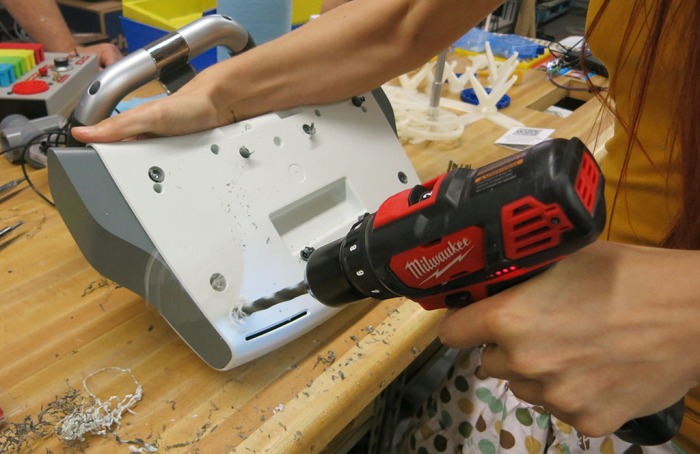
That done, we start tearing into the wheel itself. Most of the visible screw holes are at the bottom, where it is curved to fit on our laps. Unlike the pedal unit, these screws are “security screws” with a post in the middle of the Torx shaped fastener. It proved to be a minor annoyance but easily overcome with brute force as we don’t care about putting it back together.

After the “lap desk” layer was removed, we repeat the process for the actual enclosure.
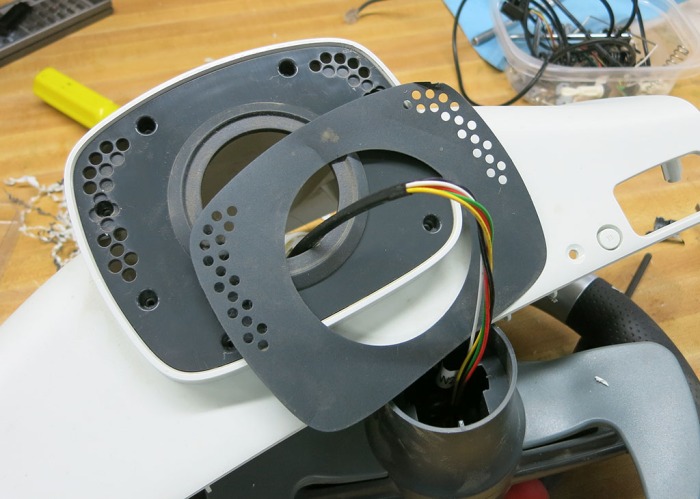
A lot of destroyed fasteners and plastic later, the innards of the steering wheel is visible. As expected, it is mostly empty space. To the left is a control board with three wire bundles leading to the rest of the wheel. There’s one controlling the motor to provide force feedback, one to a sensor to read steering wheel angle, and a wiring harness going through the center of the steering shaft to the wheel-mounted controls.

Here’s a closeup of the force feedback motor and gearbox. Mechanically, this area takes the brunt of forces players would apply to the steering wheel. So I expect I can reuse this robust assembly in a physically demanding project in the future.

However, it proved to be tricky to remove. The four obvious screws release the metal plate, but that is only part of the assembly. There had to have been fasteners coming in the opposite direction, but none were clearly visible. By process of elimination, we eventually figured out the screws were hidden under a stealthy sticker that matched its surrounding color and shape so well we didn’t realize it was a sticker.
After that discovery, it was trivial to remove the motor gearbox assembly.
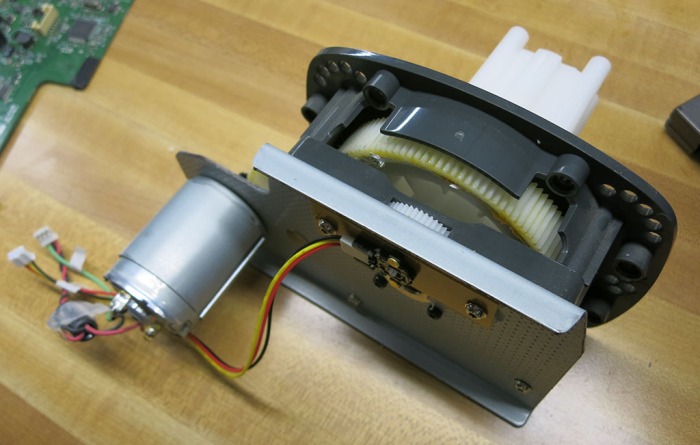
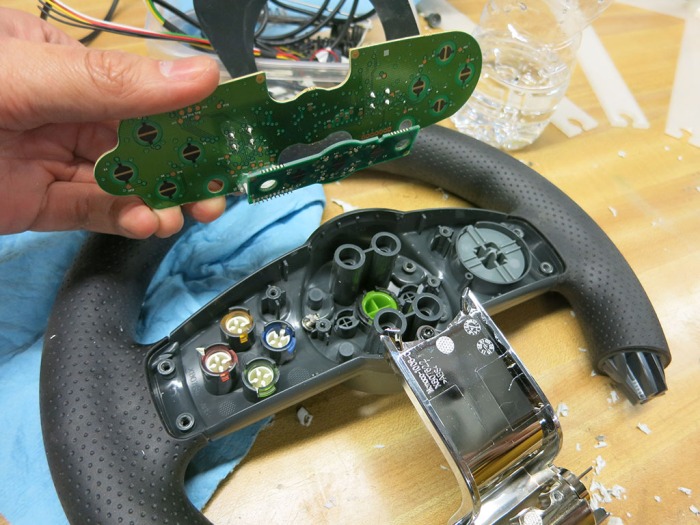
The main board was also removed for examination. The electronics people in the room looked over the board and noted the main processor has a Microsoft logo on it. We had expected to find name and designation for a microcontroller we might reprogram, but this is a custom chip.

Teardown proceeded to the wheel unit itself, where we found another surprise: The big motor isn’t the only one providing tactile feedback. The bottom left and right corners of the steering wheel also housed vibration motors.
The two motors appeared identical, but they had different sized weights affixed to their output shafts to produce different tactile sensations for users’ palms.

The shifter paddles in the back of the wheel also had to take some punishment, as people can pull on those pretty hard. Again, a lot of mechanical design dissipated any over exuberant energy into sturdy plastic pieces and metal springs, leaving just a simple mechanical motion to press on small push buttons on the back side of the wheel circuit board.

Remainder of the in-wheel PCB was unremarkable with standard buttons.
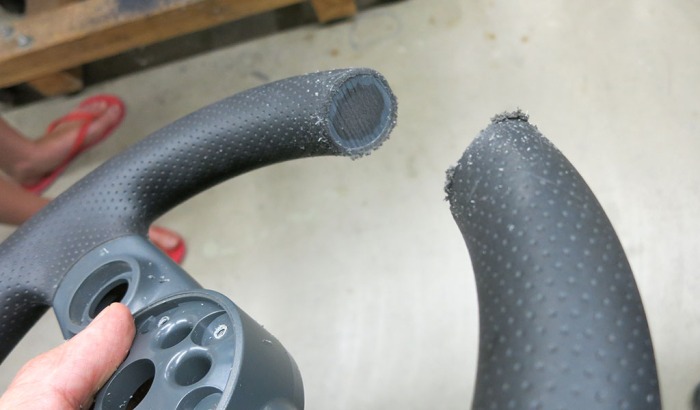
The physical wheel we hold in our hand, however, was interesting. Its weight led to speculation that it might have metal weights inside or possibly be formed from a steel tube. We put it through a metal-cutting bandsaw and found that it was solid heavy plastic all the way through. Three layers are visible: The crudely formed center (dark gray) which is likely just a C shape. Then a more precisely formed plastic layer was formed over it (lighter gray) which probably also formed the center of the wheel housing all the buttons and PCBs. Then finally, a soft rubbery rim was formed over that, with a dimpled texture for grip.
 This steering wheel controller was a lot of fun in its prime. It felt great in the hand making its best effort at realism. The robust construction took all manners of abuse (from children and grownups alike) without any sign of damage. This wheel was definitely not flimsy! I appreciated seeing all the work that went into making such a robust gaming peripheral.
Now all the potentially reusable parts like motors, springs, gearboxes, and electronics have been harvested and put away, consuming far less storage volume than the entire wheel and pedal assembly. The remaining (beefy) plastic is on their way to a landfill.

Would it be possible to get USB output from the pedals to a pc?
LikeLike
We looked over the circuit board hoping to find something labelled explicitly USB or things like “D+/D-” which would hint at USB. We didn’t find anything.
LikeLike
Hi!,
I have a controller, but it doesn’t have the pedals. Could you please give me an outline of the potentiometers to make it.
LikeLike
Apologies, but I no longer have them. The pictures in this post is all I can offer for reference.
LikeLike
I have the same wheel but i when it is plugged in the wall the xbox button wont light up and the wheel wont start up
The light down right lights up and i can feel the force feedback applying force
any thoughts on a fix?
LikeLike
Sorry, but we didn’t look in enough detail to know how to fix one. We just took one apart for curiosity’s sake and scavenge a few parts for use in future projects.
LikeLike
Put a Battery Pack In It
LikeLike
Can you tell me if there is anything special about the pedals to steering wheel cable? I just got this wheel and pedals but the cable supplied is a phone cable (not original) which I think is the reason that when I take my foot off the gas pedal the car drives backwards.
LikeLike
I’ve never noticed anything that indicated the cable is any different from a phone cable, but I have not tried to swap them myself.
LikeLike
it is way different than a phone cable. look at the wire colors. phone cable is backwards to the xbox cable, i had the same problem. just cut off one end, make the wires the same orientation, and put a new end on
LikeLike
Did anyone manage to wire a pedal set to work correctly with this wheel?i have the wheel without the pedals, but the wiring found on a revision 1 pedal set (yes there are two revisions) did not seem to work…
LikeLike
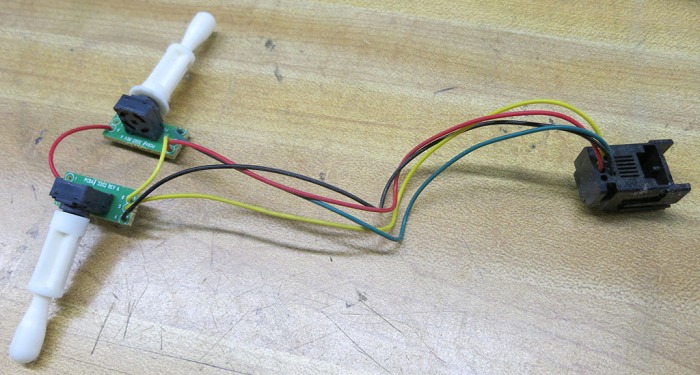
I just pulled apart a pedal base to see what was in it, and to use the potentiometers for a project.
There are two potentiometers, and they seem to be manufactured by ALPS, with a limited rotation of maybe approximately 45° at the most. There are only four wires: +v (I would imagine 5v), ground, and the wiper for each potentiometer. This should be relatively simple to make work with an Arduino Leonardo or Pro Micro to interface as USB.
LikeLike