 And now for something with aesthetics as its primary function: A duck light. I started with the battery-powered LED lights imitating little tea light candles. These lights are widely available at very low cost from discount stores and dollar stores. My local 99-cent store sold a pair of lights for 99 cents.
The lights consist of the functional base, incorporating the battery, the switch, and the LED. It sits under the cosmetic shell, which is a cylinder pretending to be a candle with an unconvincing imitation flame above it. A little prying action should be sufficient to separate the shell from the base.
The unremarkable cosmetic shell can go in the trash. Then measure the diameter of the remaining base. Use that as a starting point: Go into Onshape and design a custom shell for that base.
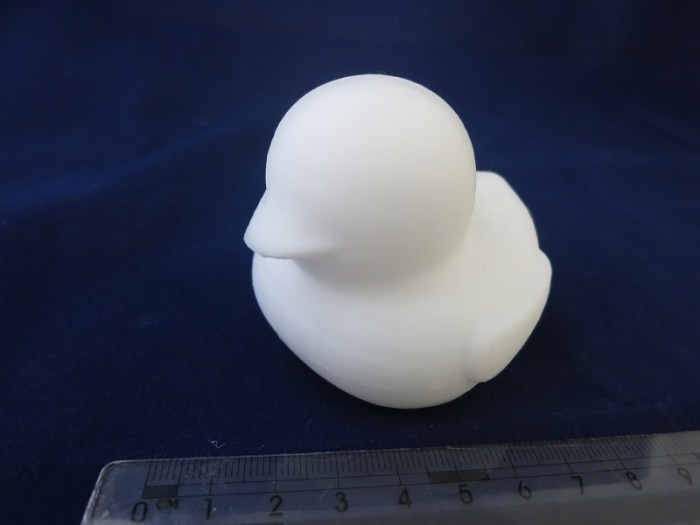
My custom shell project started with a surface that describes a variant of the popular bathtub toy duck. It was not difficult to import the surface data into Onshape, but making use of the shape turned out to be more difficult than anticipated. Onshape surface manipulation tools aren’t robust enough (yet?) to deal with arbitrary surfaces imported from elsewhere. In theory I can use the “thicken” command to turn the surface into a solid, but it and many related operations fail with a generic error message.
After some trial and error I found that the split operation works: Define a large rectangular solid, position it over the duck surface, and split the solid block into two: the duck and its negative. After deleting the negative, I have a solid duck shape.
In theory I can use the Onshape “hollow” tool to hollow out the duck shape, but again I was stymied by the error messages. To work around this problem, I started crafting shapes to manually carve out the interior. It didn’t take terribly long to hollow out the bulk of the duck this way.
After sending the hollowed-out duck to my 3D printer, I was able to mate it with the LED light base and now I have a custom duck-shaped tea light!
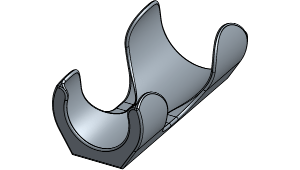 The next problem to solve in the kitchen are a pair of oil bottles – sesame oil and chili oil. Conveniently, they are from the same company so they have the same sized bottles. Inconveniently, they stand taller than other items in the kitchen cabinet, blocking views to the back and easily topple over as I reach for nearby items.
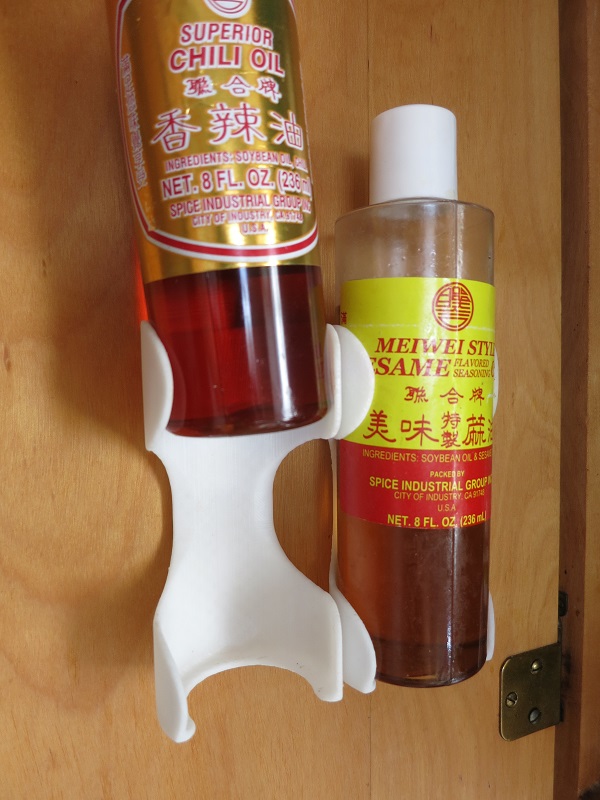
 After being duly humbled by the complexity of the planetary gears project, I decided to back off a bit and tackle something simpler. While cooking in the kitchen, inspiration struck as I poked around in the cabinets looking for the condiments I wanted: let’s organize this thing.
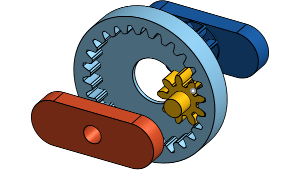 After getting the 3D printer settings dialed in, successfully printing small test objects, I decided to tackle a real project. Move beyond printing static shapes and make a multi-part machine.
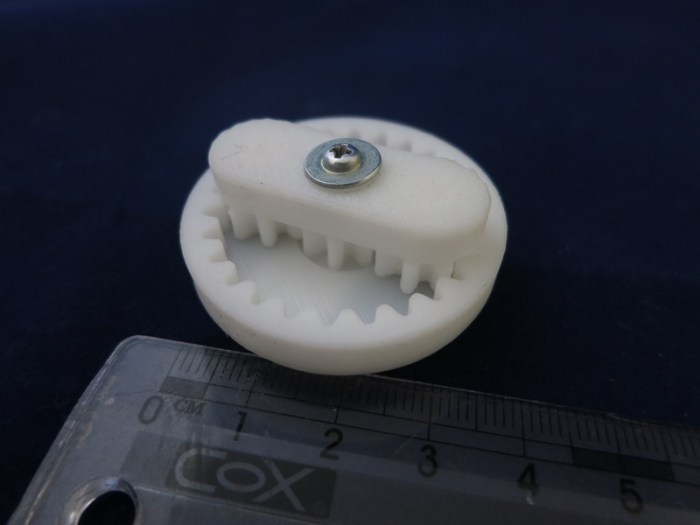
 The current state of the art in consumer home 2D laser printer is that I can expect perfect prints immediately. Take it out of the box, load paper, load toner cartridge, hit print, and out pops a crisp printout.