Desktop PC Component Advantage: Sustained Performance

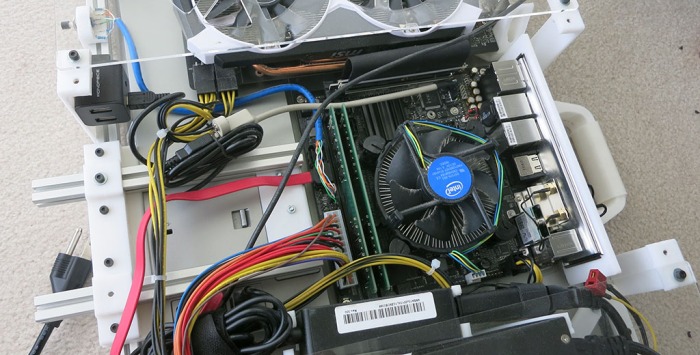
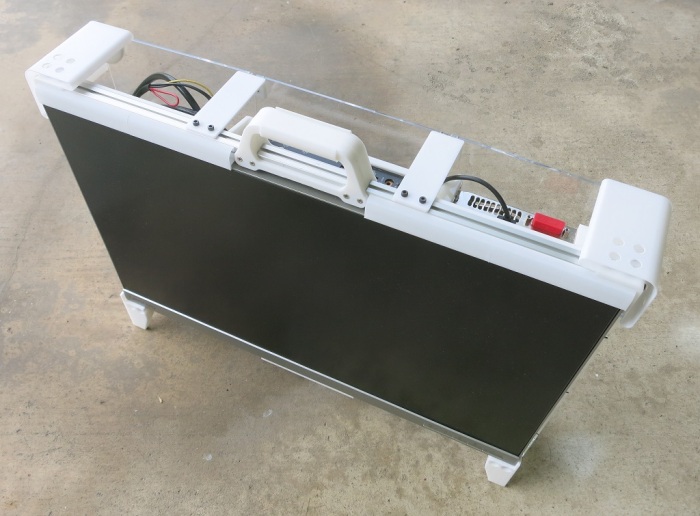
A few weeks ago I decommissioned Luggable PC Mark II and the components were installed into a standard desktop tower case. Heeding Hackaday’s call for donating computing power to Folding@Home, I enlisted my machines into the effort and set up my own little folding farm. This activity highlighted a big difference between desktop and laptop components: their ability to sustain peak performance.

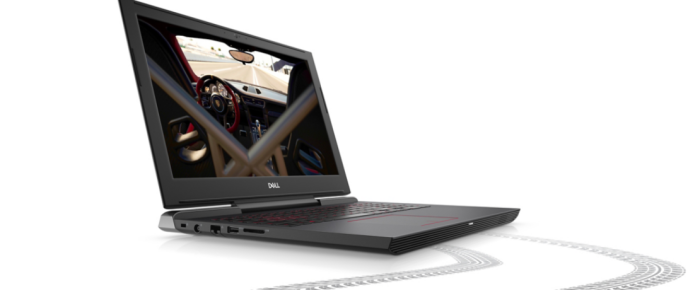
My direct comparison is between my ex-Luggable PC Mark II and the Dell laptop that replaced it for my mobile computing needs. Working all out folding proteins, both of those computers heated up. Cooling fans of my ex-Luggable sped up to a mild whir, the volume and pitch of the sound roughly analogous to my microwave oven. The laptop fans, however, spun up to a piercing screech whose volume and pitch is roughly analogous to a handheld vacuum cleaner. The resemblance is probably not a coincidence, as both move a lot of air through a small space.

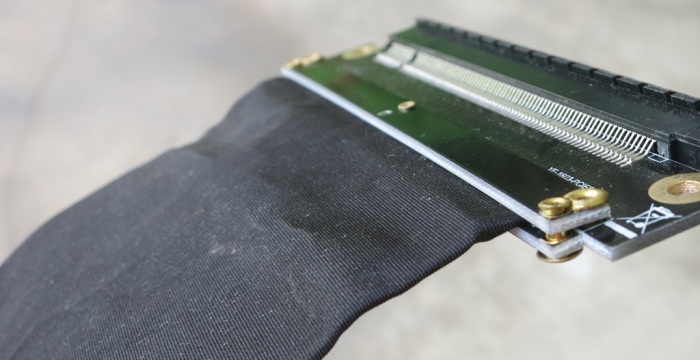
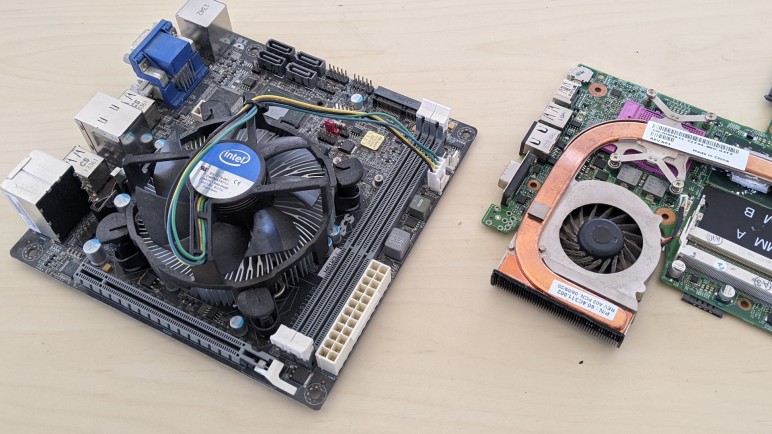
The reasoning is quite obvious when we compare the cooling solution of a desktop Intel processor against one for a mobile Intel processor. (Since my active-duty machines are busy working, I pulled out some old dead parts for the comparison picture above.) Laptop engineers are very clever with their use of heat pipes and other tricks of heat management, but at the end of the day we’re dealing with the laws of physics. We need surface area to transfer heat to air, and a desktop processor HSF (heat sink + fan) has tremendously more of it. When workload is light, laptops keep their fans off for silent operation whereas desktop fans tend to run even when lightly loaded. However, when the going gets rough, the smaller physical volume and surface area of laptop cooling solutions struggle.

This is also the reason why different laptop computers with nearly identical technical specifications can perform wildly differently. When I bought my Inspiron 7577, I noticed that there was a close relative in Dell’s Alienware line that has the same CPU and GPU. I decided against it as it cost a lot more money. Some of that is branding, I’m sure, but I expect part of it goes to more effective heat removal designs.

Since I didn’t buy the Alienware, I will never know if it would have been quieter running Folding@Home. To the credit of this Inspiron, that noisy cooling did keep its i5-7300HQ CPU at a consistent 3.08GHz with all four cores running full tilt. I had expected thermal throttling to force the CPU to drop to a lower speed, as is typical of laptops, so the fact this machine can sustain such performance was a pleasant surprise. I appreciate the capability but that noise got to be too much… when I’m working on my computer I need to be able to hear myself think! So while the ex-Luggable continued to crunch through protein simulations, the 7577 had to drop out. I switched my laptop to the “Finish” option where it completed the given work unit overnight (when I’m not sitting next to it) and fetched no more work.

This experience taught me one point in favor of a potential future Luggable PC Mark III: the ability to run high performance workloads on a sustained basis without punishing hearing of everyone nearby. But this doesn’t mean mobile oriented processors are hopeless. They are actually a lot of fun to hack, especially if an old retired laptop doesn’t need to be mobile anymore.
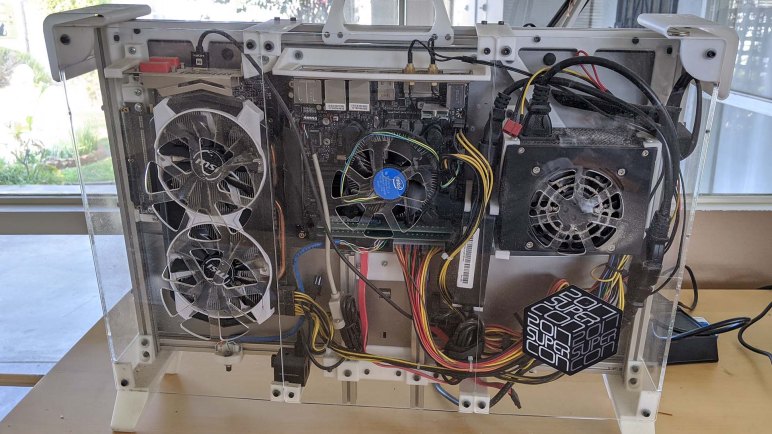
Luggable PC Mark II Decommissioned

The era of Luggable PC Mark II has come to an end. It has served me well for over two years, during its service collecting a generous coating of dust clearly visible through the clear acrylic panels. (In hindsight, not the best of ideas.) It has also collected an event souvenir in the form of the Hackaday Superconference 2017 sticker, where I had set it on the badge hacking workbench to create my time-lapse video project.

The point of failure is the video card subsystem, which is the primary purpose of the Luggable PC line of projects. Here’s the output when everything is healthy: the command lspci would include a line for VGA compatible controller: Advanced Micro Devices, Inc. [AMD/ATI]. But sometimes, the video card does not answer to roll call and that line is absent. When this occurs, the system falls back to Intel integrated graphics.

lspci output

It’s not clear if the failure originated in the video card, or in the flexible PCI extension ribbon cable that has caused problems in the past. I am tempted to replace the video card now that the cryptocurrency fad has calmed somewhat. High performance video cards are still rather expensive, but at least they are available for purchase! I had always intended to replace the video card in Mark II but the cryptocurrency craze distorted the market so much I ended up buying a laptop for my mobile computing needs. Once I had the laptop, the portability of Mark II was no longer as important.

Another development in hardware are the falling prices of UHD (or 4K) computer monitors, motivating me to move beyond the Lenovo QHD monitor at the heart of Mark II. A new video card and a new monitor working together to deliver UHD resolution at 60Hz was tempting enough. I will be removing the core of the machine (Mini-ITX motherboard, CPU, RAM, and M.2 SSD) into a commodity enclosure instead of building my own, driving a new RTX 2070 video card and UHD monitor. This will serve as my desktop computer until I feel the need to build a Luggable PC Mark III.

Dell Alienware Area-51m vs. Luggable PC

On the Hackaday.io project page of my Luggable PC, I wrote the following as part of my reason for undertaking the project:

The laptop market has seen a great deal of innovation in form factors. From super thin-and-light convertible tablets to heavyweight expensive “Gamer Laptops.” The latter pushes the limits of laptop form factor towards the desktop segment.

In contrast, the PC desktop market has not seen a similar level of innovation.

It was true when I wrote it, and to the best of my knowledge it has continued to be the case. CES (Consumer Electronics Show) 2019 is underway and there are some pretty crazy gamer laptops getting launched, and I have heard nothing similar to my Luggable PC from a major computer maker.

laptops-aw-alienware-area-51m-nt-pdp-mod-heroSo what’s new in 2019? A representative of current leading edge gamer laptop is the newly launched Dell Alienware Area-51m. It is a beast of a machine pushing ten pounds, almost half the weight of my luggable. Though granted that weight includes a battery for some duration of operation away from a plug, something my luggable lacks. It’s not clear if that weight includes the AC power adapter, or possibly adapters plural since I see two power sockets in pictures. As the machine has not yet officially launched, there isn’t yet an online manual for me to go read what that’s about.
It offers impressive upgrade options for a laptop. Unlike most laptops, it uses a desktop CPU complete with a desktop motherboard processor socket. The memory and M.2 SSD are not huge surprises – they’re fairly par for the course even in mid tier laptops. What is a surprise is the separate detachable video card that can be upgraded, at least in theory. Unlike my luggable which takes standard desktop video cards, this machine takes a format I do not recognize. Ars Technica said it is the “Dell Graphics Form Factor” which I had never heard of, and found no documentation for. I share Ars skepticism in the upgrade claims. Almost ten years ago I bought a 17-inch Dell laptop with a separate video card, and I never saw an upgrade option for it.

There are many different upgrade options for the 17″ screen, but they are all 1080p displays. I found this curious – I would have expected a 4K option in this day and age. Or at least something like the 2560×1440 resolution of the monitor I used in Mark II.

And finally – that price tag! It’s an impressive piece of engineering, and obviously a low volume niche, but the starting price over $2,500 still came as a shock. While the current market prices may make more sense to buy instead of building a mid-tier computer, I could definitely build a high end luggable with specifications similar to the Alienware Area-51m for less.

I am clearly not the target demographic for this product, but it was still fun to look at.

In A Distorted Computer Component Market, Buying Is Better Than Building

The typical rule of thumb is that building your own computer from components is far cheaper than buying a prebuilt machine. Buying parts from Newegg.com, Amazon, Fry’s Electronics, etc. results in a better machine for less money than getting something from Dell. This was certainly true when I embarked on the Luggable PC project but a few notable events have since occurred to make an exception to the rule.

The blockchain fad is the biggest disruption. Cryptocurrency miners’ demand for graphics processors drove up their prices tremendously. At the beginning of my Luggable PC project, a NVIDIA 1060 card with 6 GB memory is considered a good mid-range GPU. (Or an entry-level unit for the more demanding world of virtual reality). A desktop 1060 video card was available for around $200 and I expected its price to drop as I designed and built my luggable PC. Instead, it spiked up to over $400 at times and is now hovering around $300.

The second disruption is in 3D-NAND flash memory. It is a big step change in price/performance so flash memory makers had no choice but to switch to 3D NAND technology or risk going out of business long-term. In the short-term, chip fabrication facilities have to be taken offline for this conversion, which meant a shortage of flash memory, 3D and otherwise, across the market. Driving up prices of solid state drives.

The third disruption is in DDR4 memory. There isn’t as clearly a single factor here but manufacturing capacity seems to be lagging market demand over the past year or so. Right now, DDR4 memory is nearly double the price of similar capacity DDR3 memory when historically they should be closer to price parity at this stage of technology maturity.

There are a few other factors at play, but the short-term trend is clear: many computer components have risen in price over the past year, counter to the long-term historical trend of ever-cheaper electronics.

Computer manufacturers like Dell deal in large quantities, and therefore they buy through supply contracts whose prices are independent of day-to-day market disruption. The upside of this approach is that, in times of supply shortages, Dell pays far less for their parts than market price.

download (1)
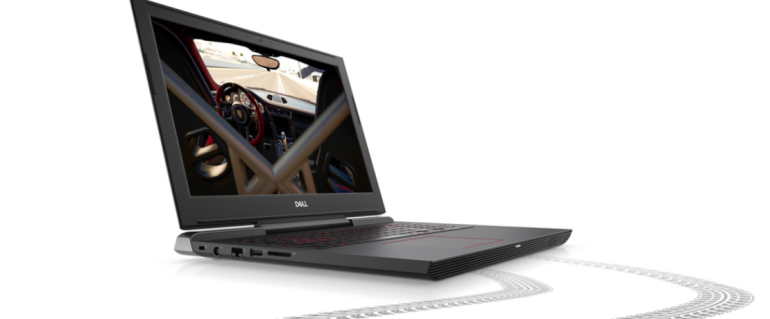
Dell Inspiron 15 7000

Today’s example: a particular configuration of Dell Inspiron 15 7000 Gaming laptop is available for $750 after promotional discount codes. Let’s look at the components and the current (approximate) market price for their desktop counterparts.

  • NVIDIA GTX 1060 with 6GB: Admittedly the laptop variant of this GPU is slightly less capable than its desktop equivalent, but for the purposes of this comparison we’ll count it at the full $300.
  • Intel Core i5-7300HQ: Again this is a laptop-only part. It is similar to the desktop i5-7400 processor in that they both have a peak speed of 3.5 GHz, so $200.
  • 256GB NVMe M.2 SSD: Unlike the other parts, desktop machines are happy to use the exact same M.2 form factor solid state drives using the NVMe interface. 256 is a little cramped but on a laptop it should be fine. (I stuck with 256 until the flash memory crunch eased a bit for me to upgrade to 512.) Let’s call it $100.
  • 8GB DDR4 memory at 2400MHz: The smaller laptop-sized DDR4 modules are a little more expensive than their desktop counterparts, but we’ll round up to $100.

With these rough estimates, we’re already up to $700 and we’re still missing some major components necessary for a working computer.

  • Motherboard with M.2 SSD slot and built-in WiFi: Bottom of the line units are available for $70-80 but a reputable unit will be $100 and up. (It is the backbone of the system so not the best place to economize.)
  • Power supply: We can pinch a bit here, reliable though not super powerful units can be had for around $50.
  • Display: A 1920×1080 IPS monitor will be around $100.
  • Keyboard, Mouse, case (luggable or otherwise) and other miscellaneous parts: Round to $50 for a nice even tally.

That’s $1000 to build a desktop or luggable PC with similar specs as this $750 Dell laptop. And while the screen might be physically larger, the whole computer definitely won’t be as lightweight and portable. Such laptop-only traits – light weight, tight integration, ability to run on battery – usually demand a price premium over equivalent desktops.

But things are weird in a distorted market.

(Cross-posted to Hackaday.io)

Upgrading M.2 SSD on Luggable PC

When Luggable PC Mark II was constructed in Fall 2017, the industry was experiencing a shortage of flash memory. Most of the fabrication facilities were switching to over to make the next generation “3D NAND” flash, following the lead of industry leaders like Samsung who got their 3D NAND flash up and running first. Taking fabs offline meant a shortage in supply and, with the technical glitches that always come with a big upgrade, the shortage in supply started driving prices upwards.

Industry news sources estimated the supply crunch will ease sometime around first quarter of 2018. So the decision was to use a 256GB M.2 SSD already on hand for the project expecting to upgrade later. Well, it’s the end of 1Q2018 and prices have indeed started dropping. 256 was getting awfully cramped so even though prices are likely to drop further, today it has dropped enough for impatience to win out. Time to double the capacity with a WDS500G2B0B.

This is a unit from Western Digital’s Blue line, the economy alternative to their high performance Black line. From a technical perspective, the biggest differentiation is the NVMe interface used in the Black line. We won’t get top of the line performance with a Blue drive, and ~500GB can still feel cramped at times, but it’s enough elbow space while we wait for 1TB NVMe 3D NAND SSD prices to drop. (That’s a lot of acronyms all strung together…)

The Luggable PC chassis was originally designed for easy SSD replacement by cutting an access port in the back plane to make SSD accessible by removing the monitor. Unfortunately, complications were found after assembly, requiring extra clamps to keep the monitor in place. Which sadly also made it much more difficult to remove, defeating the purpose of the access port. We’re back to plan A, removing motherboard to replace the M.2 SSD underneath.

Four screws were removed so we could lift the center panel.

1 - Center panel removed

Taking a good look at the insides, we see that one of the monitor mounting screws has gone AWOL. We’ll have to replace it during re-assembly.

2 - screw missing

After the wireless network cables were detached, along with the four motherboard mounting screws, carefully lifting the motherboard exposed the M.2 SSD underneath for replacement.

3 - SSD accessible

With the SSD upgraded, the biggest remaining pain point is the old GPU. We’ve waited six months for the 3D NAND transition to ramp up and drop SSD prices. We’re still waiting for the cryptocurrency fad to blow over so we can get a reasonably priced GPU…

(Cross-posted to Hackaday.io)

Supercon 2017 Fun: The Original Luggable PC

I named my Luggable PC project after the original IBM PC clone by Compaq. The Compaq Portable was the computer that started the PC clone market that is still going strong today. It picked up the nickname “luggable PC’ because it was roughly the size and weight of a sewing machine. I’ve seen pictures in books and on web sites, and occasionally I see a unit on display in a museum somewhere. I never expected to see and touch a running unit.

So I was pleasantly surprised (and amazed!) to see one at Hackaday Superconference 2017. It was brought in by Ariane Nazemi, who gave a talk about mechanical keyboards and brought the Compaq as one of his visual aids showing old-school mechanical keyboards. Chatting with Ari I learned one of his hobbies is to restore old computers to running condition. So the original luggable was not just a demonstration piece, it was an actual functional computer.

One of the optional equipment available for the Compaq Portable was a Computer Graphics Adapter. The CGA resolution of 320×200 is has long since been surpassed by modern equipment. But it isn’t very far off from the conference badge camera’s resolution of 128 x 128. And that’s probably why Ari worked to incorporate the Compaq into his badge project. I didn’t want to bother him while he’s focused on getting it to work, but I did ask to take a picture of my Luggable PC sitting next to the original while he worked.

LuggableOldAndNew

I had looked forward to his project presentation at the end of the conference, but I missed it because I had to take care of some administrative tasks. Alas.

It was great to have these two sit side-by-side and see over thirty years of progress in PC hardware evolution.

(Cross-posted to Hackaday.io)

Supercon 2017 Fun: Big Screen + Little Screen

I brought my Luggable PC Mark II (Rev B) to the Hackaday Superconference 2017. Its primary purpose was to be my development workstation as I dug into the source code for camera badge hacking. Its secondary purpose was to serve as conversation ice-breaker since the Supercon crowd includes the kind of people who would appreciate it. It accomplished its mission on both fronts!

One fun experience that came out of the weekend was sitting down in the badge hacking area next to the person behind the PaperBack project. He thought it was hilarious that I had the biggest screen on the table and his was the smallest. One discussion led to another and we decided it would be fun to have my computer simultaneously drive its big 24″ screen and his 6″ PaperBack screen.

We had to borrow a DVI to VGA connection from another helpful person in the badge hacking area, and there were some further fiddling with wiring connectors and display settings. (Including several reboots between Ubuntu and Windows since they each provide different ways to customize display parameters.) But eventually we got my Luggable PC to talk to his PaperBack as an external display.

PaperBack closeup

I put our respective Hackaday.io project pages on each of the displays. His PaperBack showing his project page, and my Luggable PC screen showing its own project page.

PaperBack and LugPCmkII

This was a completely random project done mostly just to see if it could be done. Exactly the kind of curious exploratory spirit that was pervasive throughout the conference.

(Cross-posted to Hackaday.io)

Tired PCI-Express Extension Cable Caused System Instability

I was ready for a break from working on the Luggable PC Mark II project and wanted to enjoy the results of my labor for a while. I started learning PIC programming but was frustrated by an unstable computer.

Revision A proved that the system works, and all components can happily run together reliably for a few weeks. But revision B was a problem child. It started off with occasional temporary recoverable system freezes. Then the system freezes would not recover and I had to power cycle the computer. Degrading further, the unpredictable failures would spontaneously reboot the computer.

The unpredictable nature of these events makes diagnosis difficult. Sometimes many hours would pass before an event, sometimes they would happen twice within the same minute. When one variable is changed, the system has to be left running to test if the change helped. Sometimes this meant running a system for hours before another reset occurred.

My initial suspicion was on overheating because a tremendous heat wave hit Los Angeles this week. But there was little correlation between temperature and stability. One of the “reboot itself multiple times within a minute” events occurred during the cool night.

The next suspicion was on power, as an under-voltage could cause these symptoms and the heat wave means a lot of air conditioners running in the neighborhood. But reboots continued after swapping in a different power supply and putting the system on an UPS.

The key insight was a system freeze during a work session where I had music playing in the background. The music continued but the screen is frozen, implying the video subsystem.

The PCI-Express extension cable was an unknown. I explicitly excluded one from Luggable Mark I just to eliminate that variable. As a test, the video card is inserted directly into the motherboard. The system is not luggable at all in this state but it proved informative because the system stayed stable for 24 hours.

Looking at the cable I removed from the system, I can see a lot of wrinkles from all the times I experimented with the layout and changed relative dimension of the components. Hypothesis: metal fatigue has started cracking some of the wires in this ribbon cable causing intermittent connections and general system chaos.


Wrinkly Cable

Normally a system installer would bend the ribbon cable into place once and leave it. I consider my usage pattern of performing many different bends over many weeks beyond normal expectation. Like bending a paperclip back and forth until it breaks.

In short: “My bad”.

I ordered another cable from the same vendor off Amazon (*), installed the replacement, and that restored system reliability. I plan to leave this second cable alone as much as possible. When I start working on revision C, I will use the old cable (now labelled “TEST”) to try out different layout ideas. Bend and flex and twist as I experiment. I won’t change the bends on the new cable until I settle on a layout.


(*) Disclosure: As an Amazon Associate I earn from qualifying purchases.

Rev. B @ Hackaday LA August Meetup

There’s nothing like a deadline to drive progress, so I’ve imposed deadlines on myself to keep things moving. For Luggable PC Mark II Revision B, the self-imposed deadline was to get it finished (enough) to show at the Hackaday LA August Meetup. It was a mad scramble towards the end, cutting fancy feature ideas in favor of simple ones that can be done quickly within the deadline. But I made it! I took it on the Metro Gold Line train to the meetup venue SupplyFrame DesignLab. Here’s a picture somebody took of rev B sitting on the projects show-and-tell table.

highres_464139891

Luggable PC Mark II Revision B sitting on the projects show-and-tell table along with project from other people. I’m not visible in this picture by [SpencerSkelly]

I always forget to take pictures of my own project while at a Hackaday meetup… I’m too excited talking about my project. I’m not visible in this picture. The location I spent most of my chatting time is blocked by the person with white polo shirt on the right.

Many Hackaday LA regulars are familiar with my Luggable PC Mark I, and might even be getting tired of it. Mark II was a fresh take and attracted a new wave of attention. It is always fun to share my projects with like-minded people.

RevB_Backjpg

RevB_Front

A downside of mad scrambles to meet deadlines is overdose. I’m enthusiastic about Mark II and there’s still lots to problems I need to fix with rev B…. but after the deadline scramble I’m ready for a break before I start working on rev C.

I was planning to go back to learning Python, but they had a giveaway at this meetup and I was granted a Microchip MPLAB Xpress PIC16F18345 Evaluation Board. Getting some basic familiarity with these low-power (in both computation power and electrical power) microcontrollers had been on my to-do list for some time. Now that a PIC microcontroller board has dropped in my lap, I might as well run with it!

Make a Flexible Bracket With 3D Printing Vase Mode

Due to real-world inconveniences like gravity and manufacturing tolerance, the monitor sags relative to the aluminum extrusion frame of Luggable PC Mark II Revision B. We’ll have to compensate for this by adding something to help hold the monitor in the frame.

This Lenovo L24q-20 has barely any bezel around the screen, which was a tremendous plus when I was shopping around monitors. The tiny bezel makes for compact dimensions which makes it easy to package, and the lack of excess material contributes to weight. But now the lack of bezel means I need to be careful with the bracket that we’ll need.

When there’s physical stress on a LCD screen, it distorts the layers inside and show up as visible color distortions on-screen. It isn’t good for the screen and doesn’t look good, either. We want something that can spread this stress evenly over a large area. Ideally something flexible so high-stress areas can give way to balance the load.


I started designing rigid 3D printed brackets with stick-on foam strips for flexibility, but then remembered “vase mode”. This is an option in 3D printing where, instead of printing a solid object, the plastic is only extruded on the perimeter. This results in a thin shell of the shape, the thickness of the wall is the 3D printer extruder nozzle diameter, and the center is empty.

Thingiverse had a few objects to be printed in “vase mode”. It was good for showing off something 3D printers can do easily that is difficult for other manufacturing methods. But while it was good for these Thingiverse trinkets, I didn’t see a functional use for this technique… until today!

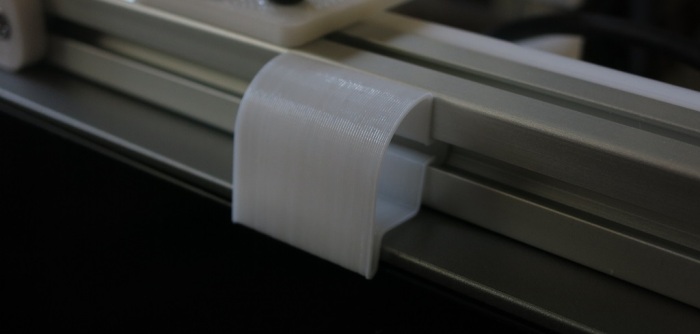
I designed the shape I wanted in Fusion 360 (as a solid) and printed a short segment using vase mode to prove the idea is sound.

Monitor top test clip
Short test piece of clip printed with vase mode

Once the short test piece proved successful, I proceeded to print enough segments to cover all available space on the extrusion bar. (Everything not taken up by the handle or the corner pieces.) They hold the monitor in place while distributing that pressure across almost the full width of the monitor.

Clip full width
Four segments of flexible clip (two on each side of handle) printed with vase mode

CAD World vs. Real World: Chassis Flex

On today’s episode of “why we build prototypes”: chassis flex.

In the digital CAD world, all features are exactly as drawn. Their dimensions always perfectly match the specified value. All surfaces mate perfectly. All fasteners are aligned to their holes. All dimensional values are static and never change, regardless of the physical stresses applied on them. Multiple objects are allowed to occupy the same space.

None of these things are true in the real world.

Digitally simulating all the messiness of the real world are hard. There exists software tools for engineers to simulate specific aspects. Interference checking can try to find objects occupying the same space, but it can be deceptive because they rarely take into account all the other factors such as manufacturing tolerance and physical stresses.

Finite element analysis can help understand how objects move in response to physical loads in the real world. It takes some level of expertise to properly set up an analysis, beefy computing resources to run the simulation, and then human expertise again to interpret the results. A badly set up simulation will tell the wrong story, a bad interpretation can do the same, and manufacturing tolerances can throw everything off in unexpected ways.

For a hobbyist project that is quick to build and failure is cheap, it is faster and easier to find out how things act in the real world by just building it in the real world. Hence the construction of Luggable PC Mark II Revision B. Seeing everything in the physical world highlighted some problems. Most of them are trivial, but one stood out.

The Lenovo monitor is attached in the lower back, using a metal plate I pulled from the original display stand. The plate goes to a 3D-printed spacer, which attached to aluminum extrusion bars, which attach to another 3D printed part, before it is attached to the bottom of the aluminum frame. All those less-than-perfect joints add up to a clearly visible problem. The monitor is supposed to sit within the aluminum extrusion frame, but when all the little errors accumulated, the top edge of the monitor does not sit in the frame like it did in CAD, it actually juts out over 20 mm from the frame.

Next: how to help the top of the frame and the top of the monitor stay together.


Screen frame separation


Maintain Relative Spacing Between M3 Nuts in Misumi HFS3 Aluminum Extrusions

In the previous post I described how to keep individual M3 nuts in place on a Misumi HFS3 Aluminum Extrusion. After I started using those little 3D-printed holders to keep the nuts in place, I ran into a related but different problem.

Some large parts require more than one fastener to hold them to the extrusion. And some of these parts get moved around as I revise the details of my design. A specific large bracket required four nuts and, after pushing the M3 nuts around (all four every time I moved the bracket) I started thinking about how to improve this process.

The first answer was to scale my existing design upwards. Instead of a tiny object that holds a single M3 nut, create a longer strip that holds multiple nuts in place. In practice, the friction of a longer strip causes many problems. When pushed, the strip will want to bend instead of move, which increases the pressure on the sides of the rail, which made it even more resistant to moving. And when pulled, the strip is not strong enough to stand up to the strain and would break apart.

The second answer is to reduce the size so there’s less frictional stress to bend or stretch and generally break the strip. But then the old problem came back: with less friction, the nuts would move around if the frame is jostled or tilted. It’s nice that they all move together, maintain proper spacing, but that’s not terribly useful.

The third answer is to combine elements from the previous two: the strip inside the rail is still loose and free to move, but I added a tab that sticks above the rail. This tab is large enough to provide friction against the rail edge. As the friction is at tab, friction would not cause the rest of the strip to bend or stretch. Since such a strip is customized for a particular part, the tab is also specialized to the mating part. When the tab is pushed up against the side of the mating part, all the nuts on the strip are at the appropriate places.

With the help of this strip, it is now much easier to move the brackets around to try out different ideas.

Nut locator strip


Make M3 Nuts Stay Put in Misumi HFS3 Aluminum Extrusions.

While putting together the exterior extrusion frame for Luggable PC Mark II Revision B, I got frustrated with another recurring headache. Aluminum extrusions (like the 15mm Misumi HFS3 I’m using) are shaped so I could put fasteners (in this case, standard M3 nuts) in a rail to fasten things at arbitrary locations along the extrusion. The fact the nuts can slide anywhere along the rail also meant they don’t stay still. If I place the nuts at the desired locations, I have to be careful not to bump or tilt the assembly or the nuts will go sliding out of position.

After too many episodes of nuts moving out of place, I decided to put some thought into the problem. I ended up with a small 3D printed part I can insert into the extrusion along with the M3 nut. It is large enough to rub against the edge of the rail and thereby holding the M3 nut in place, but small enough that it can still be moved with a little push.

Nut hold insert

It was a challenge to dial in the exact dimensions. The acceptable range is very narrow – in fact almost too narrow for a consumer-level 3D printer like mine to handle. Within the same batch I printed, some are extremely tight and some are too loose. If I print at a different time of day, some are entirely unusable. I also ran out of one spool of filament during a print, and the new spool (even though it is the same type from the same vendor, probably even the same manufacturing batch) returned different results.

So I have to keep adjusting dimensions and generate different files between batches. Fortunately, since they are small, it is not a huge loss of material to just throw away the unusable pieces. It solves my headache and that’s all I really ask of them.

Extrusion Frame for Luggable PC Mark II Revision B

Revision A of Luggable PC Mark II is a bare-bones skeleton that proved that all the components can more-or-less play nice together. It did not try to do anything beyond that, such as actually being a luggable chassis. That’s the job of future revisions starting with revision B.

Up front and center is to find a way to attach a carrying handle. Rev A had two load-carrying extrusion beams sticking up straight through everything, which was easy to build but got in the way of packaging components around it. For rev. B I wanted to try routing all the structural extrusions around the outside of the enclosure.

When building Luggable PC Mark I I had designed the frame with all the extrusions precisely seated against each other. This turned out to be a mistake because it was very difficult to cut beams to exact lengths and also to have exactly squared-off ends. The edges of the extrusions are dependably precise: the same could not be said of the ends.

Applying that valuable lesson to Mark II meant that all the extrusion-to-extrusion contacts are edge-to-edge. The ends of the extrusions will either go into 3D printed plastic  or just dangle into space. This way, minor error in length and squareness will not affect the overall design.

Misumi does not sell ready-made brackets to bolt 15mm HFS3 extrusions together, so I designed and 3D-printed my own. Since I’m making my own custom designs anyway, it was easy to incorporate features I wanted in my own design. In the case of the exterior frame of rev. B, it meant shock-absorption bumpers for the corners of the frame.

PLA is not very flexible so the impact absorption will be minimal, but it was fun to build.

LugPCM2RB Frame

Simplify3D Custom Supports for Lenovo L24q-20 Power Adapter Bracket

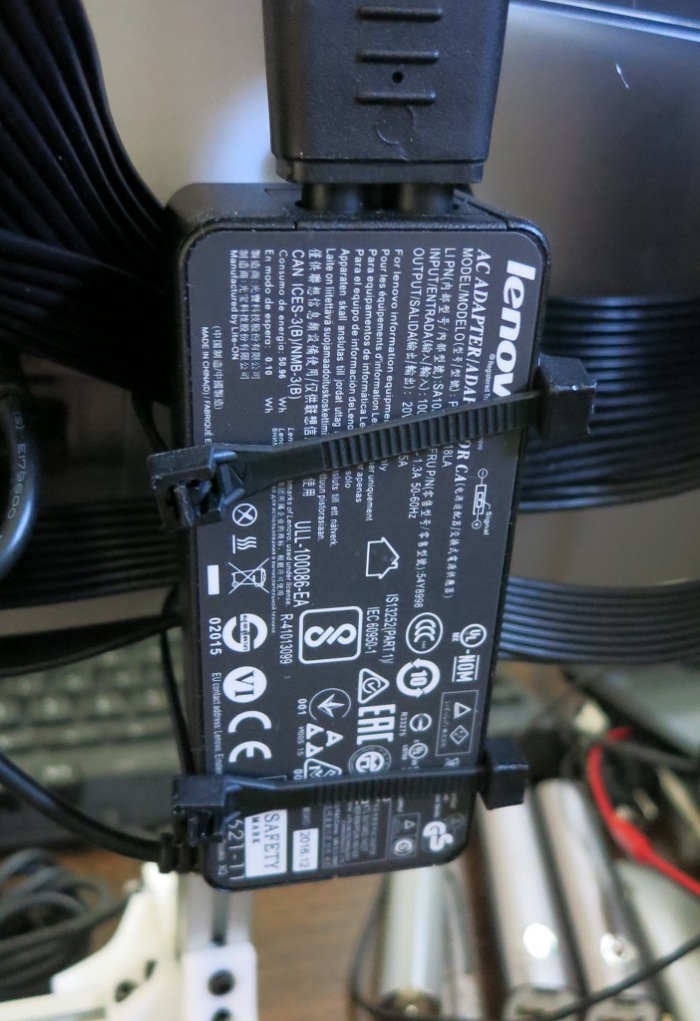
The Luggable PC Mark II project is built around the Lenovo L24q-20 QHD (2560×1440) monitor. One of the reasons I chose this screen was because its AC power adapter is relatively small and I thought I could package it within the enclosure. For Revision A, I didn’t do anything fancy: the power adapter is zip-tied to one of the aluminum extrusions. I should do better for Revision B.

Monitor PSU zip tie

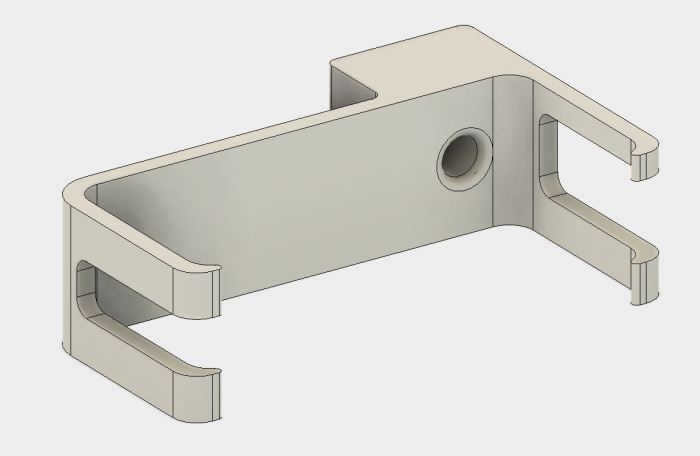
The goal is to design a mounting bracket that can hold the AC adapter in place, look relatively elegant, allow easy removal of the adapter, and do it all while taking up minimal space. This is commonly solved by a bracket with flexible claws to hold the object in place, so I designed one of my own tailored to the dimensions of this adapter.

Monitor PSU CAD

My 3D printer can translate this CAD object into the real world, but it needs a little help. Deposition modeling type 3D printers like mine can’t put things in arbitrary locations in space, due to pesky things like gravity. The fastener screw hole in the middle has enough surrounding material for the 3D printer to build up the top of the hole despite gravity, but the tines at the end need to be supported while printing.

This is one of the strengths of Simplify3D as slicer – the ability to customize these printing supports. I wanted supports to help me print the fork tines on the ends, but I didn’t want any support for the fastener hole as they are unnecessary and, if present, would be very difficult to remove. In Cura 2.x (which came with the 3D printer) supports are an all-or-nothing proposition. I could not selectively choose what to support. Simplify3D allows me to do so.

Monitor PSU S3D

And thanks to this custom support, I have a clean fastener hole along with fork tines to hold the power adapter in place. I don’t use Simplify3D custom supports very frequently, but when I do, I’m very glad I have the tool at my disposal.

The Tale of the Scale

With the core components and the auxiliary accessories installed, I have a usable computer. It is time to find out how much this setup weighs.

Weighing this configuration establishes a lower bound for the final contraption. Whatever a complete luggable enclosure may weigh, it must have all the parts present on this first draft, so it’d be impossible to be any lighter.

Luggable PC Mark I weighs in at 17.5 pounds and while it is no lightweight, I’ve had no problems lifting it by the handle and carrying it around. Some of the credit goes to the strong and smooth handle sold by Misumi for the HFS-5 extrusion. (HHDFL19) The strength gives confidence for carrying and the smooth surface helps make it comfortable.

Tux Lab’s “Luggable Frame” project with the Yamakasi Catleap 28″ monitor and the HP Z220 small form factor case sets the upper bound for weight. While it can be carried short distances (say, across the room) at over 30 pounds it is not practical to carry much farther. I expect Mark II to be lighter than that combination, but would it be lighter by a useful amount?

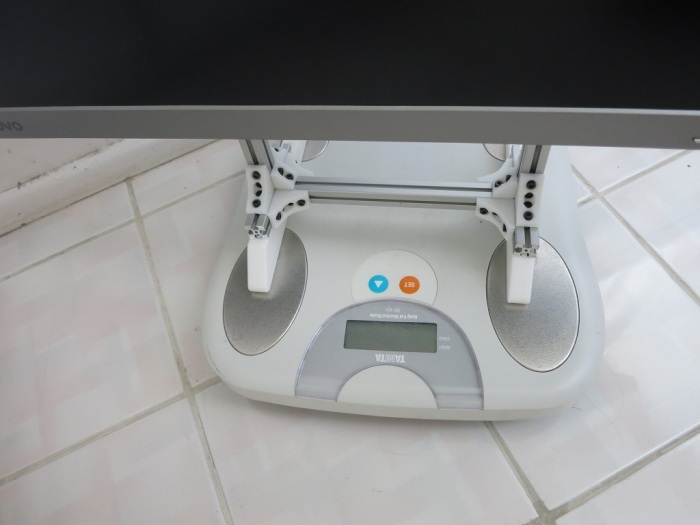
I didn’t need precise measurements – it’s just for a rough baseline – so I used the most convenient weight measuring device: my bathroom scale. I mentally gave myself a drum roll as the bathroom scale took measure of the Luggable PC Mark II…

Bathroom scale

And the number that came up was… 16 pounds!

That’s not a bad starting point. I expect the final enclosure to weigh more than 1.5 pounds, so the first usable luggable Mark II will weight more than Mark I. That’s not a huge surprise since the larger screen is significantly heavier than a salvaged laptop panel. The challenge would be to keep the weight as low as it is feasible.

Given a bare-bones skeleton baseline of 16 pounds, I’ve set for myself a target weight for the final product at 20 pounds.

Onward to the next iteration.

Need Low-Voltage, Low Power Wire Bundle? Use Cat 5e Data Cable!

In addition to USB ports, most PC tower cases also come with a front control panel that connects to the motherboard. This is where the power button, the power LED, and the hard drive activity LED are shown to the user. There is sometimes also a reset button, but they appear to be getting phased out. Personally I haven’t needed a reset button in years and any presses of the reset button in that time has been accidental (and usually instantly regretted.)

Part of building my own PC case is supplying these controls myself. This was part of the fun of building Luggable PC Mark I. For the power button, I wired up a big red button of the type typically used for arcade consoles.

The headers are easy to find (*), as are the LEDs and their associated current-limiting resistors. The momentary-on push button is also easily found. What gave me headache were the wires for them all. None of them need to carry a high voltage, or a lot of current, but there is a bunch of them and it was a hassle to keep them the same length and not tangled up. Given the hassle and the lack of need, it is obvious why I didn’t put a reset button on Mark I. Without reset, I only had to deal with 6 wires instead of 8.

Thanks to Tux-lab, I’ve learned a much better idea I can apply to Mark II: use a segment of standard networking cable. In my case, I have a spool of Cat 5e I can cut arbitrary lengths from. Cat 5e has 8 wires, enough for the purpose. Even a reset button if I wanted, which I don’t, so the fourth pair of wires were removed.

This is a neat trick, I’ll have to keep it in mind whenever I need low-power, low-voltage wiring bundles in the future.


(*) Disclosure: As an Amazon Associate I earn from qualifying purchases.

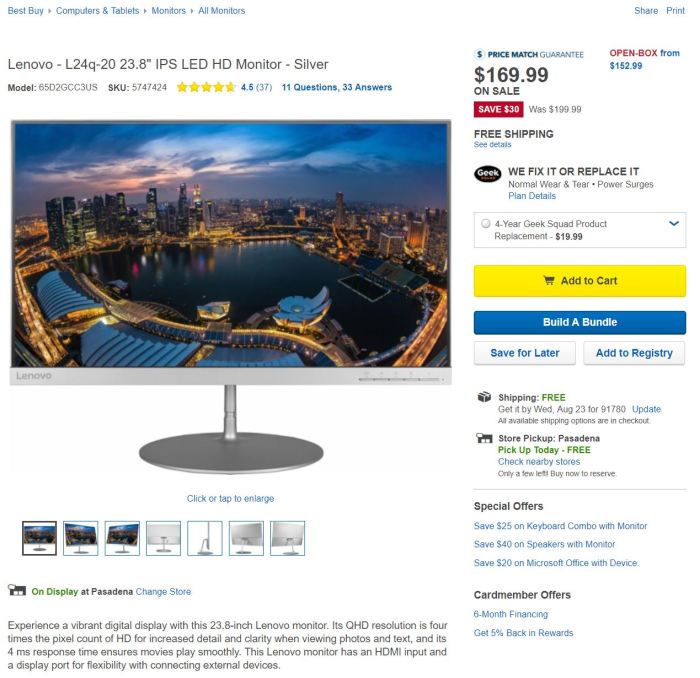
FYI: Lenovo L24q-20 sale $169.99 @ Best Buy

If anybody wants to follow along and build their own Luggable PC Mark II, as of this writing Best Buy has the Lenovo L24q-20 monitor on sale again for $169.99, a $30 discount (~15%) off the regular $199.99 price. I think this is part of the weekly deals so the price should be good through Saturday 8/26, 2017.

UPDATE: Price is back up to $199 as of 8/27, 2017. But since it’s been discounted to $169.99 twice already within the past few months, I’m sure the sale will roll around again.

BestBuyL24q-20Sale

Extra USB Ports Via Motherboard Headers

My Gigabyte Z270N-WiFi motherboard packs a lot of features into a little Mini-ITX form factor. One downside of packing features into the standard motherboard back plate is that they crowd out the USB ports and I’m left with only 4.

Well, 4 of the popular rectangular types anyway. I get a fifth USB port of the new USB-C connector that I like, but don’t have many uses for yet.

The surface of the motherboard was also cramped, and instead of the usual two (or more) USB2 headers, this board had only one USB2 and one USB3 header. Which should be enough.

Typically, a modern PC tower case has a few USB ports exposed to the user, and those ports connect to these headers. Since I’m building my own case, I’ll have to come up with something on my own.

I could buy the pieces and solder up my own, but it’s hardly worth the effort when Amazon marketplace has many vendors selling them ready-made. Since USB2 is not a very demanding specification by today’s standards, I decided I might as well try the lowest bidder first. At the time of my window shopping, that meant this particular two-pack. (*)

These plugs came mounted on metal plates suitable for installation into a standard PC case. The mounting was not a perfect fit: the plug bulged as if the distance between holes on the plate is half a millimeter narrower than the actual distance between screws on the USB plug. But that’s OK in my book, since I’m not using the metal plate anyway. For the Luggable PC Mark II I removed the plugs and zip-tied them to one of the supports. I’ll design a better home for them on the next draft.

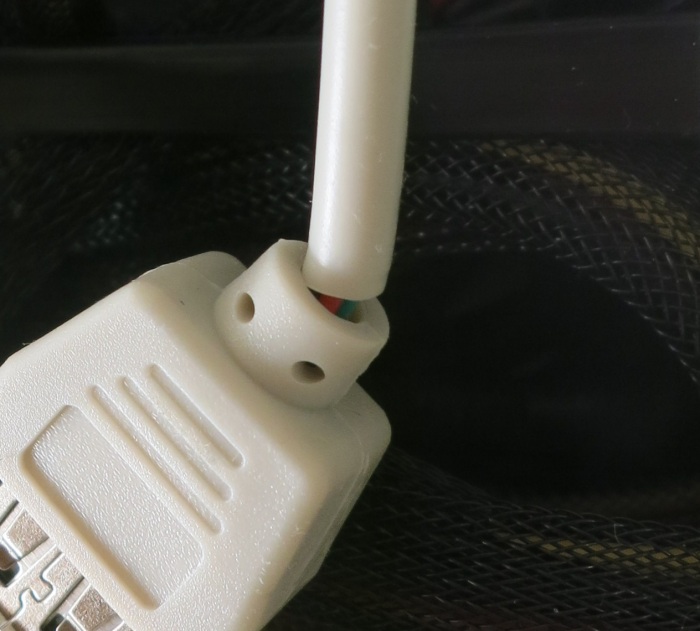
The other problem was its wiring sheath not fitting well inside the molded plug. Showing inside wire at the junction. Since I don’t expect much movement and flex in this wire, the lack of strain relief should not be a functional issue.

Bad Strain Relief

The important part is that they function just fine as USB ports.


(*) Disclosure: As an Amazon Associate I earn from qualifying purchases.

Aftermarket Antenna for Gigabyte Z270N-WiFi

One of the reasons I chose to buy my Gigabyte Z270N-WiFi motherboard is right in its name – it has built-in WiFi. Inside the box is a small antenna with two wires. The antenna is on a hinge so it can be tilted at an angle or folded down against the base, which has a magnet on the bottom.

Gigabyte Antenna

I thought this system was well designed for the typical desktop PC. The motherboard ports are usually sitting close to the ground against the wall and not a good place to have antenna stick out. Also, tower cases are typically steel, friendly for magnet attachment. So the bundled antenna and its wires allow the antenna to sit on top of the tower case where it should get a better signal.

My PC, however, is not a typical PC. Steel sheet metal is currently beyond my capabilities, so my case materials will be aluminum extrusion, laser-cut acrylic, and 3D-printed plastic. None of which are magnetic! Also, the placement of the motherboard meant the ports plate is top and center of the case, which is actually an idea location for an antenna.

Thanks to help from Tux-Lab, I learned the WiFi connector on my motherboard plate is of type RP-SMA. Given this information, it was trivial to find all the connectors for sale by Amazon vendors world-wide. I quickly noticed some of them only claimed to support the 2.4GHz band. A quick check on the spec sheet confirmed my motherboard WiFi is a dual-band unit so I need to look for dual-band antenna.

I eventually decided to try this item (*), a simple dual-band design with relatively high gain of 7 dB. After its arrival, I took a few measurements with the iwconfig tool.

  • No antenna: Link Quality=32/70
  • Original bundled antenna: Link Quality = 60/70
  • New aftermarket antenna: Link Quality = 70/70

Fewer wires, simpler design, higher link quality, I think this is a win!

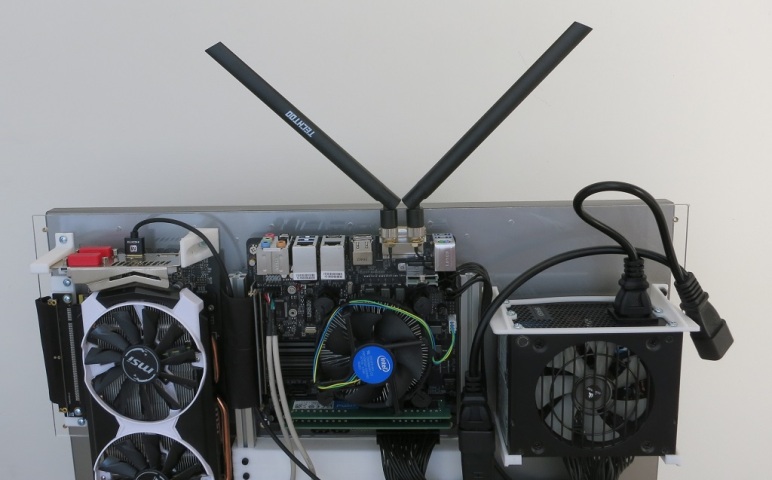
And on a completely silly note, I’m amused by the fact they made my Luggable PC Mark II look like an old-fashioned TV with rabbit-ear antenna.


(*) Disclosure: As an Amazon Associate I earn from qualifying purchases.