Notes on “Using MongoDB with Node.js” from MongoDB University

Most instructional material (and experimentation) for MongoDB uses the MongoDB Shell (mongosh), which is “a fully functional JavaScript and Node.js 16.x REPL environment for interacting with MongoDB deploymentsaccording to mongosh documentation. Making mongosh the primary command line interface useful for exploration, experimentation, and education like on Codecademy or MongoDB University.

Given the JavaScript focus of MongoDB, I was not surprised there is a set of first-party driver libraries to translate to/from various programming languages. But I was surprised to find that Node.js (JavaScript) was among the list of drivers. If this was all JavaScript anyway, why do we need a driver? The answer is that we don’t use JavaScript to talk to the underlying database. That is the job of BSON, the binary data representation used by MongoDB for internal storage. Compact and machine-friendly, it is also how data is transmitted over the network. Which is why we need a Node.js library to convert from JSON to BSON for data transmission. I started the MongoDB University course “Using MongoDB with Node.js” to learn more about using this library.

It was a short course, as befitting the minimal translation required of this JavaScript-focused database. The first course covered how to connect to a MongoDB instance from our Node.js environment. I decided to do my exercises with a Node.js Docker container.

docker run -it --name node-mongo-lab -v C:\Users\roger\coding\MongoDB\node-mongo-lab:/node-mongo-lab node:lts /bin/sh

The exercise is “Hello World” level, connecting to a MongoDB instance and listing all available databases. Success means we’ve verified all libraries & their dependencies are install correctly, that our MongoDB authentication is set up correctly, and that our networking path is clear. I thought that was a great starting point for more exercises, and was disappointed that we actually didn’t use our own Node.js environment any further in this course. The rest of the course used the Instruqt in-browser environment.

We had a lightning-fast review of MongoDB CRUD Operations and how we would do them with the Node.js driver library. All the commands and parameters are basically identical to what we’ve been doing in mongosh. The difference is that we need an instance of the client library as the starting point, from which we could obtain object representing a database and a collection with it. (client.db([database name]).collection([collection name]) Once we have that reference, everything else looks exactly as they did in mongosh. Except now they are code to be executed by Node.js runtime instead of typed. One effect of running code instead of typing commands is that it’s much easier to ensure transaction sessions complete within 60 seconds.

For me, a great side effect of this course is seeing JavaScript async/await in action doing more sophisticated things than simple straightforward things. The best example came from this code snippet demonstrating MongoDB Aggregation:

    let result = await accountsCollection.aggregate(pipeline)
    for await (const doc of result) {
      console.log(doc)
    }

The first line is straightforward: we run our aggregation pipeline and await its result. That result is an instance of MongoDB cursor which is not the entire collection of results but merely access to a portion of that collection. Cursors allow us to start processing data without having to load everything. This saves memory, bandwidth, and processing overhead. And in order to access bits of that collection, we have this “for await” loop I’ve never seen before. Good to know!

Notes on Codecademy “Learn Node-SQLite”

After my SQL fresher course, shortly after learning Node.js, I thought the natural progression was to put them together with Codecademy’s “Learn Node-SQLite” course. The name node-sqlite3 is not a mathematical subtraction but that of a specific JavaScript library bridging worlds of JavaScript and SQL. This course was a frustrating disappointment. (Details below) In hindsight, I think I would have been better off skipping this course and learn the library outside of Codecademy.

About the library: Our database instructions such as queries must be valid SQL commands stored as strings in JavaScript source code. We have the option of putting some parameters into those strings in JavaScript fashion, but the SQL commands are mostly string literals. Results of queries are returned to the caller using Node’s error-first asynchronous callback function convention, and query results are accessible as JavaScript objects. Most of library functionality are concentrated in just a few methods, with details available from API documentation.

This Codecademy course is fairly straightforward, covering the basics of usage so we can get started and explore further on our own. I was amused that some of the examples were simple to the point of duplicating SQL functionality. Specifically the example for db.each() shows how we can tally values from a query which meant we ended up writing a lot of code just to duplicate SQL’s SUM() function. But it’s just an example, so understandable.

The course is succinct to the point of occasionally missing critical information. Specifically, the section about db.run() say “Add a function callback with a single argument and leave it empty for now. Make sure that this function is not an arrow.” but didn’t say why our callback function must not use arrow syntax. This minor omission became a bigger problem when we roll into the after-class quiz, which asked why it must not use arrow syntax. Well, you didn’t tell me! A little independent research found the answer: arrow notation functions have a different behavior around the “this” object than other function notations. And for db.run(), our feedback is stored in properties like this.lastID which would not be accessible in an arrow syntax function. Despite such little problems, the instruction portion of the course were mostly fine. Which brings us to the bad news…

The Code Challenge section is a disaster.

It suffers from the same problem I had with Code Challenge section of the Learn Express course: lack of feedback on failures. Our code was executed using some behind-the-scenes mechanism, which meant we couldn’t see our console.log() output. And unlike the Learn Express course, I couldn’t workaround this limitation by throwing exceptions. No console logs, no exceptions, we don’t even get to see syntax errors! The only feedback we receive is always the same “You did it wrong” message no matter the actual cause.

Hall of Shame Runner-Up: No JavaScript feedback. When I make a JavaScript syntax error, the syntax error message was not shown. Instead, I was told “Did you execute the correct SQL query?” so I wasted time looking at the wrong thing.

Hall of Shame Bronze Medal: No SQL feedback. When I make a SQL command error, I want to see the error message given to our callback function. But console.log(error) output is not shown, so I was stabbing in the dark. For Code Challenge #13, my mistake was querying from “Bridges” table when the sample database table is actually singular “Bridge”. If I could log the error, I would have seen “No such table Bridges” which would have been much more helpful than the vague “Is your query correct?” feedback.

Hall of Shame Silver Medal: Incomplete Instructions. Challenge #14 asked us to build a query where “month is the current month”. I used “month=11” and got nothing. The database had months in words, so I actually needed to use “month=’November'”. I wasted time trying to diagnose this problem because I couldn’t run a “SELECT * FROM Table” to see what the data looked like.

Hall of Shame Gold Medal Grand Prize Winner: Challenge #12 asks us to write a function. My function was not accepted because I did not declare it using the same JavaScript function syntax used in the solution. Instructions said nothing about which function syntax to use. After I clicked “View Solution” and saw what the problem was (image above) I got so angry at the time it wasted, I had to step away for a few hours before I could resume. This was bullshit.


These Hall of Shame (dis)honorees almost turned me off of Codecademy entirely, but after a few days away to calm down, I returned to learn what Codecademy has to teach about PostgreSQL

Replace node-static with serve-static for ESP32 Sawppy Development

One of the optional middleware modules maintained by the Expressjs team is express.static, which can handle serving static assets like HTML, CSS, and images. It was used in code examples for Codecademy’s Learn Express course, and I made a mental note to investigate further after class. I thought it might help me with a problem I already had on hand, and it did!

When I started writing code for a micro Sawppy rover running on an ESP32, I wanted to be able to iterate on client-side code without having to reflash an ESP32. So as an educational test run of Node.js, I wrote a JavaScript counterpart to the code I wrote (in C/C++) for running on ESP32. While they are two different codebases, I intended for the HTTP interface to be identical and indistinguishable by the HTML/CSS/JavaScript client code I wrote. Most of this server-side work was focused around websocket, but I also needed to serve some static files. I looked on nodejs.org and found “How to serve static files” in their knowledge base. That page gave an example using the node-static module, which I copied for my project.

Things were fine for a while, but then I started getting messages from the Github Dependabot nagging me to fix a critical security flaw in my repository due to its use of a library called minimist. It was an indirect dependency I picked up by using node-static, so I figured it’ll be fixed after I pick up an update to node-static. But that update never came. As of this writing, the node-static package on NPM hadn’t been updated for four years. I see updates made on the GitHub repository, but for whatever reason NPM hasn’t picked that up and thus its registry remains outdated.

The good news is that my code isn’t deployed on an internet-facing server. This Node.js server is only for local development of my ESP32 Sawppy client-side browser code, which vastly minimizes the window of vulnerability. But still, I don’t like running known vulnerable code, even if it is only accessible from my own computer and only while I’m working on ESP32 Sawppy code. I want to get this fixed somehow.

After I got nginx set up as a local web server, I thought maybe I could switch to using nginx to serve these static files too. But there’s a hitch: a websocket connection starts as a HTTP request for an upgrade to websocket. So the HTTP server must interoperate with the websocket server for a smooth handover. It’s possible to set this up with nginx, but the instructions to do so is above my current nginx skill level. To keep this simple I need to stay within Node.js.

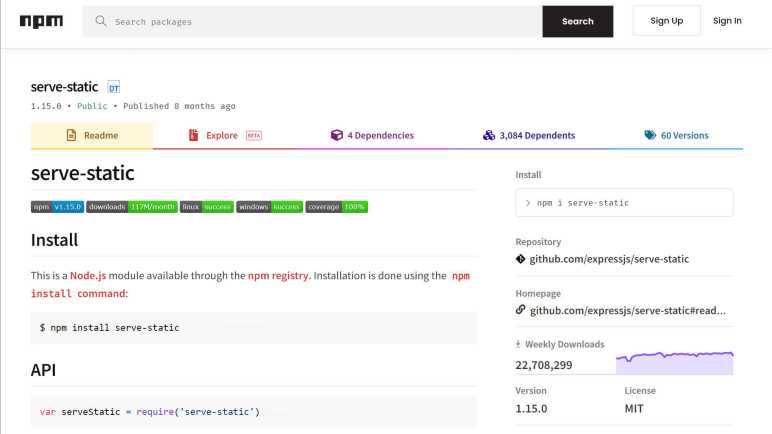
Which brought me back to Express and its express.static file server. I thought maybe I could fire up an Express app, use just this express.static middleware, and almost nothing else of Express. It’s overkill but it’s not stupid if it works. I just had to figure out how it would handover to my websocket code. Reading Express documentation for express.static, I saw it was built on top of a NPM module called serve-static, and was delighted to learn it can be used independent of Express! Their README included an example: Serve files with vanilla node.js http server and this was exactly what I needed. By using the same Node.js http module, my websocket upgrade handover code will work in exactly the same way. At the end, switching from node-static to serve-static was nearly a direct replacement requiring minimal code edit. And after removing node-static from my package.json, GitHub dependabot was happy and closed out my security issue. I will be free from nagging messages, at least until the next security concern. That might be serious if I had deployed to be internet accessible, but the odds of that just dropped.

Notes on Express “Getting Started” Guide

During the instruction of Codecademy’s “Learn Express” course, we see a few middleware modules that we can optionally use in our project as needed. Examples used in the course are morgan and body-parser, and one of the quizzes asked us to look up vhost. Course material even started using serve-static before we learned about middleware modules at all. These four middleware modules were among those popular enough to be adopted by the Expressjs team who now maintain them.

Since that meant I already had a browser tab open to the Express project site, I decided to poke around. Specifically, I wanted to see how their own Getting Started guide compared to the Codecademy course I just finished. My verdict: the official Express site provides a wider breadth of information but not nearly as much depth for educating a newcomer. If I hadn’t taken the Codecademy course and tried to get started with this site, I would have been able to get a simple Express application up and running but I would not have understood much of what was going on. Especially if I had created an app using the boilerplate application generator. Even after the Codecademy course I don’t know what most of these settings mean!

But the official site had wider breadth, as Codecademy didn’t even mention the boilerplate tool. It also has many lists of pointers to resources, like the aforementioned list of popular middleware modules. Another list I expect to be useful is a sample of options for database integration. Some minimal contextual information was provided with each listed link, but it’s up to us to follow those links and go from there. The only place where this site goes in depth is the Express API reference, which makes sense as the official site for Express should naturally serve as the authoritative source for such information!

I anticipate that I will use Express for at least a few learning/toy projects in the future, at which point I will need to return to this site for API reference and pointers to resources that might help me solve problems in the future. However, before I even get very far into Express, this site has already helped me solve an immediate problem: node-static is out of date.

Notes on Codecademy “Learn Express”

I may have my quibbles with Codecademy’s Learn Node.js course, but it at least gave me a better understanding to supplement what I had learned bumping around on my own. But the power of Node isn’t just the runtime, it’s the software ecosystem which has grown up around it. I have many many choices of what to learn from this point, and I decided to try the Learn Express course.

Before I started the course, I understood Express was one of the earlier Node.js frameworks for building back end of websites in JavaScript. And while there have been many others that have come online since, with more features and capabilities, Express is still popular because it set out not to pack itself with features and capabilities. This meant if we wanted to prototype something slightly off the beaten path, Express would not get in our way. This sounded like a good tool to have in the toolbox.

After taking the course, I learned how Express accomplishes those goals. Express Routes helps us map HTTP methods (GET/POST/PUT/DELETE) to JavaScript code via “Routes”, and for each route we can compose multiple JavaScript modules in the form of “Middleware”. With this mechanism we can assemble arbitrary web API by chaining middleware modules like LEGO pieces to respond to HTTP methods. And… that’s basically the entirety of core Express. Everything else is optional, so we only need to pull in what we need (in the form of middlware modules) for a particular project.

When introducing Routes in Express, our little learning JavaScript handler functions are actually fully qualified Middleware, but we didn’t know it yet. What I did notice is that it had the signature of three parameters: (request, response, next). The Routes course talked about reading request to build our response, but it never talked about next. Students who are curious about them and striking out to search on their own as I did would find information about “chaining”, but it wouldn’t make sense until we learned Middleware. I thought it would have been nice if the course would say “we’ll learn about next later, when we learn about Middleware” or something to that effect.

My gripe with this course is in its quiz sections. We are given partial chunk of JavaScript and told to fill in certain things. When we click “Check Work” we trigger some validation code to see if we did it right. If we did it wrong, we might get an error message to help us on our way. But sometimes the only feedback we receive is that our answer is incorrect, with no further feedback. Unlike earlier Node course exercises, we were not given a command prompt to run “node app.js” and see our output. This meant we could not see the test input, we could not see our program’s behavior, and we could not debug with console.log(). I tried to spin up my own Node.js Docker container to try running the sample code, but we weren’t given entire programs to run and we weren’t given the test input so that was a bust.

I eventually found a workaround: use exceptions. Instead of console.log('debug message') I could use throw Error('debug message') and that would show up on the Codecademy UI. This is far less than ideal.

Once I got past the Route section, I proceeded to Middleware. Most of this unit was focused on showing us how various Middleware mechanisms allow us to reduce code duplication. My gripe with this section is that the course made us do useless repetitive work before telling us to replace them with much more elegant Middleware modules. I understand this is how the course author chose to make their point, but I’m grumpy at useless make-work that I would delete a few minutes later.

By the end of the course, we know Express basics of Route and Middleware and got a little bit of practice building routes from freely available middleware modules. The course ends by telling us there are a lot of Express middleware out there. I decided to look into Express documentation for some starting points.

Notes on Codecademy “Learn Node.js”

I’ve taken most of Codecademy’s HTML/CSS course catalog for front-end web development, ending with a series of very educational exercises created outside of Codecademy’s learning environment. I think I’m pretty well set up to execute web browser client-side portions of my project ideas, but I also need to get some education on server-side coding before I can put all the pieces together. I’ve played with Node.js earlier, but I’m far from an expert. It should be helpful to get a more formalized introduction via Codecademy, starting with Learn Node.js.

This course recommends going through Introduction to JavaScript as a prerequisite, so the course assumes we already know those basics. The course does not place the same requirement on Intermediate JavaScript, so some of the relevant course material is pulled into this Node.js course. Section on Node modules were reruns for me, but here it’s augmented with additional details and a pointer to official documentation.

The good news for the overlap portions is that it meant I already had partial credit for Learn Node.js as soon as I started, the bad news is the Codecademy’s own back-end got a little confused. I clicked through “Next” for a quick review, and by doing so it skipped me over a few lessons that I had not yet seen. My first hint something was wrong was getting tossed into a progress checking quiz and being baffled: “I don’t remember seeing this material before!” I went back to examine the course syllabus, where I saw the skipped portions. The quiz was much easier once I went through that material!

This course taught me about error-first callback functions, something that is apparently an old convention for asynchronous JavaScript (or just Node) code that I hadn’t been aware of. I think I stumbled across this in my earlier experiments and struggled to use the effectively. Here I learn they were the conceptual predecessor to promises, which led to async/await which plays nice with promises. But what about even older error-first callback code? This is where util.promisify() comes into the picture, so that everyone can work together. Recognizing what error-first callbacks are and knowing how to interoperate via util.promisify(), should be very useful.

The course instructs us on how to install Node.js locally on our development computers, but I’m going to stick with using Docker containers. Doing so would be inconvenient if I wanted to rely on globally installed libraries, but I want to avoid global installations as much as possible anyway. NPM is perfectly happy to work at project scope and that just takes mapping my project directory as a volume into the Docker container.

After all, I did that as a Docker & Node test run with ESP32 Sawppy’s web interface. But that brought in some NPM headaches: I was perpetually triggering GitHub dependabot warnings about security vulnerabilities in NPM modules I hadn’t even realized I was using. Doing a straight “update to latest” did not resolve these issues, I eventually figured out it was because I had been using node-static to serve static pages in my projects. But the node-static package hadn’t been updated in years and so it certainly wouldn’t have picked up security fixes. Perhaps I could switch it to another static server NPM module like http-server, or get rid of that altogether and keep using nginx as sheer overkill static web server.

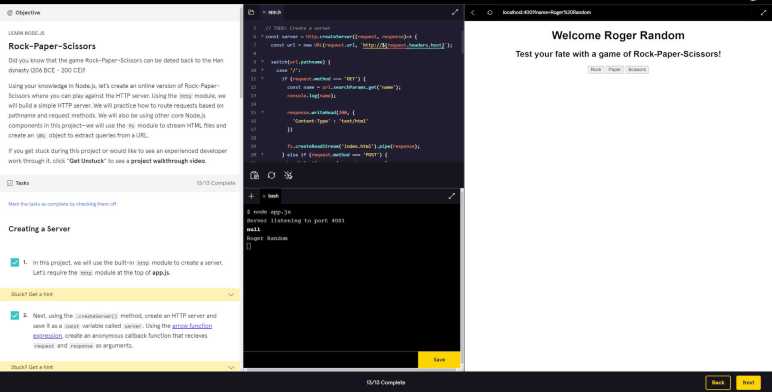
Before I decide, though, this Learn Node.js course ended with a few exercises building our own HTTP server using Node libraries. These were a little more challenging than typical Codecademy in-course exercises. One factor is that the instructions told us to do a lot of things with no way to incrementally test them as we go. We didn’t fire it up the server to listen for traffic (server.listen()) until the second-from-final step, and by then I had accumulated a lot of mistakes that took time to untangle from the rest of the code. The second factor is that the instructions were more vague than usual. Some Codecademy exercises tell us exactly what to type and on which line, and I think that didn’t leave enough room for us to figure things out for ourselves and learn. This exercise would sometimes tell us “fill in the request header” without details or even which Node.js API to use. We had to figure it all out ourselves. I realize this is a delicate balance when writing course material. I feel Codecademy is usually too much “do exactly this” for my taste, but the final project of Learn Node.js might have gone too far in the “left us flailing uselessly” direction.

In the meantime, I believe I have enough of a start to continue learning about server-side JavaScript. My next step is to learn Express.

Notes Of A Three.js Beginner: Color Picker with Raycaster

I was pleasantly surprised at how easy it was to use three.js to draw 256 cubes, each representing a different color from the 8-bit RGB332 palette available for use in my composite video out library. Arranged in a cylinder representing the HSV color model, it failed to give me special insight on how to flatten it into a two-dimension color chart. But even though I didn’t get what I had originally hoped for, I thought it looked quite good. So I decided to get deeper into three.js to make this more useful. Towards the end of three.js getting started guide is a list of Useful Links pointing to additional resources, and I thought the top link Three.js Fundamentals was as good of a place to start as any. It gave me enough knowledge to navigate the rest of three.js reference documentation.

After several hours of working with it, my impression is that three.js is a very powerful but not very beginner-friendly library. I think it’s reasonable for such a library to expect that developers already know some fundamentals of 3D graphics and JavaScript. From there it felt fairly straightforward to start using tools in the library. But, and this is a BIG BUT, there is a steep drop if we should go off the expected path. The library is focused on performance, and in exchange there’s less priority on fault tolerance, graceful recovery, or even helpful debugging messages for when things go wrong. There’s not much to prevent us from shooting ourselves in the foot and we’re on our own to figure out what went wrong.

The first exercise was to turn my pretty HSV cylinder into a color picker, making it an actually useful tool for choosing colors from the RGB332 color palette. I added pointer down + pointer up listeners and if they both occurred on the same cube, I change the background color to that color and display the two-digit hexadecimal code representing that color. Changing the background allows instant comparison to every other color in the cylinder. This functionality requires the three.js Raycaster class, and the documentation example translated across to my application without much fuss, giving me confidence to tackle the next project: add the ability to switch between HSV color cylinder and RGB color cube, where I promptly fell on my face.

[Code for this project is publicly available on GitHub]

Notes After Node.js Introduction

After I ran through the Docker Getting Started tutorial, I went back into the docker container (the one we built as we progressed through the tutorial) and poked around some more. The tutorial template was an Express application, built on Node.js. Since I had parts of this infrastructure in hand, I thought I will just run with it and use Node.js to build a simple web server. The goal is to create a desktop placeholder for an ESP32 acting as a web server, letting me play and experiment quickly without constantly re-flashing my ESP32.

The other motivation was that I wanted to get better at JavaScript. Not necessarily because of the language itself (I’m not a huge fan) but because of the huge community that has sprung up around it, sharing reusable components. I was impressed by what I saw of Node-RED (built on Node.js) and even more impressed when I realized that was only a small subset of the overall Node.js community. More than a few times I’ve researched a topic and found that there was an available JavaScript tool for doing it. (Like building desktop apps.) I’m tired of looking at this treasure trove from the outside, I want this in my toolbox.

Node.js is available with a Windows installer, but given my recent knowledge, I went instead to their officially published Docker images. Using that to run through Node.js introduction required making a few on-the-fly adaptations to Node.js in a container, but I did not consider that a hinderance. I consider it great container practice! But this only barely scratches the surface of what I can find within the Node.js community. Reading the list of Node.js Frameworks and Tools I realized not only have I not heard about many of these things, I don’t even understand the words used to describe them! But there were a lot of great information in that introduction. On the infrastructure side, the live demo code was made possible by Glitch.com, another online development environment I’ll mentally file away alongside Cloud9 and StackBlitz.

Even though Google’s V8 JavaScript engine is at the heart of both Chrome browser and Node.js server, there are some obviously significant differences between running in a server environment versus running in browser. But sometimes there are concepts from one world that can be useful in the the other, and I was fascinated by people who try to bring these worlds closer together. One example is Browserify which brings some server-side component management features to browser-side code. And Event Emitter is a project working in the other direction, bringing browser-style events to server-side code.

As far as I can tell, the JavaScript language itself was not explicitly designed with a focus on handling asynchronous operations. However, because it evolved in the web world where network latency is an ever-present factor, the ecosystem has developed in that direction out of necessity. The flexibility of the language permitted an evolution into asynchronous callbacks, but “possible” isn’t necessarily “elegant” leading to scenarios like callback hell. To make asynchronous callbacks a little more explicit, JavaScript Promise was introduced to help improve code readability. There’s even a tool to convert old-school callbacks into Promises. But as nice as that was, people saw room for improvement, and they built on top of Promises to create the much more easier-to-read async/await pattern for performing asynchronous operations in JavaScript. Anything that makes JavaScript easier to read is a win in my book.

With such an enormous ecosystem, it’s clear I can spend a lot more time learning Node.js. There are plenty of resources online like Node School to do so, but I wanted to maintain some resemblance of focus on my little rover project. So I went back to the Docker getting started tutorial and researching how to adapt it to my needs. I started looking at a tool called webpack to distill everything into a few static files I can serve from an ESP32, but then I decided I should be able to keep my project simple enough I wouldn’t need webpack. And for serving static files, I learned Express would be overkill. There’s a Node.js module node-static available for serving static files so I’ll start by using that and build up as needed from there. This gives me enough of a starting point on server side so I can start looking at the client side.

SGVHAK Rover Interface Avoids Confirmation Dialog

Shutdown Reboot

Our SGVHAK Rover’s brain prefers to be shut down gracefully rather than having its power removed at an arbitrary time. If power cuts out in the middle of a system write operation, it risks corrupting our system storage drive. While our control software is written to be fairly platform-agnostic, we’re primarily running it on Raspberry Pi which lacks a hardware shutdown button. So we need to create an UI to initiate a system shutdown via software.

The easiest thing to do would be to add a “Shutdown” button. And since it is a rather drastic event, have a “Are you sure?” confirmation dialog. This historically common pattern is falling out of favor with user interface designers. Computer users today are constantly inundated with confirmation dialog making them less effective. If our user has built up a habit of dismissing confirmation dialog without thinking, a confirmation dialog is no confirmation at all.

So how do we enforce confirmation of action without resorting to the overplayed confirmation dialog? We have to design our UI to prevent an accidental shutdown from a wayward finger press. To accomplish this goal, our shutdown procedure is designed so user must make a deliberate series of actions, none of which is “Yes/No’ on an ineffectual dialog box.

First – our user must enter a “System Power” menu. If they entered by mistake, any of the three active buttons will take then back to main menu. There’s no way to accidentally shutdown with a single mistaken tap.

Second – they must select “Shutdown” or “Reboot”, forcing a deliberate choice to be made before our UI activates “OK” button. If an incorrect selection is made, it can be corrected without accidentally triggering the action because both options are on the far left of the screen and “OK” is on the far right. Bottom line: Even with two accidental presses, our system will not shut down or reboot.

Third – With the “OK” button now activate after two deliberate actions, the user can tap it to begin the shutdown (or reboot) process.

See World(s) Online

NASALogoOne of the longest tenure items on my “To-Do” exploration is to get the hang of the Google Earth API and learn how to create a web app around it. This was very exciting web technology when Google seemed to be moving Google Earth from a standalone application to a web-based solution. Unfortunately its web architecture was based around browser plug-ins which eventually lead to its death.

It made sense for Google Earth functionality to be folded into Google Maps, but that seemed to be a slow process of assimilation. It never occurred to me that there are other alternatives out there until I stumbled across a talk about NASA’s World Wind project. (A hands-on activity, too, with a sample project to play with.) The “Web World Wind” component of the project is a WebGL library for geo-spatial applications, which makes me excited about its potential for fun projects.

The Java edition of World Wind has (or at least used to) have functionality beyond our planet Earth. There were ways to have it display data sets from our moon or from Mars. Sadly the web edition has yet to pick up that functionality.

JPL does currently expose a lot of Mars information in a web-browser accessible form on the Mars Trek site. According to the speaker of my talk, it was not built on World Wind. He believes it was built on Cesium, another WebGL library for global data visualization.

I thought there was only Google Earth, and now I know there are at least two other alternatives. Happiness.

The speaker of the talk is currently working in the JPL Ops Lab on the OnSight project, helping planetary scientists collaborate on Mars research using Microsoft’s Hololens for virtual presence on Mars. That sounds like an awesome job.

Simple Online Digital Photo Frame

The CarrierWave Playground project was created for experimentation with image upload. As intended, it helped me learn things about CarrierWave such as creating versions of the image scaled to different resolutions and extracting EXIF image metadata.

Obviously the image has to be displayed to prove that the upload was successful. I hadn’t intended to spend much time on the display side of things, but I started playing with the HTML and kept going. Logic was added for the browser to report its window size so the optimal image could be sent and scaled to fit. I had a button to reload the page, and it was fairly simple to change it from “reload the current page” to “navigate to another page”. Adding a JavaScript timer to execute this navigation… and voila! I had myself a rudimentary digital photo frame web app that loads and displays image in a sequence.

It’s fun but fairly crude. Brainstorming the possibilities, I imagine the following stages of sophistication:

Stage 1 – Basic: Where I am now, simple JavaScript that performs page navigation on a timer.

Problem: page blinks and abruptly shifts as new page is loaded. To avoid the abrupt shift, we have to eliminate the page switch.

Stage 2 – Add AJAX: Instead of a page navigation, perform a XMLHttpRequest to the server asking for information on the next image. Load the image in the background, and once complete, perform a smooth transition (fade out/fade in/etc.) from one image to the next.

Problem: Visual experience is at the mercy of the web browser, which probably has an address bar and other UI on screen. Also, the user’s screen will quickly go dark due to power saving features. To reliably solve both, I will need app-level access.

Stage 3 – Vendor-specific wrapper: Every OS platform has a way to allow web site authors an express lane into the app world. Microsoft offers the Windows App Studio. Apple has iOS web applications. Google has Android Web Apps.

Unknown: The JavaScript timer is a polling model, do we gain anything by moving to a server-push model? If so, that means…

Stage 4 – WebSocket: Photo updates are triggered by the server. Since I’m on Rails, the most obvious answer is to do this via WebSockets using Action Cable.

Looking at the list, I think I can tackle Stage 2 pretty soon if not immediately.

Stages 3 and 4 are more advanced and I’ll hold off for later.

Neural network in JavaScript

When I was first introduced to neural networks, they were considered algorithms with extremely expensive computational requirements. Even the most trivial network required a high-end PC with lots of memory and floating-point math capability.

Of course, at the time a high-end PC processor ran at 90 megahertz, 32 megabytes of RAM is considered a lot, and floating point math required a separate (and expensive) floating-point co-processor.

Now the cell phones we have in our pockets have faster processor and more memory than those powerful PCs of old. Every current processor has floating-point math capability, no extra chip required.

Which means what used to be the domain of specialized programmers, running on expensive hardware, is now possible everywhere: running in a web browser like the TensorFlow playground.

But it’s still hard for a human to grasp what’s going on inside a neural network as it learns and adjusts. While the accessibility of the technology (meaning how easy it is to obtain) has improved, the accessibility of the knowledge (meaning how easy it is to understand) hasn’t.

Computer brains have made great advances in the past years…

Human brains have not.

A quick look at Phaser

In a quest for something more substantial, I looked into the HTML5 game engine Phaser. It has a large audience and an impressive set of features. It was fun poking through some of the source to see how it does its magic, but I ultimately decided against making my own Phaser creation because it is at its core a bitmap-based system.

Bitmaps don’t scale as nicely as vectors by their nature, and I place a great deal of importance on ability to scale well. In the modern HTML world, the customer might be running resolutions ranging anywhere from a 320 x 480 iPhone screen to a 3840 x 2160 4K desktop display.

The people behind Phaser isn’t blind to this. Part of the core features includes a ScaleManager class to help the process. There are also ways to load lower- or higher-resolution assets in response to the screen resolution used by the particular user. But it is an imperfect solution, there are still bitmap scaling artifacts around that plainly wouldn’t be an issue at all had the system been based on vector graphics.

Most of the Phaser titles don’t bother with scaling at all, or only scale across a few fixed resolutions. I find myself quite annoyed when I load up a sample app, just to see it take up a tiny 320×480 (resolution of the original iPhone) section of my desktop browser.

sigh

I’ll keep looking.

Upsetting the NPM apple cart

Decades-old words of wisdom from a computer science pioneer, proven true once again.

A distributed system is one in which the failure of a computer you didn’t even know existed can render your own computer unusable.

Leslie Lamport

In a coincidence of perfect timing, my education of NPM yesterday came just in time for me to understand the left-pad incident. The short version is simple enough to understand: unhappy programmer took his ball and went home, causing a lot of other people grief in the process. The bigger picture, though, needed a bit more knowledge to understand.

While going through the NodeSchool.io NPM workshop I had noticed a few things. The workshop used a dummy placeholder registry but there was really no technical or policy reason why every Jane and Jack can’t run the same lesson against the global registry. Up to and including the fact that they can clean up (un-publish) their NPM package when the workshop is over.

I found that fact curious. Such open accessibility felt fragile and I was wondering about the mechanisms to make sure the mechanism is fortified against accidents or abuse. It wouldn’t be something covered in a workshop, so I thought I’d see more details of this protection elsewhere.

Nope, I was wrong.

The left-pad story proved that there wasn’t any mechanism in place at all. A hilariously trivial package was yanked, causing many houses of cards to fall down.

For all the wonders of NPM, there are downsides that had its share of critics. This incident kicked the criticism into high gear. The NPM registry owner received a lot of fire from all sides and have pledged to update their procedure to avoid a repeat in the future. But I’m not sure that’s enough for the famously anti-authoritarian OSS purists. For every “conflict resolution policy” there will be some who see “ruling with an iron fist.”


NodeSchool “How to npm” notes

The lesson of the day is “You get what you pay for.”

NodeSchool.io’s workshop to teach NPM (Node.js Package Manager) is titled “How to npm.”  It has the intention of letting students create a package, set up the proper dependency links, publish it, then publish it again to practice sending out updates. Since it would be bad to pollute the global package registry with a bunch of dummy student test packages, the workshop steps publish against a practice registry running locally instead of the real thing.

As of today, there’s a problem with the practice registry. It can accept updates to packages and track the version numbers, but the portion that tracks labels for these versions (“dist-tag” in NPM lingo) is broken and halts the lesson flow with a HTTP 404 error.

The symptoms match a bug in the workshop that was acknowledged, analyzed, and purportedly fixed. However, the fix is incomplete because some people are still seeing the same error in the updated version of the workshop.

Including myself!

I tried to look at the code behind the lesson and try to see if I can come up with a fix for the bug, maybe this can be my first open source contribution! But alas, I’m not yet good enough with Node.js programming to understand what’s going wrong.

Fortunately I’ve already learned a few useful things before I hit this roadblock. I believe all the material useful to somebody consuming packages has been covered. And I don’t expect to publish any packages myself soon.

But if I do, I’ll come back to this workshop again before I commit. Maybe it’ll be fixed by then.

NodeSchool “learnyounode” notes

After making my first pass through the jQuery Learning Center (I’m sure I’ll be back again) I moved on to another free learning resource: NodeSchool is a collection of resources for learning Node.js, including some self-training tutorials.

At the top of the page they point newcomers to the workshop titled “LearnYouNode”. This workshop has the subtitle “Learn You The Node.js For Much Win!” This raised my eyebrows. It wasn’t immediately obvious that the broken English was a running gag of some sort. I don’t know what it is… maybe LOLcat?

Not knowing it was a gag, I thought maybe the tutorial were written by people for whom English was not their primary language. I was worried I would get stuck trying to figure out if I’m misunderstanding broken English or misunderstanding Node.js.

Fortunately, it only took a paragraph of two of tutorial instructions to make it clear the lessons are not, in fact, broken English. Which was very good news because there was very little hand-holding. The audience is presumed to be competent developers off the bat. It actually assumed JavaScript skill level a bit higher than what I have! Fortunately close enough I could get through with some educational web searches.

The overview workshop sped me through some Node.js basics. Even better: After I successfully completed each challenge, it will show me the official answer which inevitably differed from my solution. I learned a lot from the answer key source code which I hope will help my JavaScript skills going forward.

One of the things LearnYouNode introduced me to is NPM. The Node.js Package Manager came up repeatedly in many of my previous explorations, and I knew I had to get a handle on it soon. I’ve only got a taste so far, and there’s a whole other workshop dedicated to the topic. I think that’s a good place to go next.

jQuery Learning Center

After Codecademy got me off the ground with jQuery, I moved on to the jQuery Learning Center put together by the people behind the jQuery project. The learning center assumes some level of existing knowledge, so I was glad I got the Codecademy primer first.

As expected, the jQuery Learning Center went into more depth on topics that were outside of a quick primer such as Codecademy.

Implementation: The learning center gave some details on how jQuery works behind the scenes. This helps programmers understand and debug when things go wrong, and sometimes leads to information on code performance.

Performance: Hand in hand with implementation details, the learning center teaches some basics on writing efficient jQuery code. This is different from writing terse jQuery code. What looks like small amounts of jQuery code might end up triggering a lot of work for the computer behind the scenes. A programmer unaware of the implementation and performance consequences can get tripped up.

History: The learning center occasionally switches into history lesson mode. It is moderately enlightening to understand the evolution to the current implementation. More importantly, it helps people recognize and understand old legacy jQuery code they might end up having to maintain.

Code organization: This section was not jQuery specific. It covered a few ways to use JavaScript to implement classic object-oriented programming concepts. I was intrigued by this section, because it didn’t match what I saw in the Codecademy JavaScript class. It is useful to get a different perspective on how to solve the same types of problems.

It was good timing. My own JavaScript practice program had not been written under any semblance of code organization, just building as I go, and it was growing out of control. Seeing how messy things were turned out to be great motivation to put organization concepts into practice and tame my hairy beast.

JavaScript closures make my head spin

Coming from a world of strongly typed programming languages, JavaScript is weird. And the deeper I get, the weirder it got.

I’ve had brushes with JavaScript closures in my learning to date, and the fragments I saw looked like evil black magic. Today I dove in headfirst to learn more about it.  With my new found knowledge, it no longer feels like black magic.

It still feels evil, though.

Closures have all the appearance of something that “fell out” of the flexibility of the JavaScript type system. It felt like somebody, in an effort to solve some unrelated problems A, B, and C, accidentally opened a Pandora’s Box and closures emerged. With some bizarre behavior and huge potential for difficult-to-diagnose bugs. I’d hate to think it was designed to be that way. I prefer to believe it was an accident.

Accident or not, it is a very powerful mechanism and people are using it in the world. Which means I will need to be able to read and understand code that uses closures. It is irrelevant whether I personally believe closures are evil.

It’ll take a few more rounds of practice before I’m comfortable with the nuances. In the meantime, I’ll be reviewing this page frequently as I found it to be the most helpful. The author emphasized repeatedly that hands-on experience with real closure code is more illuminating than reading a lot of rigorous academic style description of closures. So that’s exactly what I intend to do.


The best I can hope for is to start feeling comfortable with the power and pitfall of closures. Maybe I’ll even come to appreciate it as a necessary evil.

But I doubt I’ll ever come to think of it as A Good Thing.

Compilation of JavaScript resources

The benefit of JavaScript is that there are a ton of resources. The downside of JavaScript is that there is so much, it’s hard to figure out where to start and who to believe.

After the expected period of beginner fumbling, I now know a few things to be incorrect. But more importantly, I now know many things to have no single Right Answer(™). JavaScript is so flexible that there are many ways to do many things and not much to differentiate one from another except personal preference.

This makes me wary of advice compiled on somebody’s blog, because that’s really their personal opinion and I don’t know if I necessarily agree with that person’s priorities.

But if the collection of resources was assembled by a group of people, that makes me a little more comfortable. So I was happy to stumble across JSTheRightWay.org.

The name seemed pompous and arrogant, but the introduction made me feel like I’ve found a good thing:

This is a guide intended to introduce new developers to JavaScript and help experienced developers learn more about its best practices.

Despite the name, this guide doesn’t necessarily mean “the only way” to do JavaScript.

We just gather all the articles, tips, and tricks from top developers and put it here. Since it comes from exceptional folks, we could say that it is “the right way”, or the best way to do so.

I’ll be coming back to this page quite frequently. May it live up to my hopes!

The other “cloud development”

When I set out on this adventure, I knew I wanted to eventually cover the basics of the major cloud services. Write some sample services to run on Amazon Web Services, Microsoft Azure, Google cloud services, etc.

I was surprised to stumble into an entirely different meaning of “cloud development”: writing code in a browser. I had seen the educational coding playgrounds of Codecademy, and I had seen small trial tools like JSFiddle, but I had no idea that was just the tip of the iceberg and things can get much fancier.

I had started a project to practice my newly-learned jQuery skills. Just with a text editor on my computer and running the HTML straight off the file system. As soon as I learned of these web-based development environments I wanted to try it out by moving my project over.

The first I tried was Codenvy, whose whitepapers are quite grandiose in what it offers for improving developer productivity. Unfortunately the kind of development Codenvy supports aren’t the kind of things I know anything about today. But I’ll revisit in a few weeks to check again.

The second I tried was Cloud 9, which does support simple HTML+CSS+JS projects like what I wanted to do. Working in Cloud 9 gave me some tools for static analysis and serving my file off a real web server. It also integrates into Github preserving my source control workflow.

After a JavaScript project of around 300 lines of code, I can comfortably say I’m quite impressed. In the areas of development-time tooling and integration experience, it far exceeded my expectations. However, there was an area of disappointment: the debugging experience was either hard to find or just wasn’t there at all.

When my little project goes awry, I resorted to loading up the project in a separate browser window and using the web browser debugger. This is on par with the simpler tools like JSFiddle and JSBin. I had hoped for better.

I’m cautiously optimistic I’ll find a tool with better debugging experience as I continue to explore.