LEGO On Screen

I was annoyed by the fact LEGO frequently changed the electrical connectors used in motorized sets. Well, more frequently than they changed their mechanical standards (which was never) but I admit not compared to how fast some other things change. Like entertainment technology. LEGO realized their brand had appeal beyond physical bricks clicking together, and thus spawned entertainment properties with varying levels of fidelity about building LEGO. Here are some that I’ve come across:

The least interactive are movies and TV shows where we just passively watch characters onscreen. Sure, the people are shaped like LEGO figures inhabiting a world built of LEGO bricks, but the audience doesn’t affect that world in any way, nor could we explore it at our own direction.

For interactivity, we have to go to LEGO-themed videogames. My favorite in this category is the LEGO Speed Champions expansion for Forza Horizon 4. But that’s mostly because I enjoyed the driving game independent of the expansion’s LEGO theme. Still, it’s a lot of fun to experience the Forza Horizon driving game mechanics in LEGO cars in a LEGO world. While player actions in this world affect the in-game LEGO world, it’s not a brick-by-brick build because that’s not what we do in a driving game. Unlike a passive TV/movie show, though, I could explore the world by choosing where to stop and take a closer look at all the wonderful details of these digital LEGO constructions.

The next tier of games are mostly (exclusively?) by Traveller’s Tales development studio, set in various worlds where LEGO already have licensed merchandise. LEGO Star Wars, LEGO Harry Potter, etc. In these adventure games, the player can build LEGO creations, which puts it above purely aesthetic games like Forza Horizon. However, when I got to play it firsthand, I was disappointed to find that “building” consisted merely of walking our character to a pile of bouncing bricks and holding down a button. We see a scripted animation of LEGO construction, and out pops the completed product.

I found such one-button builds unsatisfying, so when I learned there existed LEGO games that depict individual brick manipulation construction, I was intrigued:

  • LEGO Builder’s Journey: I learned about this title from a SIGGRAPH 2021 presentation, where a member of the developer team talked about how they used Unity’s High Definition Rendering Pipeline to show digital LEGO pieces onscreen. They didn’t want to show digitally perfect bricks, they wanted to show bricks with all the subtle surface imperfections of real-world injection molded pieces of ABS plastic that’s seen some playtime. Their work paid off: the game looks gorgeous. From a game design perspective, they keep the player from being overwhelmed by limiting both the number of LEGO bricks in play at any given time and keeping the playing field small.
  • LEGO 2K Drive: Thanks to a free play weekend promotion, I learned this game was more cartoony and Mario Kart-y than Forza Horizon 4 LEGO expansion. While it does offer the ability to build our vehicles brick-by-brick (not possible in FH4+LEGO) unfortunately the game style just didn’t pull me in. I think it’ll be a lot of fun for the right audience, I’m just not in that group.
  • LEGO Bricktales: I’ve played the free demo where I can see it lacked the visual fidelity of Builder’s Journey but it does offer a wider scope. The playing fields are larger, and there are more pieces in play at any given time. To compensate for this, the game also has guardrails (usually figuratively but sometimes literal) to keep the player from getting too lost. The demo was fun enough for me to contemplate buying the full game.

The brick-by-brick construction interface are slightly different between these games, but they all had to solve the same basic challenge: manipulating virtual LEGO bricks in 3D space on a 2D screen. I’m sure I can get better with practice but as a beginner it can get frustrating to build under such restrictions. I don’t blame the game designers, they had to work with a pretty fundamental limitation. Following that train of thought, I’d like to see if a LEGO brick construction game would work well in virtual reality. It seemed like such a natural progression I was surprised I couldn’t find any LEGO VR titles on the market today. Perhaps in the future? [Update: Yes, in the future.] For today, if I really want to see LEGO in VR it can be done but in a limited fashion.

LEGO Electrical Connector Evolution

The most legendary aspect of LEGO bricks is the fact they’ve kept the dimensions compatible for decades. Maintaining such precision meant bricks made today can click into bricks I’ve had since I was little. Mechanically, the only deviation was their “studless” construction theme, which is a niche controversy I won’t get into right now. New pieces are constantly being introduced with novel desirable properties, but they all click together in some way. However, the same could not be said of various LEGO forays into motorizing creations. Just in the various on-and-off times I’ve played with LEGO, I’ve managed to collect four incompatible motor control systems. Here are representatives from each generation, sorted left-to-right in order of age.

At the far left is the battery tray and switch for the oldest system. The battery tray is sized for three “C” sized batteries, which hasn’t been in common household use for years. The switch toggles between two different ways to connect positive and negative power to wires, driving a motor either forward or back. It was possible to drive multiple motors simultaneously with multiple ports on the switch. Each plug can also accommodate another plug inserted on the side, but stacking connectors that way quickly becomes unwieldy.

To solve that problem, somebody had the idea that LEGO electrical connectors should conform to LEGO brick form factor. Such was the case for the gray cube which is a motor from the first-generation LEGO Mindstorm set. It was successful at letting us stack multiple motors in parallel, but there must have been some kind of problem motivating a change.

The gray cylinder represents the LEGO “Power Functions” line, which is very focused on studless construction except the connector, which is the same LEGO 2×2 size as Mindstorm RCX connector but with only two standard LEGO studs instead of four. The other half houses four electrical contacts.

Then I guess the person who felt LEGO electrical connectors should be LEGO bricks retired. Because that idea went out the door for Mindstorm NXT. Its style of electrical connector resembled landline telephone cables but was not compatible with them.

Today, fancy LEGO bricks use the “Powered Up” system, linked by yet another type of connector that remind me of SATA plugs for a computer’s data storage drive but not identical.

That’s at least five different ways LEGO has implemented electrical connections, and maybe there were more but I’m not enough of a LEGO historian to know. Why were these changes made? Some clue can be found in technical documentation written by people like Philippe “Philo” Hurbain who dissected and reverse-engineered their valuable LEGO components. Reading those pages, I understand the evolution as follows:

  1. The oldest system that used triple C cells only worried about powering a DC motor, so it’s just two pins for going forward or reverse at full speed.
  2. The first-generation Mindstorm system had to accommodate more than motors: it also had to support sensors, so more wires were added.
  3. The “Power Functions” system didn’t need to support sensors, but it did simultaneously provide raw battery positive/ground as well as PWM-controlled motor forward/reverse within a single connector.
  4. The NXT system also supplied power and ground. Instead of PWM-controlled forward/back, it had more sophisticated I2C data communication.
  5. The current generation “Powered Up” system supplies power and ground lines for simple accessories such as a simple LED. It has a pair of PWM-controlled lines to run simple motors forward/back at varying speeds. And finally, it has asynchronous serial data lines for sensors and other smart peripherals.

Seeing how it covers all the scenarios, would the “Powered Up” system be the final word in LEGO electrical connections? Or would it just be yet another standard that will soon go away? We will have to wait and see how things play out. In the meantime, we don’t have to pay hundreds of dollars for LEGO sets for a taste of the LEGO life, there are many depictions of LEGO on screen in movies, TV, and video games.

Implementing Novel LEGO Design Gets Expensive

Sometime after I bought my second LEGO Mindstorm NXT set, I conceded I had to give up on my idea of building a large enough LEGO collection to build whatever I can think up. I had thought it would be a matter of buying enough sets to have a sufficient base collection of important pieces. After all, how many of those can there be? The harsh answer: more than I can afford.

Exhibit A: This LEGO Technic turntable. It consisted of two pieces that snap into each other and can rotate. Geared teeth both inside and out allow building motorized mechanisms for one or the other (or both) pieces. This piece is critical for building any rotating mechanism that demands more strength than a single LEGO axle can support. It formed the base for a crane in both the Crane Truck and Unimog U400 sets, and also the pivoting point between the base and body of the Motorized Excavator.

I had forgotten I was obsessed by this piece. The aforementioned three Technic sets were all interesting in their own right, but seeing this turntable reminded me my long-term goal was building a LEGO Mindstorm NXT robotic arm. A robot manipulator with just 3 degrees of freedom isn’t very interesting, and that’s why I bought a second NXT set to give me six NXT motors and six degrees of freedom. Structurally, the end manipulator might be something an NXT motor can handle directly. But as I worked out the design from finger to wrist to elbow to shoulder joint, I realized I need something beefier than just a LEGO axle in an NXT motor. Enter the LEGO Technic turntable: I would need several of them for a 6DOF robot arm.

But these turntables are rare. Only one in each of the Technic sets I bought, and none of those sets were exactly cheap. Furthermore, as I built those three sets, I would encounter and learn about even more interesting pieces I would want to incorporate into my own LEGO Technic creations. This was exciting until I stepped back and did some math. I realized buying enough sets to get me enough special pieces (not just turntables) will cost thousands of dollars. Furthermore, as I collect parts towards a long-term plan, there’s no guarantee LEGO wouldn’t switch up something important partway through this process forcing a costly redesign. As much as I’ve enjoyed LEGO, given all of these issues, I decided to stop spending my disposable income this way.

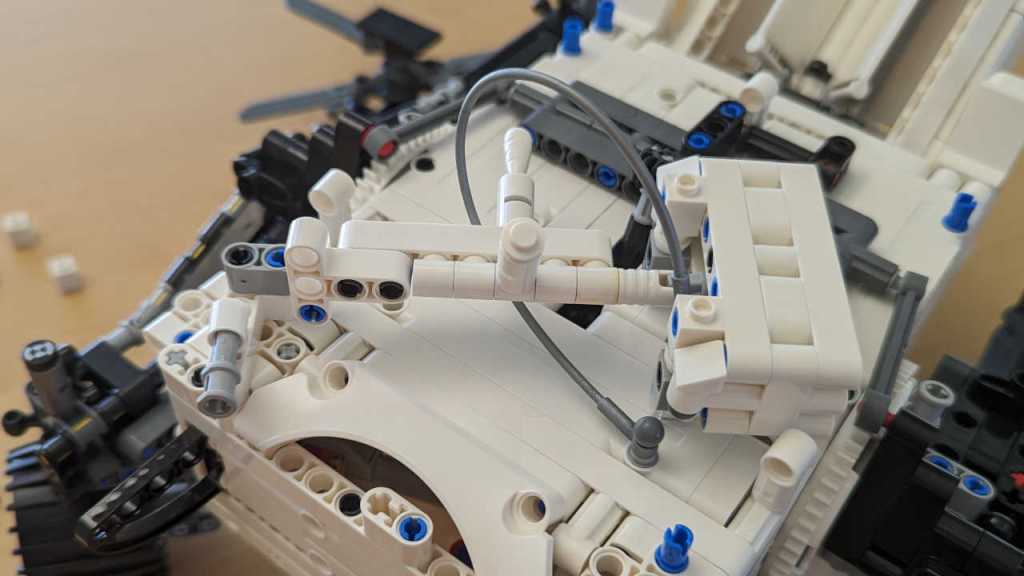
Until, that is, the Mars Rover Perseverance set that kicked off this LEGO nostalgia tour. And putting it together, I was very amused to see a familiar face: the turntable rendered in white+gray instead of black+gray in earlier sets. It was used for the stressful job of main rover suspension joint to either side of rover body. The geared teeth inside and out were unused in this case, but the axles to transmit corner steering forces did pass through its center. I didn’t know they were used in this set when I decided to buy it (just being a LEGO rover was enough) but the fact two turntables are used in this rover set meant I’ve accidentally stumbled into the most cost-effective way to acquire turntables years later. I had a good laugh at my own expense, but I’m not interested in reviving my old project idea of an NXT robot arm for multiple reasons. There’s the fact I’m far fonder of 3D printing now, that LEGO had discontinued the Mindstorm line, and even if I want to build it independent of now-discontinued Mindstorms, LEGO had changed their motor connectors again.

LEGO Mindstorm Struggles

I love building LEGO Technic sets according to their in-box instructions, it’s a great joy to see small mechanisms add up to impressive machinery. I’ve wanted to use those same parts to turn my ideas into reality, but I’ve struggled to do so. Some of my frustration were about the mechanical limits of LEGO pieces, but there was an electronic component as well: LEGO Mindstorms.

Before the era of cheap and plentiful Arduino IDE compatible microcontrollers from online marketplaces, hobby roboticists options were significantly more expensive. The only options I could realistically afford were Parallax BASIC Stamps. I remember filling out a paper order form and mailing it, along with a check worth a significant fraction of my checking account, to order my own. In this environment, the LEGO Mindstorm line held tremendous promise: a full soup-to-nuts package from software development environment to runtime hardware to mechanical construction via LEGO Technic bricks.

But the target market for LEGO Mindstorm is just a bit off from where I was. Intended to be easy for beginners, I chafed at the limitations imposed by multiple layers of abstraction. I didn’t want to deal with drag-and-drop graphical UI when I was familiar with lower-level programming languages like C. And I especially didn’t appreciate times when the drag-and-drop UI didn’t let me express something I could see clearly in C in my head. (Years later, I would learn about ways to run C code directly on Mindstorm NXT bricks, but by then I had already moved on.)

On the hardware side, the LEGO Mindstorm line managed to be simultaneously too much and not enough. One specific example is the tremendously capable LEGO Mindstorm NXT Motor. Not merely a plastic shell around an electric motor, there were also reduction gear to make the rotation motion easily usable plus rotary encoder for closed-loop feedback operation. This meant each motor can act as either a position-based servo or a rotation-based gearmotor depending on software. It’s fantastic but that complexity also meant it was expensive and rare. Each NXT base kit had only three of these capable motors, severely constraining the degrees of freedom our Mindstorm creations can make. Almost every nontrivial NXT project I’ve seen required buying multiple sets just to get enough motors.
The same story repeats for many aspects of NXT ecosystem: sensors, runtime hardware bricks, etc. A basic kit can get us started with a “Hello World” equivalent, a line-following robot or something. But building anything nontrivial requires using multiple sets working together. After constantly bumping walls with my first Mindstorm NXT set, I bought a second set when NXT 2.0 was released. Having two sets were helpful but not nearly as helpful as I thought it would be. This is quite a deep hole to throw money into. By the time Mindstorm EV3 was released, I decided I had better options elsewhere.

LEGO Technic Limits, Big and Small

I just finished rebuilding a motorized LEGO Technic excavator, the third in a trio of large Technic sets I bought about ten years ago. I then stopped buying Technic sets until the recently released LEGO Technic Perserverance rover kicked off this nostalgia tour. I had forgotten why I stopped, but now that I’ve been reminded, I thought it would be worth writing down: LEGO Technic is great fun and lets me try out certain ideas almost instantly, but LEGO creations are mechanically constrained within a range due to parts availability. It takes a great deal of effort to go beyond this range, when it is possible at all.

The well-defined regular spacing of LEGO pieces is key to its easy modularity, but it also places a hard floor on how small we can build with official LEGO pieces. There are fractions: halves, thirds, quarters, but nothing in between. If I want to build something that interacts with a non-LEGO piece, matching the exact size is impossible. Example: if I wanted to build a coin-operated LEGO machine, I couldn’t build a coin slot exactly the size of a real coin. There exist unofficial 3D-printed parts to circumvent such size restriction. But if I’m using 3D printing, I’m more inclined to just do the entire thing with 3D printing and ignore LEGO.

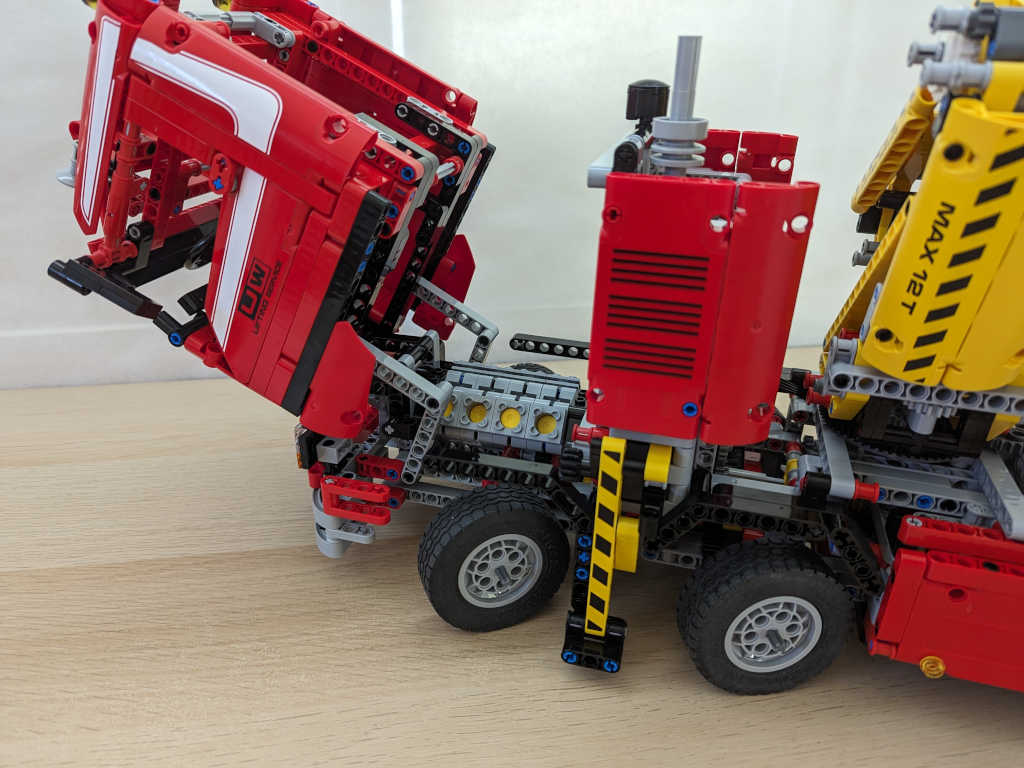
Likewise, the selection of available LEGO pieces imposes a practical upper limit on what we can build. LEGO beams have a maximum length and anything larger requires joining multiple beams. And everywhere there is a joint, there is a small tolerance that could move. It’ll never be as strong or rigid as a single longer or thicker piece. My 3D-printed Sawppy rover can incorporate aluminum extrusion beams for structural strength, but such options are not available for pure LEGO creations. The Crane Truck chassis is very long by LEGO creation standards and is composed of many joined beams. Yet despite its sturdy construction, every time I pick up the crane truck I can hear and feel the crinkling sound of LEGO pieces flexing and moving, and the chassis sagging under its own weight.

To be fair, this is actually representative of challenges building real life machinery as well. Everything bends and twists under load, including real truck chassis. When I revisited the Technic site, I see the largest production set right now is 42146, modeling a Liebherr LR 13000 mobile crane. At that scale, those Technic beams are sure to wobble and flex. But beam flex happens on the real thing and must be accounted for in planning and operating real world cranes. So, I guess it’s realistic. But is it fun?

Beyond size limits on the big and small ends, there’s also the problem of building up intricate mechanisms via multiple LEGO pieces. Again, every joint introduces another point of movement and flexibility, which compounds into a floppy structure that might not even be able to hold itself up together in the face of gravity. Such was the case for the LEGO Technic Mars rover suspension. It was also true for all three of my large Technic sets, each of which featured an articulating arm and they all flop about when moved.

Every engineer learns to work within the constraints of a problem, and some people relish overcoming these mechanical challenges of building with LEGO. I thought I might become one of these people, but my frustrations went beyond the mechanical. LEGO also had ambition to incorporate electronics into the Technic line, and the 2010s were in the middle of the rise and fall of LEGO Mindstorm.

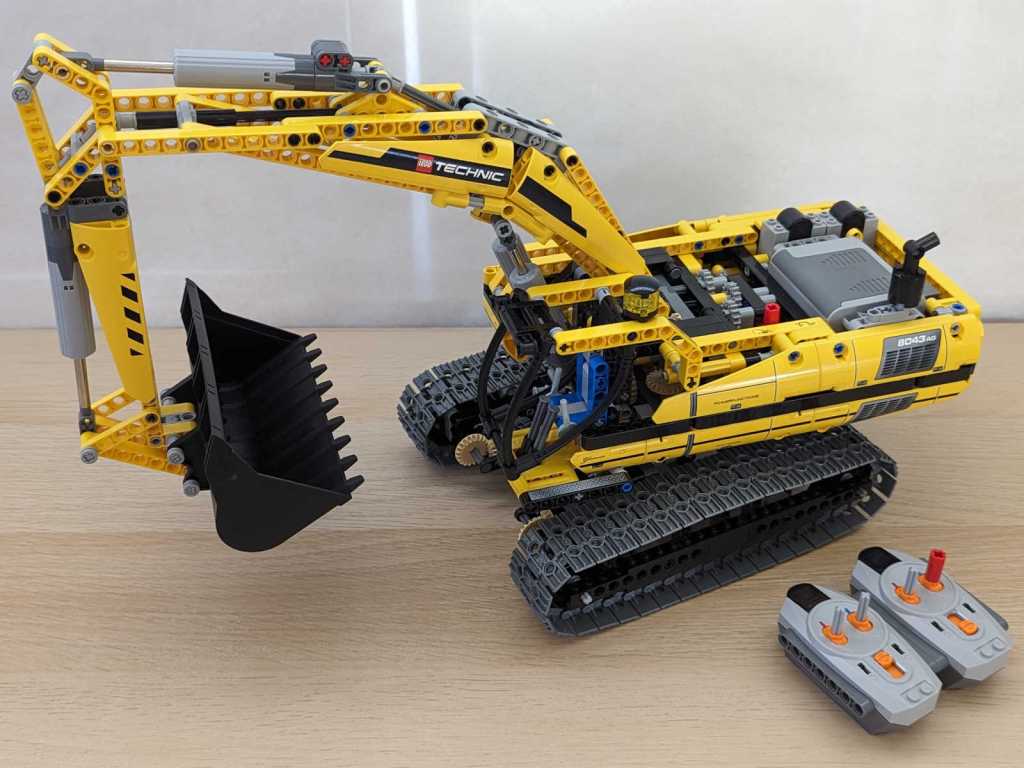
LEGO Technic Motorized Excavator (8043)

I thought the LEGO Technic Unimog truck was an admirable model of the real truck both in appearance and mechanical detail, but I found the pneumatically operated crane arm accessory wanting. I kept my eyes open for another set, one that would revert to mechanical linear actuators and offer motorized controls on all axis of movement. My wish was granted by LEGO Technic Motorized Excavator (8043).

I was bemused when the manual started with a warning that we should not actually take the excavator to play in the dirt. Bah, spoilsports!

Both crane trucks included only a single motor and a complex gearbox with multiple clutches to redirect that power. In contrast, this set included four motors and a single selection clutch. That selection is actuated by one of the motors. The remaining three motors would do one of two jobs depending on that selection, for a total of six functions. When the clutch is set in one way, these three motors control excavator locomotion: left track forward/back, right track forward/back, and body pivot clockwise/counterclockwise. When the clutch is set the other way, these three motors control excavator arm motion: shoulder joint up/down, elbow joint in/out, and wrist joint for bucket scoop/release.

In hindsight, this instruction manual did not meet the usual bar of LEGO instructions. I encountered the first issue during arm assembly. It was physically impossible to mount the pair of blue pins as instructed. I had to shift them one position over for things to fit. The second issue I didn’t realize until after assembly: there weren’t any checkpoint tests. The Crane Truck instructions included a few tests of “turn this shaft, you should see movement in that shaft” nature, helping us verify we had assembled the gearbox correctly. This manual had nothing of that sort, so I didn’t notice my mistake.

Once I completed construction, I was happy to see the gearbox internals exposed to view. For some reason, the product package designer tried to hide this fact, showing the excavator only from angles where we couldn’t see the exposed gearbox. I liked seeing the gears work! Which was good, because I immediately found that I couldn’t control shoulder joint elevation. The exposed gearbox allowed me to debug. Tracing forward from the spinning motor, and going backwards from the shoulder elevation actuators, I found where they were supposed to meet.

The mistake happened here in step 39. The instructions called out two of the gears because their orientation is important. I made sure I installed those two gears correctly, but I missed the fact there was a third gear I was supposed to install as well. Its orientation was not important, but it needed to be there!

I didn’t want to take everything apart in order to rewind back to step 39 out of 99 steps. I tried to be clever, selectively disassembling just what I thought I needed to access the short red shaft that was missing a gear. I felt pretty good about this process until I heard a dreaded plastic-on-plastic “clink!” sound of something falling out.

Gah! Where did you come from? Trying to be clever about installing a missing gear had allowed this gear to fall out the bottom. I turned the excavator over to see if I could figure out where it came from, and immediately learned this was a bad idea because I heard “clink, clink” of more parts falling out. I am digging myself a deeper and deeper hole here.

A cascading comedy of errors ensued as I took the excavator further and further apart. It seemed like every time I tried to put a part back where it was supposed to go, two more would fall out. But I eventually stabilized the situation, installed the gear that I missed the first time, and put everything back together in working order. I doubt I saved any time by trying to be clever, but looking on the bright side I now have a much better understanding of how this excavator fits together.

Once it was all put together and working, I am very happy with this set. I finally had a LEGO Technic set that motorized all the axis of motions necessary to replication movement of the real equipment the kit emulated. And even better, this kit is remote controlled via infrared so I’m not even flipping levers on the machine. I could send it on a journey across the room to scoop up loose piles of LEGO pieces and drop them somewhere else. This is the closest I’ve come to fulfilling the fantasy of 5-year-old me to operate construction equipment. The next obvious step is to rent some time on the real thing, but that’s beyond the scope of a LEGO nostalgia tour.

Naturally, a tinkerer’s brain would look at a great thing and think of ways to improve it. Hackaday recently featured a project by Brick Technology YouTube channel. It repurposed many pieces from this set but articulates the arm with a hydraulic system installed in an entirely different body. It’s pretty impressive! But I don’t think I’ll go down that path because it doesn’t address my gripes with LEGO Technic.

LEGO Technic Unimog U400 (8110)

I enjoyed playing with my LEGO Technic Crane Truck, but it definitely had room for improvement. One particular disappointment was in the limited motorized articulation of its namesake crane. When I saw another crane truck set LEGO Technic Unimog U400 (8110) I was intrigued by the pneumatic piston articulation of its crane. It is easier to run air hoses instead of axles to transmit power through a crane mechanism, would it prove to be a superior solution? I parted with some of my money for an answer.

I don’t know if LEGO Technic Crane Truck was modeled after any specific truck, but this set has Unimog U400 in the name. Looking at this Unimog U400 picture on Wikipedia, I say it’s a pretty good likeness. Even better, the resemblance is more than skin deep.

A signature feature of the Unimog line is the portal axle system giving them greater ground clearance. I’m happy to report LEGO reproduced the portal axles via these wheel hub gears.

To take advantage of the ground clearance, this set also had coil spring suspensions front and rear so the truck can traverse uneven ground. It’s a solid axle design, located by what I now know as a Panhard rod thanks to this Autopian article.

There is again only a single electric motor in this set, with a gearbox that let us either use its rotational power directly or to drive the pneumatic air pump.

The mechanical or pneumatic power is then directed to either front or rear accessory mounting points.

A four-cylinder engine drives all four wheels, and the engine is visible under the cab once it is tilted forward as the real truck does.

The drivetrain and steering mechanisms are not motorized in this set, but I noticed their related geartrain components used shafts that were longer than necessary. The extra length poked into an empty space behind the gearbox, under the cargo bed. I think these are provisions to help anyone who wants to turn this into a remote-control vehicle.

The sizable cargo bed can accommodate a LEGO WALL-E. (Sold separately.)

After the truck was built, we build the removable accessories front and rear. The default front accessory is a winch that runs off the mechanical accessory drive, a fairly straightforward affair. The star of the attraction is in the back: a crane with gripper end that operates on both mechanical and pneumatic accessory drive. The mechanical driveshaft turns the rotating base to control azimuth. Three levers control pneumatic pressure delivered to a corresponding piston: shoulder joint elevation, elbow joint elevation, gripper open/close, or some combination thereof.

I was intrigued by the theoretical capability to operate the crane purely on power controls, unlike Crane Truck where we had to manually reach out to the crane arm to turn knobs for crane extention and winch. And technically speaking, this set delivered on the promise of full power control. Practically speaking, though, the pneumatic system didn’t work very well. The biggest problem is gravity. Raising elevation on each joint is a slow process as the air pressure fought against the weight of the system. When the lever is flipped in the other direction, that weight crashes down and the joint immediately collapses. With each pneumatic control lever a binary on/off affair, I found it impossible to keep descent rate under control.

Even if the pneumatically operated crane arm turned out to be a disappointment, the rest of the truck was still fun to play with. In the future, I might even take up the invitation to turn it into a remote-control vehicle! As for crane arm articulation, my next LEGO Technic purchase would return to the world of mechanical linear actuators.

LEGO Technic Crane Truck (8258)

I took a brief detour taking care of a battery charging circuit, but now I can return to my LEGO nostalgia tour. I left off with a bunch of miscellaneous licensed LEGO merchandise, but what kicked off this nostalgia tour was the NASA Perserverance Rover kit. The rover set was part of LEGO’s Technic line that feature mechanical capabilities. As someone interested in mechanical tinkering, Technic line is the best line to play with! I’m excited to enter the Technic phase of my tour with Crane Truck (8258), an eight-wheel behemoth featuring a midship-mounted crane. It didn’t start well: when I pulled out the instructions sitting on my bookshelf, I noticed a problem. I had kept the sticker decal sheet in the first page of the associated instruction book, so it doesn’t get lost.

But the sheet was slightly larger than the book, so about a centimeter of the edge was exposed to sunlight and those exposed edges suffered years of sun damage.

Damaged edges were liable to break apart into little pieces. When breaks occur in the middle of graphics, my rebuilt model would have to go without these unusable pieces.

Some of the decals had a clear separation between damaged and undamaged areas. In these cases I could make a clean cut and use the undamaged portions.

Some of the damaged portions are crinkled and damaged but did not break apart upon removal from the backing sheet, so I applied them and hoped for the best.

There is a single motor in this set, whose power drives one of four functions via a complex gearbox in the belly of the beast.

The gearbox complexity meant it’s not always clear what function each part served. When a subset of gears seemed to be isolated from everything else, it’s not easy to tell if a mistake was made or if it’s just a matter of other parts yet to come. To relieve this anxiety, there were checkpoint tests included in the manual. Turn one part of the mechanism, and it move another part of the mechanism. If this test fails, backtrack and find out what was missed.

Four out of eight wheels could steer on this particular truck. I was pleased to see the turning ratio are different between the steering racks, a nod to their different Ackerman steering angles. Only a single pair of wheels on the tandem rear axles were driven with a mechanical linkage to the V8 piston engine.

The V8 engine is visible when the operator cab tilts forward, emulating what the real thing needs to do to service the engine.

When built, it is an impressive looking truck with a long chassis. I was disappointed with the mechanical functionality, though. In addition to the aforementioned drivetrain where only two wheels were “driven”, the motorized functions only cover partial functionality. One of the four motorized axis of motion is to deploy/retract the outrigger system, but actually deploying outrigger feet needs to be done manually. The remaining three motorized axis operate the crane: two operate the azimuth and elevation of the entire crane, and the final motorized axis moves the crane elbow joint. Extending the crane or retracting the hook are manual operations, so it is not possible to play-operate this crane purely from the motorized function controls.

The trailer coupling (“fifth wheel“) is purely cosmetic, there’s no pretense of mechanical function at all.

Looking over the crane arm mechanism, I can understand the space limitations that made full motorization impossible. There’s not enough room to run all the LEGO axles needed to transmit motor rotation. It’s understandable, but I was curious if this problem can be solved with a different approach. Sometime later, this curiosity led me to buy a LEGO set that used pneumatic articulation.

Miscellaneous Licensed LEGO Sets

I love R2-D2 and have spent a lot of money on R2-D2 merchandise, including several LEGO R2-D2 sets. Over the years I’ve also bought several other LEGO sets of licensed merchandise.

Far and away the best of them is LEGO Ideas WALL-E (21303) which has the best backstory of all LEGO sets. LEGO Ideas sets originate from people outside of LEGO. Creative LEGO builders can submit their design on the LEGO Ideas website and fans vote on which designs should become actual LEGO products. The most popular ideas are invited to go through LEGO product design process, those that manage to emerge from it become products on shelves.

LEGO WALL-E idea was submitted by Angus MacLane, a lifetime LEGO fan who also happened to have a day job at Pixar Animation Studios. In fact, he was part of the WALL-E film production team. With such insider knowledge, this LEGO set absolutely built and felt like it was designed by someone who knew both LEGO and WALL-E inside and out.

Pawing through my archive of LEGO build instructions, I learned I also have 4738 Hagrid’s Hut. I have no memory of buying this set. I’ve read the books and enjoyed some of the movies, but I wouldn’t call myself a huge fan even before I learned what a horrible person J. K. Rowling turned out to be. I rebuilt this set hoping it’ll jog some memory and… nothing. Shrug.

That’s not the only set I’ve forgotten about. Going through my LEGO figures, I find a few that imply LEGO with missing pieces and memories.

  • I must have bought a LEGO Marvel licensed set for this Iron Man figure, probably a small one because I don’t see pieces implying a large Avengers set. But I don’t recognize anything as an opponent for Tony Stark.
  • I’m not a huge fan of C-3PO but I probably bought something just to get a R2-D2 figure and C-3PO came in the set. But I’ve lost track of the R2-D2 companion for this specific C-3PO.
  • A Darth Maul implies there should be a Jedi for him to fight. Likely a Qui-Gon Jinn, but tan robe and bearded face doesn’t stand out like Darth Maul does in my pile of LEGO figures.

I was moderately amused by LEGO’s BrickHeadz line. I assume they’re trying to earn some money from the Funko Pop audience, as BrickHeadz are clearly designed to be built once and put on display, never disassembled. Or simply collected and left in their boxes, never to be built. Which is a shame, because it’s interesting to see how much LEGO designers can do with so little. I’m especially impressed by how different hairstyles can be represented with generic LEGO bricks over the surface of a 4x4x4 volume. I don’t think all faces are identical, but they certainly are in my tiny collection.

  • 41602 Rey was purchased after watching The Last Jedi, best of the trilogy (fight me) which set up some intriguing possibilities that J.J. Abrams ignored and flushed down the toilet. So much money squandered and opportunity lost with Rise of Skywalker.
  • 41611 was a two-pack: neighborhood scientist inventor Doc Brown and his friend in time, Marty McFly all set to document the inaugural test run of Doc’s time machine. As of this writing, an impressive depiction of the DeLorean is available as LEGO 10300, but I decided to pass on that.

On the subject of LEGO cars, I do have McLaren Senna 75892 from LEGO Speed Champions line. I got this set because it is the featured car of a LEGO themed expansion pack for Forza Horizon 4, which I spent many hours playing. I actually haven’t driven the Senna much in game, I had far more wheel time in the little red rally Mini. I contemplated buying that as well, but it is part of a larger set 75894 and I decided against it.


I was happy to continue revisiting my old LEGO sets, but one of my previous electronics projects needed immediate attention.

My Other LEGO R2-D2 Astromech Droids

My sun-discolored Mindstorms R2-D2 is not my only LEGO R2-D2. I love the little droid, as does a lot of people, and its popularity means LEGO returns to milking that revenue stream on a regular basis. There have been many takes on creating the movie star in plastic brick form, and LEGO separated me from my money on two other occasions. After I rebuilt my sun-discolored R2-D2, I proceeded to rebuild these two.

LEGO Technics R2-D2 (8009)

Smaller and more abstract than the Mindstorms R2-D2, this variation is built exclusively with the LEGO “studless” construction method. Most commonly featured in the Technics line but can be found where other product lines need mechanical capability, such as the drivetrain for a steam locomotive. It doesn’t have the electronic smarts of a Mindstorm set, but it does have mechanical marvel of a Technic set. Featuring a rubber band powered mechanism to switch between R2-D2’s two-wheeled and three-wheeled modes, and a simple lever to extend R2-D2’s welding arm.

LEGO Ultimate Collector Series R2-D2 (10225)

I don’t know the internal corporate business decisions at LEGO, but I imagine they saw the robust market for rare kits and decided there was a business case for expensive low volume kits. Thus the “Ultimate Collector Series” to extract hundreds of dollars from their target audience. Either adults who love LEGO, or rich parents of spoiled children. I was of the former category when I swiped my credit card for 10225.

For the most part this was built in classic LEGO style with studded bricks, with some studless pieces to implement articulation mechanisms. This included the ability to switch between two-legged and three-legged modes, the welder arm, and the buzzsaw arm.

This kit also came with a bonus second R2-D2 in the form of a small LEGO figure. Since this kit was fully designed for static display, it also came with a little display plaque where the little R2-D2 figure sits.


Since there were plenty of money to be made from R2-D2 merchandise, LEGO ignored the definition of “ultimate” and has continued to released more R2-D2 sets. There was the small 30611 deployed as promotion. As of this writing, LEGO Star Wars R2-D2 (73508) is available in stores. Judging from pictures, it appears to be very similar size to the (not actually) Ultimate Collector 10225 I bought but is definitely not a re-release of the same kit. I can see many differences in implementation, most obviously in how the two kits approached building R2-D2’s dome head.

It also has a display plaque, topped by its own small bonus LEGO R2-D2 figure sitting atop the addition of a “Lucasfilm 50th” graphic. It looks like a pretty cool set, but I decided I had enough LEGO R2-D2 in the house and passed on spending over two hundred bucks for my own 73508. That’s money I’ve already spent on other licensed LEGO merchandise.

Reconstructing Sun-Yellowed LEGO R2-D2 (9748)

While digging through my LEGO pieces to reconstruct my train sets, I would frequently come across some severely discolored pieces. They were from a LEGO R2-D2 set, number 9748 in the Mindstorm line of electronics-enhanced kits. I had my little astromech droid displayed on my office window ledge for several years, causing severe sun damage on some of the plastic pieces. I disassembled the kit and distributed its component parts into my LEGO organization system, intending to use those sun-yellowed pieces as internal structure of future creations where we wouldn’t see the discoloration. That never happened, so now I’ll rebuild the droid with an extra challenge: I want to reconstruct the droid including its sun-yellowed nature.

You see, the discoloration only happened in places where certain pieces were exposed to sunlight. The original colors were preserved in places shaded from sunlight. Here are some examples of white pieces with discoloration only where sunlight could reach. A piece of standard LEGO white plate and a standard LEGO tan plate are at the bottom of this picture for color comparison.

Even though R2-D2 only had three wheels, this kit came with four wheels in the box to support four-wheeled creations. While three of the wheels were sitting on the window ledge, the fourth was stored away, and we can see a severe difference in the soft rubbery gray parts of the wheels. In contrast, the rigid gray plastic hubs were barely affected by sunlight exposure.

Obviously different plastic formulations had to be used for soft tires versus rigid plastic. But this kit taught me not all rigid LEGO pieces used the same plastic formulation, either. Many pieces in this kit looked white when new but, after receiving a lot of sunlight, some were immune to sun damage and remained white while others yellowed. It appears all the sun damage immune pieces were Technic-style studless construction pieces, but not all studless pieces were immune.

Reconstructing this yellowed R2-D2 meant physically identical LEGO pieces were not interchangeable as they would normally be. I had to investigate adjacent pieces to make sure their shadow would align with sun-yellowed borders of specific pieces.

Thanks to paying attention to sun-yellowed borders, the recreated R2D2 didn’t have blotches of white exposed in the middle of bricks that were formerly shaded. It still looks weird with a mixture of sun-yellowed parts attached to parts immune to sunlight damage, but I’m going to call it character.

A day after I reconstructed this, all four flexible beams used to define R2’s shoulder curvature broke. I don’t think this is sun damage, I think this is age. Formerly soft plastic could no longer sustain such a tight curve and failed. Maybe I can 3D-print some replacements out of TPU or similar flexible filament, but I’ll leave them alone for now as part of veteran R2’s character. I have other R2 sets to reassemble for a group photo.

My Other LEGO Trains

I own three LEGO train sets beyond the gorgeous Emerald Night train set, none of which are nearly as sought-after in the LEGO aftermarket economy. I bought this trio after Emerald Night, thinking I would enjoy building up a LEGO train collection. Buying and building these three sets, though, didn’t bring me the same level of joy as Emerald Night so I stopped buying any more LEGO train sets. I guess I was just a big fan of Emerald Night.

Now I’m putting my LEGO sets back together, I could enjoy them again. I will also apply all the sticker decals that I didn’t use before, as I no longer intend to disassemble them and use those pieces elsewhere. They’ll just sit on display (or stored intact) in the future.


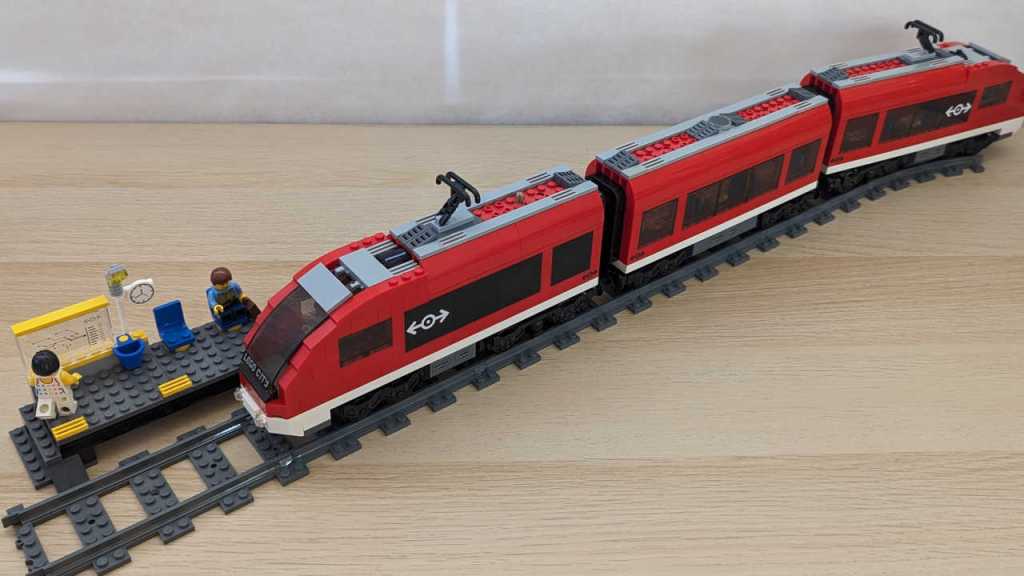
LEGO City Passenger Train (7938)

A modern aerodynamic electric passenger train is the historical successor to steam-powered Emerald Night. Naturally those pantographs are just for looks, as LEGO trains are actually powered by batteries instead of overhead wires. As a result, the first car is packed with battery and associated equipment instead of passenger space as implied by the non-functional opaque windows.

The set also came with a small train platform for passengers to await their ride. Since I’m applying the sticker decals this time around, I finally had a good look at the informational display. Based on its short length, I had thought this train was for urban commuters, but the display listed cities as far apart as London and Moscow. Wow, it’s a train with aspirations for international travel!

I interpreted the numbers listed behind each city as the departure times for each train. It is an extremely tight schedule: eight train services to cities all over Europe departing within a 35-minute window from 11.03 (service to Dublin) to 11:38 (service to Rome.) And according to the analog clock on the lamppost, it is now 11:42. These two passengers on the platform have missed all the scheduled trains.


LEGO City Cargo Train (7939)

A cargo train set is a natural complement to the passenger train, and they were likely released simultaneously judging by sequential kit numbers 7938 and 7939. From this kit I learned a cargo train set has higher play value than passenger train sets. One of the train cars carries two adorable LEGO microcars that somehow still has enough space for a LEGO figure. (They have to forgo large hair/headwear, though.) There’s a car to carry a large cargo container, a container tractor-trailer truck with a half-length container.

The best part: a gantry crane to move containers between them. I loved the detail of the crane operator cab: this little person is seated on a rotating platform and has 270-degree visibility via panoramic windows.


LEGO City Red Cargo Train (3677)

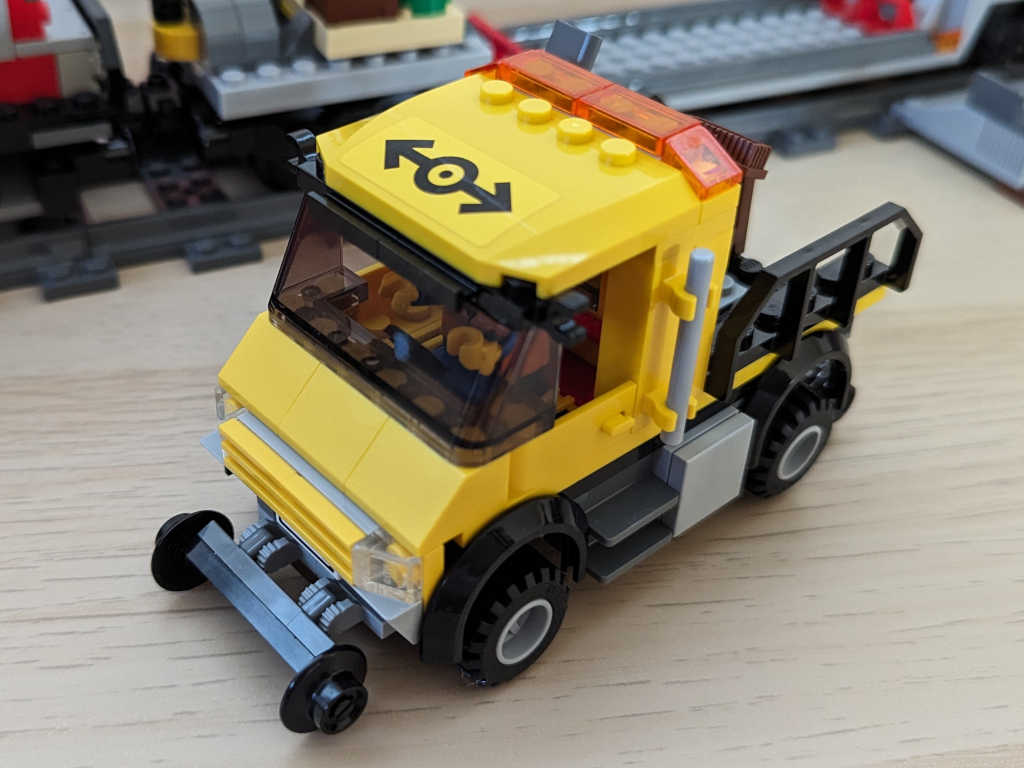
Supporting both passenger and cargo operations is this set in the theme of rail maintenance. The engine has a tall operator station for all-around visibility, consistent with a switcher locomotive for short range work. A car for carrying bulk cargo like gravel, and structures to load and unload it. A long car has a small mobile crane on one end, and a cargo car for carrying bright green barrels of… eh… I don’t know what.

The best part: a small work truck that can convert between road and rail travel. I thought these dual-mode machines were cool in real life and I admit this little truck was the biggest motivation for buying this train set.

On an entirely different topic but still related to purchase motivation, my love for R2-D2 from Star Wars meant I bought several sets after my first LEGO R2-D2 set.

Emerald Night (10194) and LEGO Aftermarket

After several years of not building anything original with my LEGO pieces, I finally had to admit to myself that I’m not using LEGO as construction toys anymore. Rather than letting them sit unused in neatly organized trays, I’ve decided to pull them out and rebuild them according to their respective instructions. This way at least I can still enjoy them in some form.

LEGO pieces have a very distinct tactile sensation as they snap together, a sensation I associate with happy memories. It’s what I treasure about LEGO, but not everyone feels the same. Some treat them as investment assets! Every LEGO kit is produced for some period of time, usually a few years, then discontinued. The finite supply imposes a scarcity and wherever there is scarcity, there is a market. Some time ago I learned there’s an entire economy around people who buy and sell LEGO kits, and the highest value kits are those that were still sealed in original LEGO box and never opened.

Buying LEGO kits just to never assemble them? It is such a foreign concept to me, but I guess it can be lucrative. Take, for example, kit 10194 “Emerald Night”. This LEGO train paid tribute to steam era locomotives that evoke a lot of nostalgic imagery. It launched in April 2009 for $99 USD. The BLS inflation calculator says that’s roughly $142 in 2023 dollars, but this specific kit has vastly outpaced inflation. As of this writing, there are several eBay listings for unopened (“new in box”) Emerald Night with asking price north of $1,000. Used sets in good condition (I think mine would qualify) are listed in the $500 ballpark. This is insane.

I don’t remember details of buying this set. According to brickeconomy.com it was available exclusively online via LEGO Shop@Home and not sold in stores. I guess that meant a limited production & sales volume? Combined with the fact it builds out to a majestic looking steam engine, I can see why it would still be in high demand now. But I don’t see my LEGO as investment assets, I got mine to build and play and make choo-choo noises with my mouth as it runs down the track. If I want investment assets, I will buy some VFIAX.

None of the parts in Emerald Knight jumped out at me as shapes unique to this kit. However, the locomotive exterior and its associated tender are in a deep rich dark green instead of the typical LEGO green color. Like WALL-E orange, I don’t own any other LEGO pieces of this color, either. After disassembling the train many years ago, I’ve frequently eyed those dark green pieces and struggled to find another application for them. I never did. But now that I’ve put Emerald Night back together, I could admire this epic LEGO train again. Then I continued to reassemble all of my other LEGO trains.

I Haven’t Used LEGO Construction in Years

When I was young, LEGO were construction toys. The box picture was only a starting point, a “Hello World” to show what can be built with pieces in that box. I would build it, sure, but then I would take it apart to build something else from my imagination. Then I would take that apart to build something else, and repeat. In that past era, majority of pieces were generic bricks. What could be built were low-resolution approximations, and specialized parts were few and far in between.

Over the past several decades, LEGO has evolved away from that type of usage. What’s inside a LEGO box have become more and more specific to what’s pictured on the outside. Specialized parts help build higher fidelity models but are difficult to repurpose for other creations. One example of this trend are the wheels of the new Perseverance rover kit 42158 that I just assembled. It has specialized wheels for that distinct Mars rover look, instead of using generic LEGO wheels like they did for their earlier Curiosity rover kit 21104.

This trend towards more specialized parts meant that after I build a LEGO kit according to instructions, I am less and less able to reuse those parts for something else of my own imagination. As a result, some kits are put on static display, others are disassembled only to never end up usefully deployed in any other context. And it’s not just the physical shape of the pieces, they also use colors outside of LEGO’s standard color palette. While building WALL-E kit 21303, I was very impressed that none of its pieces jumped out at me as a specialized part. I thought the whole kit (minus the decals, naturally) were built from standard LEGO. I didn’t learn of my mistake until I took WALL-E apart and started sorting parts: WALL-E’s body was neither LEGO’s standard yellow nor their standard orange. It was a different shade in between!

Here are three small 1×1 pieces on a white beam, each representing one of the colors. To the left is standard LEGO yellow, to the right is standard LEGO orange, and between them is WALL-E orange which is neither of those colors. As another point of comparison, standing behind the beam is a LEGO figure. Standard LEGO yellow for head and hands, and standard orange for the torso. Neither of which match WALL-E orange. I’m not well versed enough in the LEGO lineup to know if this shade of orange is used in other kits or created specifically for WALL-E. I do know I don’t have anything else in this specific shade of orange.

But it’s not just the specialized parts and colors. The biggest reason for my migration away from LEGO is 3D printing. Ever since I got up and running on 3D printers, it has been my preferred tool for turning my imagination into plastic reality. I don’t have to be constrained by the selection of LEGO parts I have on hand, and dimensions are not constrained to multiples of a single LEGO stud. And if a part breaks, it’s a lot easier to reprint a part than it is to replace a specific LEGO piece.

Ironically, one of my earliest 3D printing projects were trays to organize my disassembled LEGO pieces. I got all of my LEGO neatly organized and set up for future creations, only to never touch them since. (I’m laughing at myself in hindsight.) Putting Perseverance rover kit 42158 rekindled my love for LEGO and that satisfying tactile sensation of clicking LEGO pieces together. Since I haven’t used LEGO as construction sets for years, and it’s growing ever less likely in the future, I might as well reassemble these kits back to the picture on their boxes. And if I’m doing that, I might as well start with the prettiest of them all: LEGO Emerald Night.

LEGO Technic NASA Mars Rover Perseverance (42158)

One of my many back-burner projects is a micro Sawppy: a smaller 3D-printed motorized Mars rover model with a target parts cost under $100. Well, the LEGO group has joined the chat with their $100 NASA Mars Rover Perseverance kit number 42158. This is more complex and expensive than their earlier rover (Curiosity rover #21104), but less than what serious fanatics have created. As someone who grew up playing with LEGO and a fan of Mars rovers, I had to get one.

This product is in the Technic line, which goes beyond cosmetic appearance by incorporating mechanical features. The front of the box depicts a wheel raised by a boulder, implying a functioning rocker-bogie suspension.

The back of the box shows four-wheel steering, with alignment for turning-in-place and for driving in an arc. It also advertises some level of arm articulation. It’ll be very interesting to see how that’s implemented. I opened the box and got to work. Window-shoppers can download the assembly instruction PDF to see all the details without spending money.

I was not surprised to find the wheels were custom pieces unique to this kit.

Also unique to this kit were a few decal stickers.

Construction started with fairly standard Technic fare. The first thing that really made me think “Huh, haven’t seen that before” were these angled shafts. Usually, universal joints were used only for vehicle models with suspensions and had to transmit power through range of suspension motion. This is the first time I recall seeing them used for an interior non-articulating joint.

The first completed bit of rover suspension was the differential bar on top of the rover. A stout triple-beam unit to handle the load. It got me excited to seeing the rest of rocker-bogie suspension implemented in LEGO.

I was surprised to find the rover instrument mast could be built in the stowed travel configuration. No such feature for the rocker-bogie, though, which is fixed in the deployed position. I have ambition to give micro Sawppy a rocker deploy pivot but that’ll take development effort I have yet to invest.

A little over four hours later, I completed assembly of the kit. It’s pretty cool and absolutely recognizable as Perseverance rover with little buddy Ingenuity. The robot arm articulation geartrain turned out to actuate only the shoulder joint, elbow and wrist joints are posed manually.

As is typical for LEGO, a few extra copies of easy-to-lose pieces are included. If one goes missing, we can still complete the kit.

The cover art boulder is no lie: rocker-bogie suspension geometry is fully functional.

It was also, unfortunately, quite flexible. LEGO pieces have small gaps between them so we can snap them together and take them apart. These small gaps, combined with the natural flexibility of ABS plastic, resulted in a pretty floppy suspension that splayed out as it squatted. On the upside, I’ve determined the real thing built with carbon-fiber and titanium is also pretty floppy so all good.

A similar problem hampered the corner steering mechanism as well. It’s a pretty clever design switching between “center steering” and “arc travel” modes with a single lever in the middle of rover body. But transmitting steering motion all the way out to the corners meant many linkages, each adding their own tiny bit of play. As a result, steering angles for the four corner wheels are more suggestions than commands. But still, pretty cool.

I enjoyed assembling and playing with this kit. LEGO assembly instructions, using techniques polished over decades, were excellent as always. I aspire to one day make Sawppy assembly instructions as clear as LEGO assembly instructions. However, the instructions only describe one thing. The beauty of LEGO is that it enables building countless other ideas of my imagination. It did that very well, until I got into 3D printing.