Fantom Drives USB Storage (FDU80) Teardown

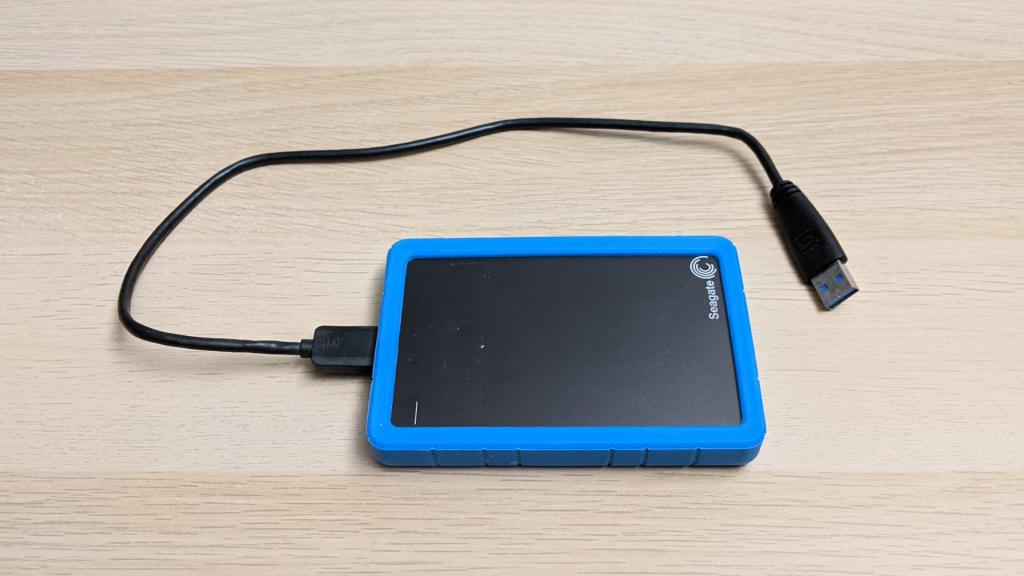
After wrapping up my adventures in Xbox One SSD upgrades, I decided to stay on the theme of storage devices and dug up this old thing from my pile of hardware awaiting teardown.

This device looks ancient but Fantom Drives appears to be still around today. Or possibly a company has acquired rights to that name and logo for doing business. The website lists a few internal M.2 SSDs but most of the product line are external USB storage drives. This is likely an early product of that line.

Size of this enclosure is consistent with a single 5.25″ floppy (or CD-ROM or DVD) drive bay. However, the front faceplate is empty with no slot for a disk.

Around the back we see a plug (IEC 60320 C13/C14) for power and a USB plug (type B) for data. A power switch and cooling fan rounds out the plate. I found the fan curious, because I don’t see any grille for intake or exhaust on this enclosure. Airflow would have been limited at best.

I see four screws on this plate. Two of them holds the fan in place, and the other two probably holds the USB data translation system in place. Neither look like a way for me to open up the box.

Four screws are visible on the bottom, and again they don’t look like something that’ll let me open the enclosure. They probably hold the storage device within.

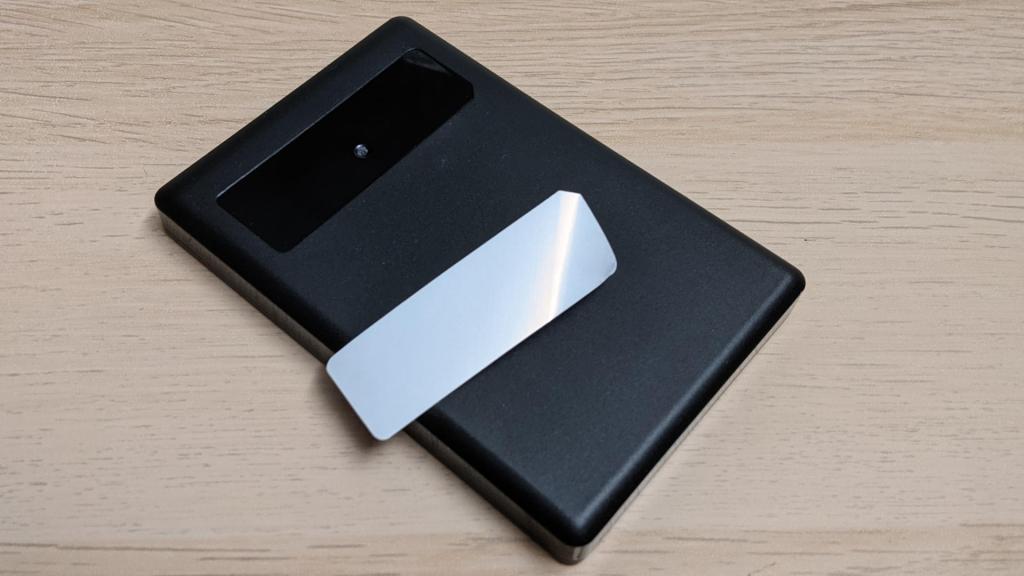
I’m sure the warranty is long gone on this device, but I’m thankful for this “Warranty Void if This Seal is Broken” sticker because they would have placed it in a location critical to disassembly. Which is where I should start.

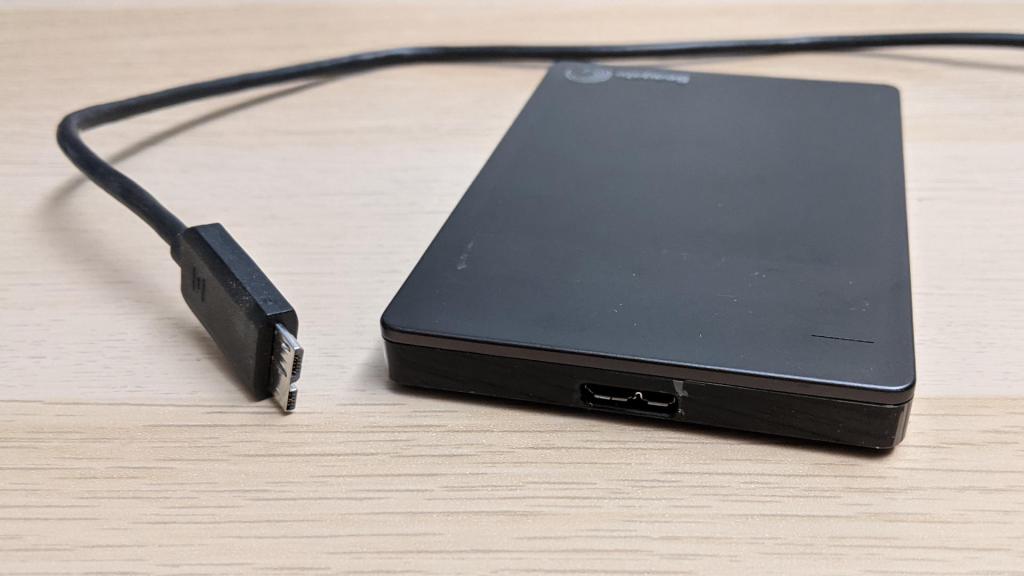
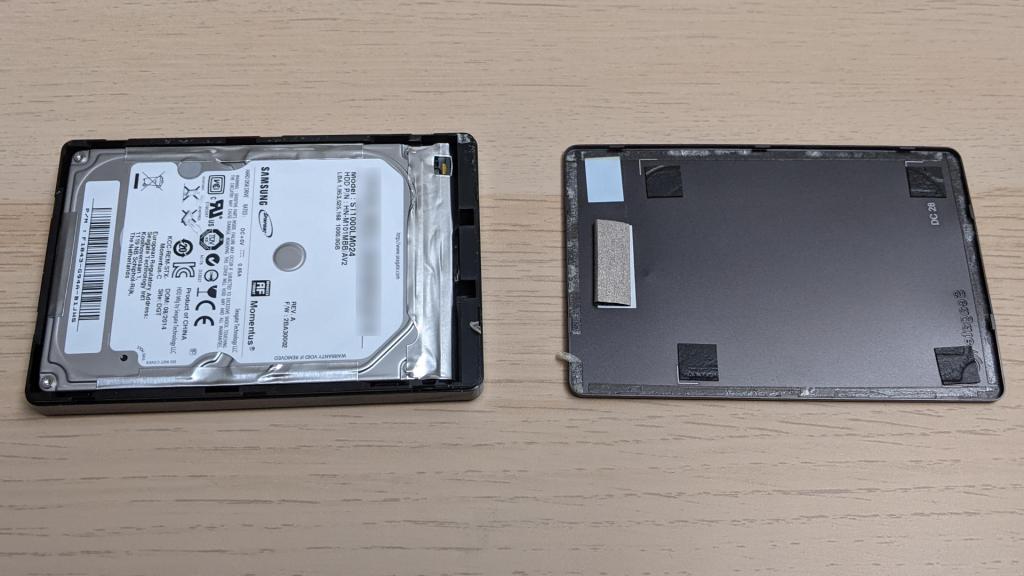
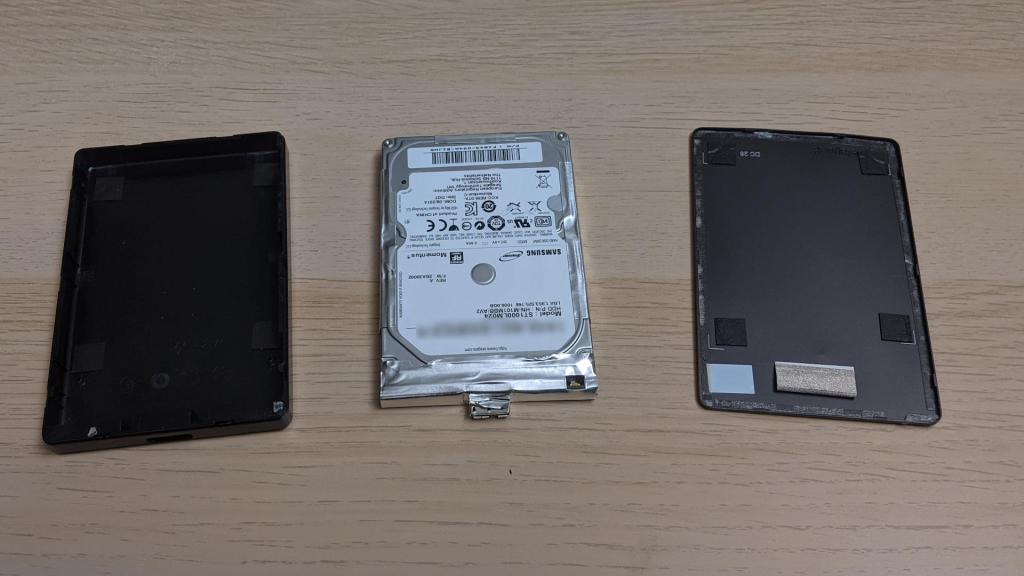
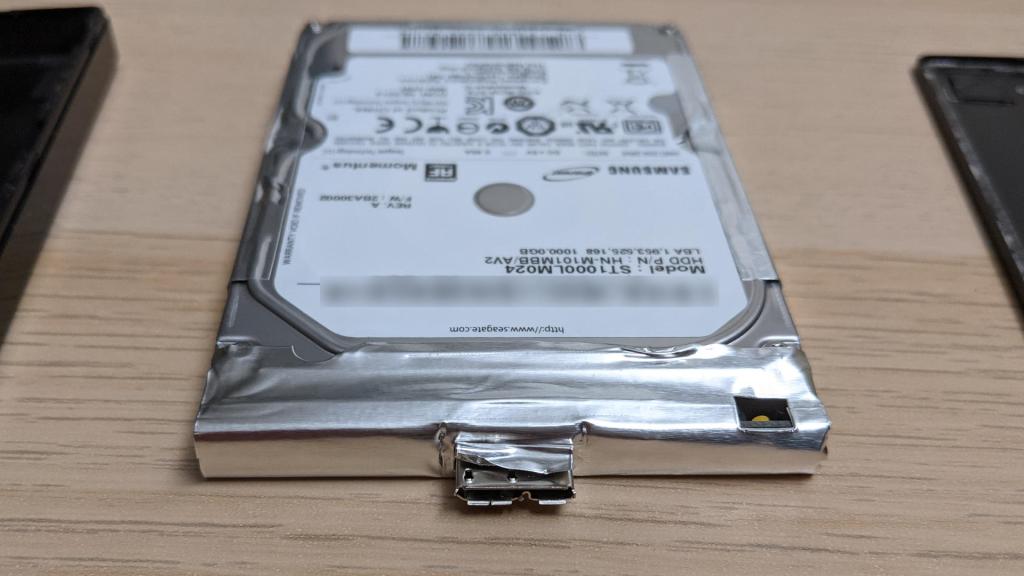
After the sticker was removed, the dark plastic clips on either side could be removed, allowing top and bottom enclosure halves to separate. Inside the enclosure we see… a standard 3.5″ hard disk drive looking pretty small inside that enclosure. It has a capacity of 80GB, giving an idea of how old this thing is. Nowadays we can buy cheap microSD cards with more capacity.

Another hint of its age is the antiquated parallel ATA interface used by this drive. I remember working on old PCs, fighting these huge and unwieldy cables. I do not miss them. Modern SATA (serial ATA) is so much easier to work with.

The spindle motor on this hard drive caught my attention: it is connected with four wires and not three like the hard drive motor I tried to turn into a generator. Could this be a pair of windings for two independent sets of coils? If so, I might try to run this thing using a stepper motor driver just to see what happens.

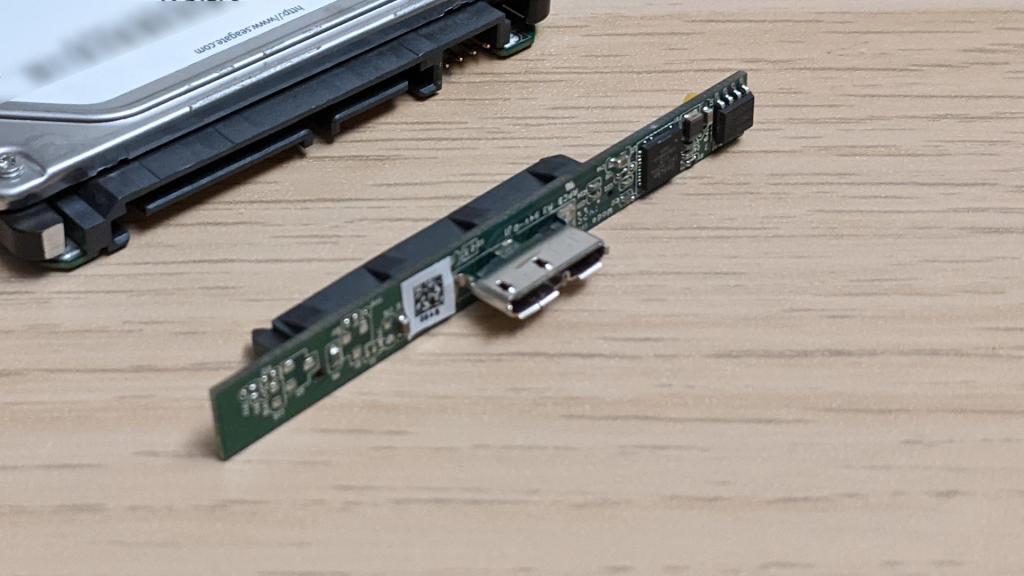
As for the electronics, I don’t know if I will ever find use for a board that translates between USB2 and PATA, two old and slow interfaces. The power supply is more likely to find reuse. I have a sizable stockpile of wall warts including several units with 12V DC output and several with 5V DC output. However, this particular power supply might come in handy if I ever need 12V and 5V together.

But back to that four-wire motor: what’s going on over those wires?

Seagate Backup+ Hub External Drive 8TB (SRD0PV1) Teardown

I’ve owned and taken apart several USB external hard drives to extract their standard form factor SATA hard drive within. Today another drive shall undergo an extraction process. This is a Seagate Backup Plus Hub (SRD0PV1) I had used to back up my TrueNAS disk array. I used a Raspberry Pi as TrueNAS replication host and this drive as storage. I paid a few extra bucks for the version with an integrated USB hub hoping to power my Raspberry Pi from one of the ports and simplify my wiring. Unfortunately, I learned that when the drive initially spins up, all power goes to the drive and these USB ports become momentarily disconnected. Shutting down the Pi sank my plan. I shrugged, chalked the few extra bucks to lesson learned and ignored its integrated USB ports. I powered my Pi conventionally and used the drive for TrueNAS replication back up storage. That daily backup setup worked for about two years before TrueNAS started reporting replication failures: “Device not found.” Where did it go? Looks like my Raspberry Pi would acknowledge the drive existed as a USB device but couldn’t use it as one.

Running Ubuntu’s dmesg command and querying for all the lines that have USB in it, I found a trail ending with an error message “Cannot enable. Maybe the USB cable is bad?” Following that advice, I tried several different cables but that didn’t make a difference, so it wasn’t the cable. I tried plugging the drive into my Windows machine with similar results: New USB device? Yes. New hard drive? No.

Thus it was time for another hard drive shucking session. Since my TrueNAS array is running well, the data within isn’t critical right now. But it’s a low-pressure opportunity to learn if my data backup would survive such an episode of hardware failure.

I found no external fasteners (not even under its rubber feet) so I started attacking visible seams with iFixit opening pick and opening tool.

After a symphony of snapping sounds announcing death of many plastic clips, top lid came free. We can see a Seagate BarraCuda 3.5″ HDD. It is from their “Compute” product line for general personal storage usage. Usually with a two-year warranty, so we’re right on time.

Speaking of warranty, there was an interesting piece of text on the label that I don’t think I’ve seen elsewhere before. “HDD sold as component of OEM solution and not for resale. The product warranty does not cover HDD if removed from OEM solution.” If the warranty hadn’t already expired, I guess I’ve just voided it.

Many more snapping of clips later, the external enclosure has been separated into three plastic pieces: top, bottom, and a frame sandwiched between them.

RIP, plastic clips.

Vibration dampening rubber knobs sit between the external frame and screws fastening the HDD to a folded sheet metal tray.

Once those screws were removed, the drive could be slid off the tray. I was surprised to see such a large expanse of circuit board; I had expected two small boards with a ribbon cable to bridge them.

Removing two screws allowed the circuit board to be removed. All physical connectors (SATA, power, USB) are on this side, as are a few through-hole electrolytic capacitors.

The other side is sparsely populated with surface-mount components.

I didn’t see any visible signs of damage that might explain why Ubuntu “cannot enable” this device. Not that I would necessarily know how to fix it, anyway. This was just for curiosity. I might as well look around now that I have this in my hands.

I noticed three identical copies of a circuit, but beyond that, I don’t know what it does. Why would the circuit board for an external hard drive need three of something?

The largest chip on this board is a GL3520 by Genesys Logic, a Taiwan company specializing in USB solutions. The GL3520 is no longer listed on their website, but their GL3523 (which I infer to be its successor based on model number) is listed as a USB3 hub controller. This is consistent with integrated USB hub functionality.

The next largest chip is the ASM1153 by ASMedia, another Taiwan company. ASM1153 is a USB to SATA bridge and its presence is completely expected within an external USB hard drive product.

But now with the enclosure removed, this Seagate BarraCuda Compute 8TB drive has been transferred to the PC with a Rosewill hard disk drive cage so it is now an internal drive. It was successfully detected as a SATA device, and by running “zpool import” I was able to mount it to my Ubuntu filesystem. I copied a few files as tests, and they all seemed intact. Then I ran “zpool scrub“, and no errors were detected. I take this to mean that my data has survived which is great news. I want to keep using it as my TrueNAS replication backup, but I don’t want to dedicate my PC tower to this task. Fortunately, I have an old Dell Optiplex 960 that should suit.

Western Digital My Book 1TB (WDBACW0010HBK-01) Teardown

I took apart an external USB 2.0 hard drive I had formerly used for MacOS Time Machine, but haven’t touched in years. It was the second of three external drives under two terabytes that I had gathering dust. The third and final drive to be disassembled in this work session was used for a similar purpose: the Windows Backup tool that (as far as I can recall) was introduced in Windows 8. Now it will serve that role again, sort of, by becoming part of my fault-tolerant ZFS RAIDZ2 storage array running under TrueNAS. Which does not support USB external drives, so I am removing the bare drive within for its SATA connection.

Like the other two drives, this one lacked external fasteners and had to be taken apart by prying at its seams to release plastic clips. (Not all of the clips survived the process.)

The geometry was confusing to me at first, but following the seams (and releasing clips) made it clear this enclosure was made of two C-shaped pieces that are orthogonal to each other. I thought it was a creative way to approach the problem.

I was also happy to see that the cooling vents on this drive was more likely to be useful than the other two, since the drive is actually exposed to the airflow and it is designed to stand on its edge so warm air can naturally escape by convection. There is no cooling fan, and none was expected.

Like the other two drives, there’s a surface mounted indicator LED on the circuit board. To carry its light to the front façade, there’s an intricately curved light pipe. It might look like a flexible piece of clear plastic in the picture but it is actually rigid. I was a little sad to see that, because its precision fixed curvature means there’s almost no chance I can find a way to reuse it.

Two circuit boards are visible here. The duller green board is the actual hard drive controller circuit, the brighter green board is the USB3 adapter board converting it to an external drive. My goal is to remove the bright green board to expose the bare drive’s SATA interface so I could install it in my TrueNAS server. It was quite stoutly attached! On the other two drives, once the internals were exposed I could easily pull the drive loose from the adapter board. This board was rigidly fastened to the drive with two screws, including this one that took me an embarrassingly long time to find. On the upside, this rigidly fastened metal reinforcement meant the USB3 port is the strongest I’ve seen by far. Another neat feature visible here is a power button, a feature I don’t often see on external drives.

This assembly was mounted inside the external case with some very custom shaped pieces of rubber for vibration isolation. Like the light pipe, I doubt I would be able to find a use for these pieces elsewhere. But that’s fine, the main objective was to retrieve the SATA HDD within this enclosure and that was successful.

This is enough hard drive “shucking” for one work session. I have more retired drives (two terabytes and larger) awaiting disassembly, but I think I have enough to satisfy my TrueNAS array replacement needs for the near future.

Seagate Expansion External Drive 1.5 TB (9SF2A6-500) Teardown

The terabyte drive shucking series continues! Second in this work session is an older Seagate external drive with a slower USB 2.0 interface. They dropped out of favor after USB 3.0 came on the scene, but that’s only a limitation imposed by the external enclosure. I’m confident the hard drive within will be just as fast as the others once I’ve pulled it out and can connect it via SATA to my TrueNAS ZFS storage array. This particular drive served as my MacOS Time Machine backup drive and exhibited some strange problems that resulted in my MacBook showing the spinning beach ball of death patience while the drive makes audible mechanical clicking noises trying to recover. I no longer trust the drive as a reliable single-point backup, but I’m fine with trying it in a fault tolerant RAIDZ2 array.

Again I had no luck finding fasteners on the external enclosure, so I proceeded to pry on the visible seam. I was rewarded by the sound of snapping plastic clips and lid released.

Despite the visible ventilation holes, it seems like the hard drive is actually fully enclosed in a metal shell. I guess those vents didn’t do very much. The activity light in this particular drive was not as clever as the previous drive, it is a straightforward LED at the end of a wire harness.

Unlike the previous drive, which had an external shock-absorbing shell, this drive’s vibration-isolating mechanism is inside in the form of these black squares of soft rubber.

The screws have standard #6-32 thread but have an extra shoulder to fit into these rubber squares. I feel these would be easily reusable so I’m going to save them for when I need a bit of shock absorption.

Once those four screws were removed, the bare drive slid out of the case easily. I didn’t need to bend the top of the sheet metal box to remove the drive, I did it so we can see the circuit board in this picture.

When I added this bare drive to my ZFS array, I had half expected the process to fail. If the clicking-noise problem persists, I expect TrueNAS to fail the drive and tell me to install another. I was pleasantly surprised to see the entire process completely smoothly. There were no audible clicking, and TrueNAS accepted it as a productive member of the drive array. I wonder if the problem I encountered with this drive was MacOS specific? It doesn’t matter anymore, now it helps back up data for all of my computers and not just the MacBook Air. It’ll share this new job with one of its counterparts, who formerly kept my Windows backups.

Seagate Backup Plus Slim Portable Drive 1TB (SRD00F1) Teardown

I remember when consumer level hard drives reached one terabyte of capacity. At the time it seemed like an enormous amount of space and I had no idea how I could possibly use it all, and where the storage industry could go when additional capacity didn’t seem as useful as it once did. The answer to the latter turned out to be solid state drives that sacrificed capacity but had far superior performance. SSD capacities have since grown, as our digital lives have also grown such that a terabyte of data no longer feels gargantuan.

As someone who has played with computers for a while, I naturally had a pile of retired hard drives. An earlier purge dismissed everything under one terabyte, but with the wonder of the terabyte milestone still in my mind I held on to those one terabyte and higher. This became sillier and sillier every year, especially now that the two worlds have met back up: Sometime within the past year I noticed I can buy an one terabyte solid state drive for under $100 USD.

In this environment, the only conceivable use I have for these old drives is to put them together into a large storage array, which motivated me to retire my two-drive FreeNAS box. My replacement running that operating system (which has since been rebranded TrueNAS) put six of my old terabyte drives to use as a RAIDZ2 array, resulting in four terabytes of capacity and tolerance of up to two drive failures. In the year since I’ve fired these old drives back up, I was a bit disappointed but not terribly surprised some of these old drives have already started failing. It’s not a huge worry as I had plenty more drives waiting in reserve. However, some of them are sitting inside external enclosures and need to be shucked in order to retrieve the disk drive within. First up: the Seagate Backup Plus Slim Portable Drive (SRD00F1) This will be a smaller 2.5″ laptop-sized drive with slower performance, but that should be fine as a member of a large secondary storage array.

I used this drive for a while as portable bulk storage to hold stuff that didn’t fit on my laptop’s small SSD, so it had to be something durable enough to be tossed in my backpack without too much worry. I was enamored with the design, which had an impact absorbing exterior of blue rubber that also incorporated a flexible band to hold the corresponding cable cable while in my backpack. It had an USB 3 micro B connector which I rarely see beyond external hard drives like these.

As a small portable drive, there were the expected lack of visible fasteners. Perhaps something is hidden under the sticker?

Nope, no fastener there. Without stickers, this device must be held together by either glue or clips. Most of the body is black plastic and the top feels like a sheet of metal, so the gap between them is the obvious place to start prying. It didn’t take a lot of force to break the top free from some indents cast into the plastic, but it’s enough force to bend the metal. I had passed the point of no return: this drive will never come back together nicely.

The top was held by both double-sided tape and a plastic ring that helped it clip onto the body. I thought it was very clever how they designed the activity indicator light. Under the metal slit is a block of white tape (still attached to the lid in the picture below) serving as diffuser for the LED. The LED is on a circuit board that is almost completely enclosed by foil tape, but there’s a small hole cut in the tape for the LED to shine through.

There were no fasteners inside the case, either. Once the lid was removed, the drive came out easily.

Here’s a closer look at the drive, with its electronics still inside the foil tape. The rectangular hole for activity LED is visible on the right, with the LED itself peeking through.

After the adhesive-backed foil was removed, I could pull off the adapter circuit board. It is an admirably minimal design to bridge USB3 to SATA. The orientation of the board was a surprise, I hadn’t know there were vertically-standing surface-mount connectors for USB3 micro-B and for SATA connectors. Most of the connectors I’ve seen sit flat on the same plane as the circuit board, not orthogonal to the board like these.

At the moment I don’t foresee anything useful I could do with this board, but at least it is tiny so I can toss it into the hoard as I await ideas. In the meantime, it’s onwards to the next retired hard drive.