Potential WebUSB Study Syllabus

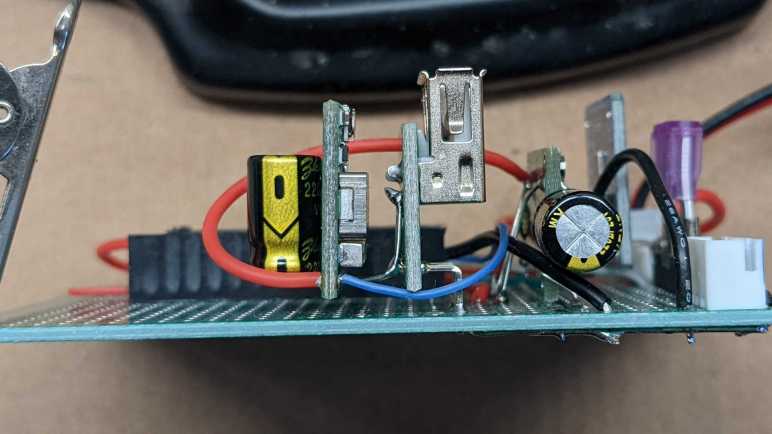
I followed through the steps of an Adafruit WebUSB example and established connection between Chrome browser on my Android phone to a microcontroller plugged into the USB port on the phone. I think WebUSB would enable many of my project ideas. But before I can turn any of my vague ideas into reality, I have a lot of homework to do.

The Adafruit example was thin on background information. I think it was written for people who already know how to work with TinyUSB library and just wanted to see Adafruit’s adaptation into an Arduino library. This impression is backed up by the fact its GitHub repository README (https://github.com/adafruit/Adafruit_TinyUSB_Arduino) is written using vocabulary I don’t understand. Following the link to TinyUSB’s site gives me similar language, so I have to start climbing my learning curve from somewhere else.

Searching from the browser side, I found a Chrome developer documentation page on WebUSB. I was able to comprehend more of this page, but not all of it. Here I learned one constraint on WebUSB: web apps are only allowed to connect to USB devices the operating system doesn’t already have a driver for. This is a mitigation against malicious apps bypassing operating system protection for USB devices like security keys. It also avoids ambiguity/duplication with existing functionality. For example, there’s no real need for a web app to interface with a USB keyboard via WebUSB when the operating system can already deliver key press events. Though there’s an interesting wrinkle here around USB serial, a common way to connect to microcontroller projects. By this rule, a web app can’t connect to a USB serial device on my desktop via WebUSB because my operating system already knows how to work with a serial device. (So it’s over to Web Serial land.) But apparently Android lacks a built-in handler for serial, so maybe it’s available via WebUSB? At this point I don’t yet know if that’s an opportunity or just a source of confusion.

Fortunately for beginners like myself, author of this Chrome developer documentation page included a link to USB in a NutShell for those unfamiliar with fundamental USB concepts. Hey, that’s me! I will try to start with USB in a NutShell and work my way back to TinyUSB and its various incarnations like Adafruit’s Arduino library. But that’s just the “USB” part, I have a lot I’ll have to learn for the “Web” part as well.

Adafruit WebUSB Arduino Example

I knew WebUSB existed but not much more than the name implying some sort of USB capability for web applications. I was motivated to look into it a bit more after learning about an index of browser diagnostics tools. Initial inconclusive signs were not promising but I kept looking. After a bit I thought: I want to explore this capability for my electronics projects. Maybe somebody at Adafruit has already looked into this? Searching for WebUSB on Adafruit Learn gave me a hit: Using WebUSB with Arduino and TinyUSB. So yes, they have!

I was happy to see the hardware in this example was Adafruit’s Circuit Playground Express (3333), because I have one already on hand. When following an example for the first time, it’s always nice to have the exact same hardware that I know will work, rather than similar hardware that should work. Despite that advantage it was not smooth sailing. I got stuck when it came to changing my Arduino IDE’s Tools/USB Stack to “TinyUSB”: there wasn’t a “USB Stack” option under “Tools” menu! I ran around in circles for a while before I eventually figured out I was using the wrong Arduino board support package. This example required “Adafruit SAMD Boards” and not “Arduino SAMD Boards”. I was thrown off because “Arduino SAMD Boards” included support for a bunch of Arduino boards and Adafruit’s Circuit Playground Express. I was able to select the proper board without realizing I was in the wrong board support library. I don’t know why Arduino claims support for boards that aren’t theirs, when the manufacturer has provided their own board support. It’s confusing, this is the second time they bit me, and I’m not happy.

Anyway, once I installed Adafruit’s board support library and selected Circuit Playground Express under Adafruit’s umbrella, I had a “USB Stack” option under “Tools” and could proceed to follow along with the example with no further issues. My first run used Chrome on my desktop computer, and after that success I tried it with Chrome on my Android phone. It works there, too!

And I can verify chrome://device-log is no longer empty on the phone, it now shows the newly-connected USB hardware.

This is huge! WebUSB might enable many project ideas that involve using one of my retired Android phone as the display (or more) of an electronics project. Which ones? I won’t know for sure until I learn more about the constraints of Android Chrome WebUSB support. I would have to pick a relatively simple one as a starting point before jumping into the more complex ideas. There’s a lot of study ahead. This Adafruit example was unfortunately lacking on background and theory of WebUSB so I’m on my own. I think it was written for people who already have the appropriate background, and that’s not me. Well, not yet. I need a refresher course on web development, and I will need to learn technical details of USB as well.

Android Chrome Device Log Strangely Empty

Learning about Chrome’s index of special URLs was very interesting. Aside from satisfying curiosity, it also gave me the tools to investigate an idea: can I write a web app to use an Android phone as interface to an electronics project that communicates over USB?

I want to repurpose my old retired Android phones as project UI, and have been making small incremental steps. My AS7341 spectral color sensor project presented its data as a web page served by the ESP32 on board, and my Android compass app for magnetometer exploration was also a web app to visualize data from my phone’s onboard sensors. But I haven’t been able to combine a phone’s onboard capability with external offboard capability. The barrier is a security measure: only web apps served from public TLC-secured https address is allowed to access extended capabilities like magnetometer. Web apps served locally over unencrypted http, like those served by my ESP32, is not allowed to access such things.

At one point in the past, web apps served via secured https was allowed to retrieve data from non-secure http sources, but I found that has been locked down in modern browsers. Now they require https all the way. I found this restriction during research for an earlier iteration of my AMG8833 thermal camera idea: I thought I could pair AMG8833 data with a phone’s onboard camera, but the https/http barrier sunk that plan. I had to wait for my Adafruit Memento to revisit that idea.

WebUSB is another one of these https-only features. If I can communicate with external peripherals over WebUSB, I can serve a web app from a https source (like GitHub pages) and talk to my hardware over USB instead of forbidden insecure http. To test this hypothesis, I took a USB keyboard and plugged it into my desktop PC running Google Chrome. I brought up chrome://device-log to verify that a USB keyboard shows up as a newly attached HID peripheral.

I then plugged the same keyboard into my Google Pixel 7. The keyboard is recognized and functional: I brought up Google Chrome and could type chrome://device-log. But unlike Chrome on my desktop, Chrome on my phone does not show a newly attached USB keyboard as HID peripheral. It just shows a completely empty device log. I know that even if a device shows up here it is not a guarantee that it supports WebUSB. But it’s not very promising when the log shows nothing at all. Does this necessarily mean Android Chrome doesn’t even see the hardware? That would be discouraging.

I know USB doesn’t work the same way on an Android phone as it does on a PC. For one thing, Android control panel has this “USB Preferences” screen to control how my Android phone uses its USB port. This screen represents a mechanism unique to Android USB behavior. There may be others, and I’ll have to learn to work with them. I checked https://caniuse.com and it says WebUSB is supported on Chrome for Android. That encouraged me enough to keep searching for more information on how this might work and found a WebUSB example from Adafruit which managed to make my Android device log less empty.

Dedicated Buck Converter for USB Charging Port

A M5Stack ESP32Cam has a type C connector for USB connection, and it was perfectly happy to run with just +5V on Vbus relative to GND on a hacked-up USB-C cable. However, my Pixel 3a phone did not recognize it as a valid power source. Even though when I do (what I thought was) the exact same thing with a USB type A connector, then use one of my USB-A to USB-C cables, the Pixel 3a is happy to charge at baseline (2.5W) USB power. There’s a subtlety I failed to grasp here which I hope to decipher after I obtain a USB-C breakout board.

Another thing I failed to anticipate was the power surge when an USB peripheral is plugged in. This board has a MP1584 buck converter providing +5V to the ESP32 dev board running ESPHome. My first draft of the USB-A connector tapped directly to that +5V bus. When I plugged in the ESP32Cam, everything was fine. But when I plugged in the Pixel 3a, the ESP32 would reset and reboot. The voltage level looked fine so I’m not sure what’s going on, it is potentially another data point for the unsolved puzzle. As a workaround, I will dedicate a separate buck converter just for the Pixel charging port. And this time I’ll use the buck converter with an enable pin so Home Assistant could control charging.

Since it was a very compact module, it was pretty easy for me to have it piggyback behind the USB-A connector board. Another 220uF capacitor is here to buffer +5V output, and I used its legs to make the power connection to correct pins on the USB-A board. Two more wires were needed: a thicker one to tap into the main ~11V voltage bus as input, and a thinner one connected to an ESP32 pin via a 1kΩ resistor. A quick test with Home Assistant proved I could toggle charging on and off from a switch in the UI, but the real fun is in automating that switch.

Making a USB Data-Only Cable

My current microcontroller project uses a development board that has built-in hardware to take both power and programming/debugging data over USB. But I want to connect it to another power source, which means I need to disconnect USB power in order to avoid potential problems from dueling voltage regulators on the same voltage plane. My first attempt used a small jumper on the circuit board, but it looks pretty accident-prone, so I went with the backup plan: a USB data-only cable.

I hate having to resort to this solution, as I hate having USB cables that don’t do what I thought they did. This hatred was bred by USB power-only cables. They are frequently bundled with small electronics that charge their batteries via USB power and have no need for USB data communication. The problem is that these cables look identical to normal USB cables and it’s too easy to use them elsewhere not realizing they are power-only. I have spent far too much time debugging device communication issues only to realize my problem was a USB power-only cable in the mix.

A data-only cable is the same kind of cursed, but in reverse. Unfortunately, it is what I need now if I wish to debug a development board that already has its own power source. USB data communication is a differential signal protocol, so we really need only the two data lines. They are usually labeled D+ and D- on a diagram. When we cut open a wire, the convention is to have D+ on the green wire and D- on the white wire.

Black is ground by convention, and red wire for +5V USB power. I took one of my micro-USB cables and cut it open to expose these wires, then I cut the red wire. The nature of differential signals means their voltage difference relative to ground isn’t as critical, but I need to leave ground wire intact to make sure the ground planes on either end don’t drift too far apart. With the +5V line cut, there shouldn’t be much electrical current flowing through the ground line.

This serves my purpose but it isn’t great. For one thing, it confuses my computer. Apparently having three out of four wires alive triggers USB device insertion alert. When the cable is connected to the development board with its own power, everything works as expected. But when it’s just the cable without the board, Windows throws up an “Windows doesn’t recognize the last USB device you plugged in” alert. This tells me it is doing other weirdness behind the scenes. I hope it doesn’t damage the computer, and I’ll try to make sure I don’t plug the cable in by itself.

On the upside, the damaged insulation makes it pretty obvious I’ve hacked on this USB cable. I doubt I would ever unknowingly use this cable so I should never expect USB power from this data-only cable.

I hated having to do this, but this hacked-up cable will serve until I have a better idea. In the meantime, work can continue on my ESP8266 solar panel voltage monitor project.

Power Source Selection Jumper

I’m making a Wemos D1 Mini clone (with an ESP8266 at its heart) into a solar panel output voltage monitor. I plan to run it off the solar panel power as well, since it seems silly to involve another power source when it is already hooked up to one. However, having a buck converter supplying 3.3V to the ESP8266 means I need to avoid taking USB power at the same time. Having multiple voltage regulators on the same voltage plane is a bad thing. I don’t want to have dueling regulators when, for example, debugging over USB while it is connected to solar.

I know this is not a new problem, because every battery-powered USB device knows to switch between battery power and USB power. But I’m having trouble finding the right vocabulary to describe exactly my battery-less scenario. Using search terms like “isolating USB power” I usually find people who are trying to avoid ground loops for audio quality, or optical isolators for data, and other similar tasks which are useful but not the problem I’m trying to solve right now.

Momentarily stymied in my research, I switched over to devising my own manual solution. I’m routing the 3.3V output pin of my buck converter through a jumper on the circuit board. When the jumper is installed, the ESP8266 will run on the solar power it is measuring. When the jumper is removed, the module will run on USB power.

But I know myself, and I could not trust myself to remember to install/remove the jumper as the situation changes. Hence the next trick: placement of the jumper. I put it right next to the USB port so that the jumper could not be installed at the same time as the USB cable, ensuring that it is impossible to have both power sources active at the same time.

I think this mostly works, but I’m worried about the jumper pins. They are taller than I had expected and reach pretty close to the USB connector as we can see in this side view. When I plug/unplug the USB cable, I have to carefully avoid accidentally touching those pins. Accidentally shorting those pins would probably not damage the dev board, because electrically it is same as the jumper in place and at that point USB is not plugged in. However, touching the pin could connect voltage supply to ground and that might fry either the buck converter or something on my USB host, neither of which is ideal.

I didn’t like how accident-prone this design is, so I switched to plan B: cut the USB power line.

V-USB For Super Basic USB On AVR Chips

One of the gifts to Supercon attendees was a Sparkfun Roshamglo badge. While reading documentation on writing software for it, one detail that stood out about this Arduino-compatible board was the lack of a USB-to-serial bridge. Such a component is common on Arduino boards. The only exceptions I’m aware of are the Arduino Leonardo line using the ATmega32u4 chip which has an integrated USB module.

The ATtiny84 on the Roshamglo is far too humble of a chip to have an integrated USB functionality, so that deviation from standard Arduino caught my interest. In fact, not only does the board lack a serial-to-USB bridge, the ATtiny84 itself doesn’t even have a UART peripheral for serial communication with a serial-to-USB bridge. Now we’re missing not one but two things commonly found in Arduino-compatible boards.

What’s the magic?

vusb-teaserThe answer is something called V-USB, a software-only implementation of basic USB fundamentals. It is not a complete implementation, most notably it does not handle all the error conditions a full implementation must gracefully handle. But it does enough USB to support the Micronucleus boot loader. Which creates a very basic way to upload Arduino sketches to an ATtiny84 without an USB serial interface engine (SIE), or even a UART, on the ATtiny84 chip.

Yes, it requires its own custom device driver and upload tool, but there are instructions on how to make all that happen. The point is minimizing hardware requirements – no modification on the host computer, and minimal supporting components for the ATtiny84.

It looks like a huge hack, and even though SparkFun cautions that it is not terribly reliable and won’t work on every computer, it is still impressive what the V-USB people have done under such limits.