Now that I’m warmed up to make circuit sculptures, it’s time for more practice. And for that practice, I’ll need wire and lots of it. Most of the projects I’ve seen are built from straight rods of brass that I could procure from the local hobby shop. However, I personally prefer the color of copper (though it will suffer from oxidation) and I can get copper wire fairly inexpensively in a large spool. But of course, that wire would need straightening.
Thus the next project: A holder for a spool of wire that includes a straightener. For reference on straightener, I looked at CNC wire bending machines of both the DIY variety and an industrial offering, both of which featured similar wire straightening mechanisms. Then I tried to replicate my own using my stock of cheap 608 bearings and metal 8mm shafts left from my Sawppy rover project.
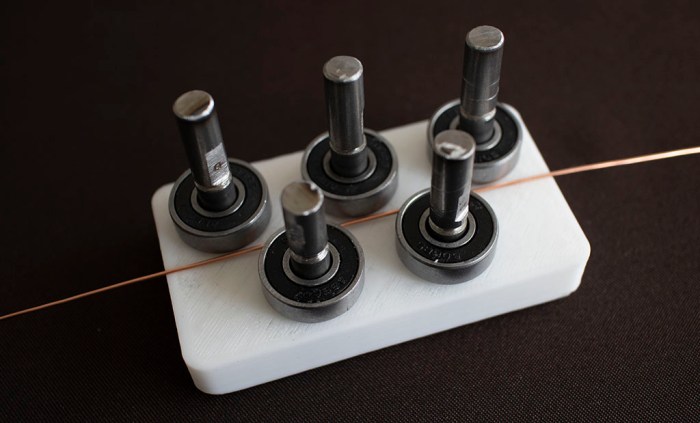
Version 1 was a very simple base that laid out the five shafts in the arrangement I wanted. I neglected to consider wire behavior so they ended up getting caught under the bearing.
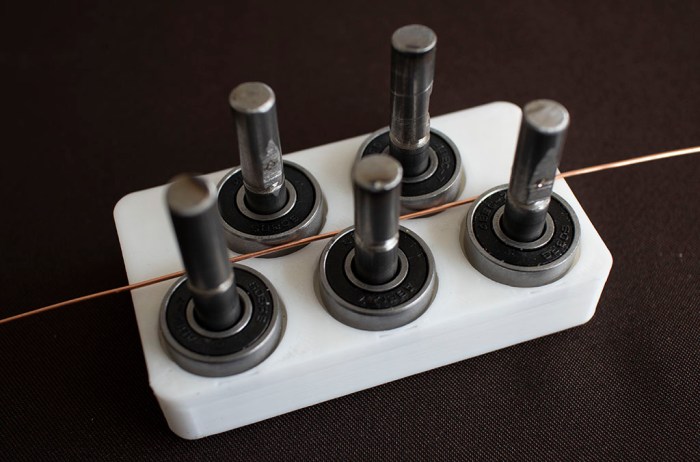
Version 2 addressed that issue by raising its working surface so wire would not get under bearings. However, a 3D printer has problem holding precise tolerances and so shaft holes had to be drilled out before the shafts would fit. This changed position enough that final bearing spacing didn’t work well.
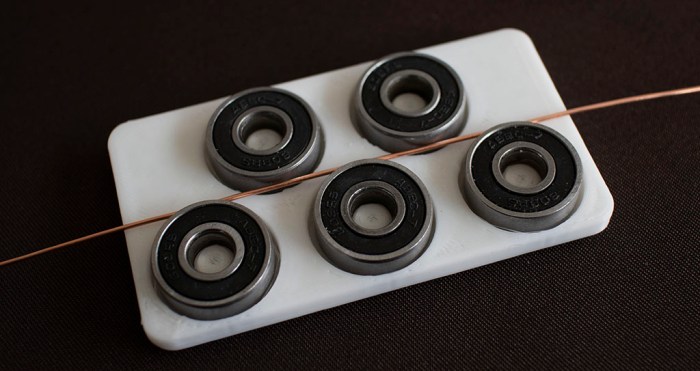
Version 3 attempted to eliminate variability of shaft position by eliminating the shafts entirely – have bearings sit on 3D-printed posts. Unfortunately position errors were even worse!
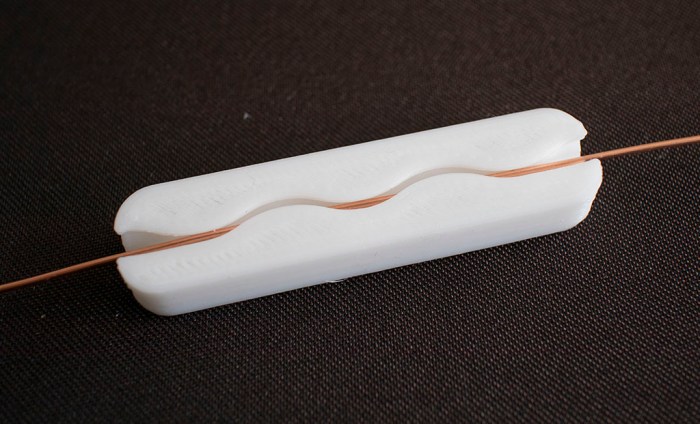
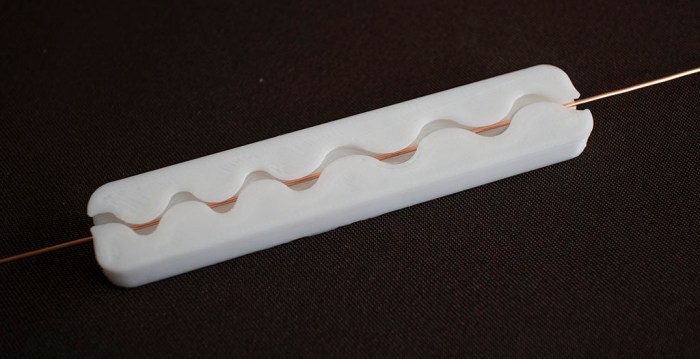
After stopping and thinking about the problem, I thought perhaps I’m over-complicating the device. As an introduction, I’m only dealing with 18 AWG wire. This is fairly easy to bend so perhaps I don’t even need bearings – simple shapes might be enough. Hence version 4 replicated the round (but not rolling) surfaces in a wave.
Version 5 tried to improve by having a second stage with different spacing. This is an improvement. A mild one, but an improvement nonetheless.
Version 6 integrated version 5 into a spool holder.
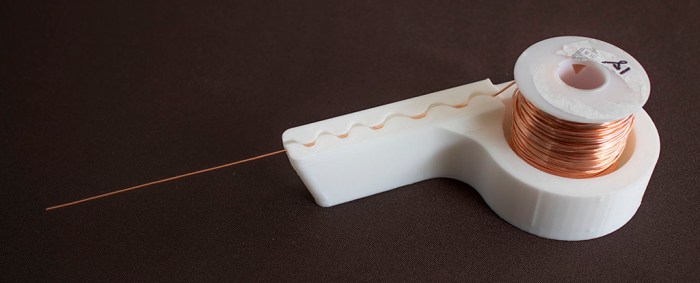
Since I’m not using bearings, friction is quite high. It would not be acceptable if I were trying to build a CNC wire bending machine (a potential future project) but for manual use it’ll do for now. Using a pair of pliers, I can grab and pull on the end to give me wire straight enough for the next few projects.
Onshape CAD file is publicly available here. Adjust dimensions to fit your 3D printer’s characteristics, then export to STL for printing.
UPDATE: Onshape has a free subscription tier for makers, even though it isn’t as prominently advertised as it used to be.
(This page has also been posted to Hackaday.io)

Hey, great build!
I can’t access the file that you’ve linked, because I don’t have an onshape account. Can you link the download link of the stl file or the cad file directly?
Thank you!
LikeLike
This design is focused on single-piece simplicity with no mechanical adjustments. All adjustments to fit a particular printer’s characteristics along with the specific spool of wire need to be done in Onshape CAD. There’s no need to be shy about Onshape, it’s really cool and free for makers: https://www.onshape.com/products/free
LikeLike
That is so awesome! I created an Onshape account and exported the STL file to Cura. However, it comes to 2mm in dimensions. I could actually resize it in Cura, but I don’t know the dimensions it should have to fit the 0.8mm or 1mm wire. Could you give me an idea pls? I could learn Onshape, but that still doesn’t tell me how big it should be before printing so the spacing is right for the wire.
LikeLike
It should be close to 18 gauge (~1.02mm) diameter wire. If it is way off, please double check both your Onshape export and Cura import settings as it usually means an inch/millimeter mixup somewhere. If it is a tiny bit off, this is expected, as every 3D printer and slicer acts a bit differently so you’ll have fine tune for your setup. Once tuned, though, the resulting print is simple and reliable. Nothing to fall apart and never needs readjustment.
LikeLike