Monoprice Creator 22 Graphic Pen Display (Item #39945)

Ever since I saw my first Wacom Cintiq, I’ve thought graphic pen displays were a cool technology. However, they were priced for professional artists and I couldn’t justify spending that kind of money just for messing around. But when Monoprice held a clearance sale, I could not resist a Creator 22 (Item #39945) for just $170.

The underlying panel has the good color and viewing angle typical of IPS displays. With a 1920×1080 “Full HD” resolution it is acceptable but not great. Noticeably lagging in today’s world of 4K UHD and Apple’s “Retina” displays. There is a tangle of wires feeding into the back of this unit. A HDMI cable for video, a 12V DC @ 2A power supply, and a USB-A port for graphical input. In theory USB Type-C can handle video, power, and input all in a single cable, but we don’t have that advancement here. Heck, peripherals like this aren’t even supposed to use Type-A ports (peripherals are supposed to be Type-B) but here we are anyway.

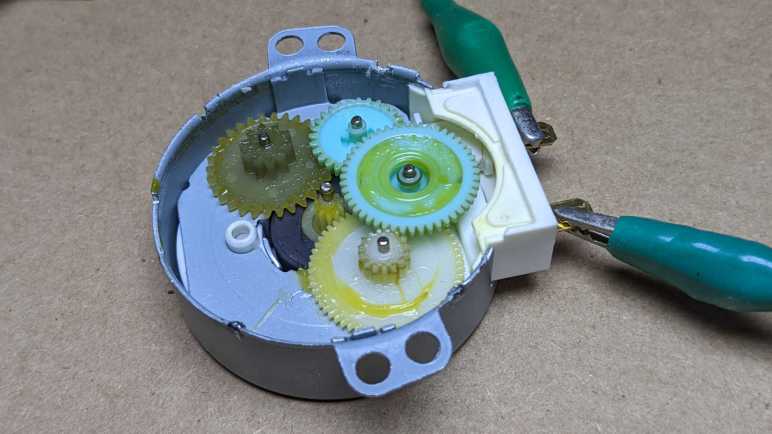
According to the enclosed manual, there was supposed to be a USB flash drive in the box with device drivers, but I didn’t find one. Fortunately, there was a download link on the Monoprice product page. While the product has a Monoprice name on it, the driver installer showed a different name: Bosto. Looking over Bosto Tablet’s website, it appears Monoprice Creator 22 is a rebranded variation of the Bosto 22Mini.

Part of Bosto’s driver is a calibration app, where we are to tap the pen at crosshairs drawn in each corner so the driver can map their position to onscreen display. Unfortunately, this calibration app doesn’t work properly on setups with multiple monitors: the crosshairs were drawn on the wrong monitor and I couldn’t figure out how to move it. To work around this issue, I disabled all other monitors to run the calibration routine. Afterwards I could re-enable remaining monitors and thankfully pen input knew to work on the correct display. However, despite running the calibration routine, the cursor position did not always match up with pen position. It seemed fine near the center, but near the edges & corners the position would be off by up to 3mm. I would not be happy if I had paid full list price, but I was willing to tolerate it at discounted price.

Out of the box, there was a clear protective sheet of plastic attached to a tab that told me to remove before use. Under that glossy sheet of plastic is another sheet which is intended to stay. This second sheet has a matte surface that serves two purposes here. In addition to an anti-reflective effect, the texture feels better than a slick glass surface for drawing. Unfortunately, this textured surface sheet is already trying to peel from the monitor, leaving white bubbles all around the edges. I presume this texture sheet will eventually wear out and would need to be replaced, but I found no replacements from either Monoprice or Bosto. This is not a dealbreaker as I might never use it enough to introduce noticeable wear. The other consumable is the pen nib, and here Monoprice was generous. The manual listed six replacements, but I actually had twenty in my box.

Given the above, “acceptable but not great” is my general summary of the Monoprice Creator 22 at its clearance $170 price point. I wouldn’t have been happy if I had paid full price, probably telling myself “shoulda sprung for a Wacom One” if I had. But at clearance price it is a great entry point for me to mess around. If the novelty of pen input fails to capture my long-term attention (quite likely, as I know myself) I still have a serviceable ~22″ IPS 1080p HDMI screen. And if playing with pen input turns into something with actual utility, I may justify moving up to a Wacom Cintiq.

In the meantime, my first impressions here were based on some minimal time with my new toy. Roughly on par with the amount of time I got to play with a Surface Pen on a Surface tablet or an Apple Pencil on an iPad. So relative to a tablet-based drawing solutions, my initial highlights are:

Pro:

  • Will never have palm/finger interference problems.
  • Much larger surface area.
  • Textured drawing surface feels better than glass.
  • Affordable (due to clearance sale.)

Con:

  • Requires a computer.
  • Tangle of cables
  • Lower pixel density.
  • Dead-end discontinued product.

Monoprice Graphical Pen Display Clearance

For decades I’ve been interested in graphical pen displays that integrate a computer monitor with a graphics tablet into a single unit. There’s something very satisfying about drawing directly on screen and see it respond like real paper, yet with all the flexibility of working digitally. This technology started with professional gear costing thousands of dollars, and now we can get very close with commodity touchscreen tablets. Companies like Apple and Microsoft sell pencil accessories to turn their respective tablets into drawing sketchpads. Even though they haven’t worked well for me due to touch input interfering with stylus input, I was close to buying an Apple Pencil for my iPad. But then I saw Monoprice clearing out their inventory of graphical pen display.

As a company, Monoprice finds markets where incumbents thrive on huge profit margins. They find a contract manufacturer to build products under the Monoprice name and sell at a lower price. Monoprice rise to fame came from their HDMI cables that are a fraction of the price of Monster Cable (& friends). With that success, Monoprice used the same tactic to enter a wide range of markets ranging from 3D printers to camping equipment. But not all of their experiments were successful. Occasionally Monoprice decides a particular market is not worth further investment and it appears graphical peripherals have become the latest example.

For the past few years, Monoprice offered a line of graphical input devices. There were several graphical pen displays for several hundred dollars, and a few affordable drawing tablets (without integrated displays) for tens of dollars. These products undercut pricing of Wacom equivalents by at least 30%, but that still left them more expensive than I could justify buying. Especially when the software situation is an unknown given Wacom’s status as de-facto standards in this field: Every single artistic application will be compatible with Wacom devices, the same guarantee could not be made of Monoprice counterparts. Apparently enough people thought the same ad I did because in the past few weeks I noticed one of those tablets listed in a Monoprice clearance sale email. I checked Monoprice site and saw this was what remained of their product line.

Looking at that feature chart, my attention was drawn to the “Touch Screen” row. Given my past struggles trying to draw on a tablet screen that was also sensitive to my finger and hands, I liked the idea of getting a graphical display that was not a touchscreen. I don’t have to struggle with tuning “palm rejection” settings if the screen never cared about my palm to begin with! Unfortunately, the Monoprice clearance sale that brought this to my attention had discounted item #40443, the lone product on this chart that was also a touchscreen. Since that’s not what I wanted, I held off buying hoping one of the other items would be discounted in a later sale. My patience paid off when item #39945 was discounted from its $380 list price down to $170. This was too tempting to pass up so now I have a Monoprice Creator 22 Graphic Pen Display.

Disappointments in Cheap Digital Sketching

Despite my minimal artistic skill, I’ve long been fascinated by the possibility of using pen-based screen input for a digital drawing sketchbook. But I could not justify buying the good gear. Which meant a long string of experiments in more affordable approaches filled with frustration and disappointment.

My earliest experience was doodling with a small iPAQ (a Windows CE-based device) which used a sharp pointed stylus on a resistive touchscreen. These early PDAs like PalmPilot and Apple Newton barely sufficed for note taking. Given their low resolution, poor responsiveness, and no pressure level sensitivity, they compared poorly to contemporary Wacom drawing tablets.

Following Apple’s trailblazing iPhone, cell phones moved to higher resolution screens and capacitive touchscreens. Any phones with ambition to be competitive must deliver instant visual response to touch input, which is great for drawing responsiveness. But those capacitive touchscreens also eliminated the ability to use stylus for fine point accuracy. There existed “capacitive touchscreen stylus” but every unit I had tried merely delivered a wide touch surface as inaccurate as a finger. And finally, capacitive touchscreens introduced a new problem: I could no longer rest my hand on the screen for stability, as that would be treated as additional touch input messing things up.

I had high hopes for my next step: a Samsung 500T Windows 8 tablet with integrated pen digitizer using technology licensed from Wacom. The screen was much larger than a phone, and the Wacom digitizer delivered pressure data. Unfortunately, overall system responsiveness (not just to pen input) was intolerably slow. Just one of many problems which made that tablet into a big sack of sadness.

After that disappointment, I went upscale and upgraded my laptop to a Microsoft Surface Pro. It also had a Wacom-licensed pen input digitizer, and much faster hardware for better responsiveness. I could mostly use it as the digital sketchbook I always thought would be neat to have. The biggest complaint was that I never mastered a posture that would keep my hand off the screen. The Surface Pro had a basic form of “palm rejection” like the 500T: touch input could be disabled when the pen is active. But this required keeping the pen in range of screen digitizer. If I lifted the pen more than a few millimeters, it would fall out of range. Which meant the tablet reverted to touchscreen input and immediately engulfed in chaos caused by my palm.

After that era, consumer level tablets moved away from Wacom technology. Microsoft’s Surface Pen has since switched to a different technology, and Apple launched their own take with the Apple Pencil. In addition to pressure sensing, both of these technologies added the ability to sense tilt angle, literally opening up a new dimension in digital sketching. When I tried floor demonstration units at Best Buy and Apple Store, I was quite impressed. But with my drawing style and posture, they both still suffered from unwanted hand input. This will be an ongoing problem on anything designed primarily for finger touch input. What I wanted is a product primarily designed for pen input and ignores my fleshy parts, but that is a very limited product niche. I didn’t think I could ever justify the cost of that niche until Monoprice decided to clear out some inventory.

Computer Pen Input Has Always Been a Novelty to Me

One skill unique to digital artists is the ability to draw on a tablet while looking at a separate screen. I can’t think of any other art medium with such a separation between an artists’ hands and their workpiece. Towards the end of The Line King: The Al Hirschfeld Story(*) documentary was a clip of Hirschfeld trying a drawing tablet. This lifelong master of pen and paper struggled to make a basic sketch, saying “It’s almost impossible to control […] I supposed it is possible to control it, it’d just require another lifetime to do it, that’s all.

The separation of drawing tablet and scree is a curious evolution of computer input devices, because things didn’t start out that way. Decades ago, specialized computers had light pen input devices that allowed pointing and drawing directly on screen. It made it all the way down to consumer (or at least business) level hardware with provisions on early IBM PC video cards.

I guess early product designers assumed people wouldn’t put up with trying to manipulate input that was separate from its screen representation. If so, the computer mouse proved that assumption wrong. People were indeed willing to learn to manipulate with physically separated input devices when there is enough productivity at low enough cost to be worth learning a new skill. The same basic arguments applied to artistic creations. Given the advantages of digital creation over physical media (ease of edit, archive, copy, transmit, etc.) some artists were willing to learn to draw on a desktop tablet while looking at a screen.

But human beings still prefer to have visual feedback physically corresponding to manipulation input. And thankfully technology has advanced enough to give that back to us, at least in some contexts. We interact with modern slab-faced smartphones with its touchscreen instead of a mouse, and artists can get graphical pen displays that integrate drawing tablet capability with a computer screen. I remember when the technology became a practical product and watched an artist demonstrate the first Wacom Cintiq. While being well aware that most of the skill is in the artist, I was nevertheless blown away by how immediate, responsive, and thereby intuitive drawing on a graphical pen display was. And I was not alone, as that first Cintiq was successful enough to launch a full and still evolving product line of graphical displays. It was extremely expensive, but it meant an artist no longer had to draw on one device while looking at another device. A capability well worth the cost for artistic creators.

As a software code jockey with no artistic skill to speak of, I had no justification to spend thousands of dollars on a graphical pen input display. It was just a novelty that I loved to play with whenever I had the chance. I got close with a few Windows and iOS tablets, but it wasn’t quite the same.


(*) Disclosure: As an Amazon Associate I earn from qualifying purchases.

Notes on “Make: FPGAs” by David Romano

After skimming through a Maker Media book on CNC routing wood furniture, I wanted to see what I could learn from their FPGAs: Turning Software into Hardware with Eight Fun & Easy DIY Projects (*) by David Romano. I was motivated by the FPGA-based badge of Superconference 2019, which had (I was told) a relatively powerful FPGA at its core. But all my badge work were at the software level, I never picked up enough to make gateware changes. Perhaps this book can help me?

My expectations dropped when I saw it was published in February 2016. The book is very honest that things are evolving quickly in the realm of FPGAs and things would be outdated quickly, but I was surprised at how little of the information in the book could be transferred to other FPGA projects.

In the preface, the author explained they had worked with FPGAs in a professional context since the early days (1980s) of the field. Seeing the technology evolve over the years and drop in price into hobbyist-accessible range, this book was written to share excitement with everyone. This is an admirable goal! But there is a downside to a book written by someone who has been with the technology for so long. They are so familiar with concepts and jargons that it’s difficult to get in the right frame of mind to explain things in a way that novices in the field can understand.

As an example of this problem, we only got up to page 15 before we are hit with this quote: “Behavioral models and bus functional models are used as generators and monitors in the test bench. A behavioral model is HDL code that mimics the operation of a device, like a CPU, but is not gate-level accurate. In other words, it is not synthesizable.” That sound is the <WOOSH> of indecipherable words flying over my head.

The hardware examples used in this book are development boards built around various FPGAs from Xilinx. To use those boards, we have a long list of proprietary software. It starts with Xilinx software for the FPGA itself, followed by tools from each development board vendor to integrate with their hardware. This introduces a long list of headaches, starting from the fact Xilinx’s “ISE WebPack” was already a discontinued product at the time of writing, with known problems working under 64-bit Windows. And things went downhill from there.

For reference, the hardware corresponding to projects in the book are:

The project instructions do not get into very much depth on how to create FPGA gateware. After an overly superficial overview (I think the most valuable thing I learned is that $display is the printf() of Verilog) the book marches into using blocks of code published by other people on OpenCores, and then loading code written by others onto FPGA. I guess it’s fine if everything works. But if anything goes wrong in this process, a reader lacks knowledge to debug the problem.

I think the projects in this book have the most value for someone who already has one of the above pieces of hardware, giving them instructions to run some prebuilt gateware on it. The value decreases for other boards with Xilinx FPGA, and drops to nearly nothing for non-Xilinx FPGA. This book has little relevance to the Lattice ECP5 on board Superconference 2019 badge, so I will have to look elsewhere for my FPGA introduction.


(*) Disclosure: As an Amazon Associate I earn from qualifying purchases.

Microwave Turntable Repair

My microwave is getting older and sometimes doesn’t heat food as much as expected. I kept using it after an earlier test of its heating power was inconclusive. A few days ago, a new problem cropped up: after an audible mechanical noise, the turntable stopped turning. This led to uneven heating, and I thought maybe it’s time to get a new microwave. Before I spent money, though, I wanted to take a look at the turntable motor and see if I can apply any lessons learned from my earlier teardown of a similar motor.

This microwave was a Sharp R-309YK and I was pleasantly surprised there was design effort for ease of repair. An access panel is stamped into the bottom of the microwave held by four small tabs of metal.

Using a pair of pliers, I twisted off those four small tabs and removed the panel. We see the turntable motor identified as 49TYZ-A1 by Yuyao Yahua Mechanical & Electrical Co., Ltd. I don’t know how important it is to buy the exact replacement, there are a lot of similar motors in this form factor. The only significant variation I noticed was the shape and length of the output shaft.

Before I buy a new motor, I had nothing to lose by taking a closer look at this one. I applied 110V power and nothing moved. The problem is indeed here rather than somewhere else in the microwave.

Following precedent of my previous teardown, I opened up the faceplate to look for a mechanical obstruction or anything else that would explain why the motor wouldn’t turn. I thought maybe a gear snapped a tooth, but there was nothing of the sort. I removed one gear after another until I was left with only the rotor, which did not live up to its name because it did not rotate under power.

I picked up the rotor for a closer look, and I noticed a crack running across its magnet. Tiny pieces of magnet had chipped off the edge of the crack. After clearing out the tiny chips and dropping the rotor back in, it spun up under power. I guess a lodged chip of magnet was enough to keep the rotor from starting up? But the rotor made a lot of intermittent noise while spinning. The click clack noise sounded like a tiny part catching on a physical obstruction and tapping it. But I had no luck finding the culprit. If it’s another magnet chip, I couldn’t find it. Hypothesis: centripetal force acting on the cracked magnet opened it up to a C shape and pulling a corner far enough out it is barely tapping some other part of the motor. If true, that’s not good because it will quickly produce more magnet chips and stop the motor again.

Fortunately, I had kept the rotor from my previous turntable motor teardown. I had disposed of most of the motor but kept the rotor because I wanted to visualize its magnetic field. Using my calipers, I confirmed that all major dimensions were nearly identical.

It seems to be a drop-in replacement, spinning up without the click clack noise. I reassembled the motor and reinstalled it in the microwave. A quick test confirmed that my turntable is turning again with this salvaged rotor.

All I had to do was reinstall the access panel, which was designed so that I could turn it 180 degrees and insert tabs to fit into precut slots. It just needed an appropriately sized screw that could self-tap into sheet metal. I found one in my stockpile of fasteners, and we are good to go. I didn’t need to buy a new microwave today, I didn’t even need to buy a new turntable motor. I appreciate Sharp engineers for stamping in an access panel to make this project so much easier than it would have been otherwise.

Notes on “Make: Design for CNC” by Filson, Rohrbraher, and Kaziunas France

After skimming through Maker Media’s Bluetooth book, I did the same for their Design for CNC: Furniture Projects & Fabrication Technique (*) published in 2017. The cover listed authors as Anne Filson, Gary Rohrbacher, and Anna Kaziunas France. Bill Young didn’t get on the cover but was included in “About the Authors” section at the end. The focus is on building human-scale furniture by using CNC routers to cut flat pieces out of 4′ x 8′ sheets of plywood. Details are given for some (but not all) of the pieces we see on the authors’ site AtFAB, and readers without all the equipment (which includes me) are encouraged to join the 100kGarages community for help to turn ideas into reality.

CAD software used for examples was SketchUp 2015, that particular version is no longer available. While there is still a free Sketchup tier, it is limited to their browser-based release. CAM software in the book is Vectric VCarve, which never had a free tier. The authors’ CNC router is a ShopBot PRSalpha and discussion on cutters mostly referenced Onsrud. Obviously, a reader with more in common with authors’ setup will have an easier time following along. I have none of it, but I skimmed the book to see what I can learn. Here are the bits that I thought worth jotting down:

Chapter 2 had several sections that are valuable to anyone building structures out of flat sheets of material, whether CNC routing big pieces out of plywood or laser-cutting small things out of acrylic. They describe some basic joints, that lead to assemblies, leading to styles of structures. These were the building blocks for projects later in the book and are applicable to building 3D things out of 2D pieces no matter what tools (software or hardware) we use.

Chapter 3 describes their design process using SketchUp. Some of the concepts are applicable to all CAD software, some are not. Explanations are sometimes lacking. The author used something called the Golden Ratio without explaining what it is or why it is applicable, so we have no idea when it would be appropriate to use in our own designs. We are shown how CAD helps keep various views of the same object in sync, but at certain places the book also says to use “Make Unique” to break this association without explaining why it was necessary. I had hoped to see automated tooling to support managing 3D structures and their 2D cutting layout, but no such luck. This workflow used a “Model” layer to work in 3D and a “Flat” layer to lay out the same shapes in 2D space for cutting followed by a “Cut” layer with just 2D vectors to export to CAM software. It feels like a motivated software developer can help automate this process. (Perhaps someone has in the past five years! I just have to find it.)

I noticed a trend of information becoming less generally applicable as the book went on. By the time we got to CAM in Chapter 7, it was very specific to VCarve with few generalizations that we can take and apply to other CAM software. One missed opportunity was a discussion on climb milling versus conventional milling. The book explains that there are so many variables involved (the material, the cutter, the machine) a specific setup may work better one way versus the other. The only way to know is to try both approaches and use whichever one works better. Problem: they never explained what “better” means in this context. What do we look for? What metrics do we use to decide if one is better than the other? The authors would have a lot of experience seeing various results firsthand. That would have been valuable and applicable no matter what CAM software we use, but they didn’t share that knowledge and just left us hanging. Or perhaps they have seen so much, it never occurred to them that beginners would have no idea how to judge.

Another disappointment was in the area of parametric design. In chapter 5 they covered the fact that plywood is not made to precise dimensions, and we’d need to adjust accordingly. However, the recommended default method of adjustment is to scale the entire project rather than adjust a thickness parameter. Later in chapter 12 they showed how to modify a few of their designs by plugging parameters into an app written in Processing. However, the app is limited to the variables allowed by the authors, and each app is unique to a project. The book doesn’t cover how to do parametric design in SketchUp. (Maybe it can’t?) But more disappointingly, the book doesn’t cover the ins and outs of how to write parametric capability for our own designs. The authors started this book by saying how designing and customizing for our own purposes is a huge part of what makes CNC routed projects preferable to generic designs from IKEA, so it was a huge letdown to see nothing about making our own parametric designs.

I would have appreciated more information on working with wood grain. Wood grain is discussed mostly as a cosmetic concern and not a structural one. I guess using plywood mitigates most of those worries? I would have also wanted to see more actual finished pieces. Most of the images in this book were 3D renders and not real pictures, another letdown.

Despite these disappointments I felt I learned a lot from this book generally applicable to building 3D structures from 2D shapes. The resources section at the end looked promising for more information on designing for CNC that go beyond wooden furniture. And finally, unrelated to the topic or the book content, the colophon pointed me to AsciiDoc, which is something I might look into later for future Sawppy documentation.


(*) Disclosure: As an Amazon Associate I earn from qualifying purchases.

FormLabs Form 1+ Stepper Motor Control

I have a broken FormLabs Form 1+ laser resin 3D printer and I’ve been figuring out how to operate subcomponents for potential repurposing in the future. I just got a basic (if imprecise and incomplete) understanding of how to operate its 64mW 405nm laser, which I considered the most challenging component. Now that’s done, I’ll wrap up my Form 1+ exploration by looking at what I considered the least challenging component: its two stepper motors.

The larger of these motors operate the Z-axis, the smaller one operates the resin tilt tray. Both of those have four-wire connector to the printer mainboard, with pins labeled A+/A-/B+/B-. This identifies them as bipolar stepper motors popular in the field of FDM 3D printers and thus quite familiar to me. In order to repurpose these motors elsewhere, I just need to know two parameters: their operating voltage and current limits.

To determine these values, I started by finding the existing stepper motor driver chip which was placed close to the two stepper motor connectors. It is a Texas Instruments DRV8821 dual stepper motor driver chip. The chip itself is capable of handling up to 32V and 1.5A but configured for lower values for use in this printer.

Voltage was easier to determine, as I looked up position of motor voltage (VM) pins on the chip and probe them while the printer is active. They measured 24V DC. Finding the current limit took a bit more work. DRV8821 datasheet section 7.3.2 Current Regulation gave the formula: (Current Limit) = (Reference Voltage) / (5 * Current Sensing Resistor). There are four current sensing resistors wired on the circuit board, so I had to figure out which motor is wired to which pins on the driver. Probing for continuity, I found the following:

MotorMainboard labelDRV8821 labelDRV8821 pin#
ZA+AOUT15
ZA-AOUT23
ZB+BOUT148
ZB-BOUT246
TiltA+COUT127
TiltA-COUT225
TiltB+DOUT122
TiltB-DOUT220

This tells me the current sensing resistors AISEN (DRV8821 pin 4) and BISEN (47) are associated with the Z-axis motor. Both are labeled R100 which I decoded to mean 0.1 Ohm. CISEN (26) and DISEN (21) are then for tilt motor which are labeled R200, for 0.2 Ohm. Probing the circuit while powered-up, I found the voltage dividing resistors supplying reference voltages and measured it at 0.5V for both ABVREF (17) and CDVREF (18).

Using DRV8821 datasheet formula, I calculate the following:

  • Z-axis stepper motor can be driven with 24V DC at a maximum of 0.5/(5*0.1) = 1A.
  • Tilt stepper motor can be driven with 24V DC at a maximum of 0.5/(5*0.2) = 0.5A.

FormLabs Form 1+ Laser Control Circuit (Partial)

So far, I’ve had only limited success deciphering operations of laser module in a FormLabs Form 1+ laser resin 3D printer. I knew it was a laser diode, but instead of just two wires for power+ground there are four wires snaking out the end of this module. My oscilloscope can show me how voltage varies during a print job and also during API programmatic control, but I didn’t know how to interpret those voltage values.

It’s time to move on to the next resource at my disposal. Beyond preserving the ability to run print jobs and programmatic access API, I also have the functioning printer mainboard itself I can examine. I’m only a beginner at electronics, but I can follow copper traces on a circuit board for a little bit before I get lost. As far as I can tell, the printer mainboard is a two-layer circuit board, meaning there aren’t hidden layers of copper that I could not trace. However, it makes copious use of vias to tunnel things from one layer to the other, and it’s hard for me to pick out the right via to follow when a copper path switches sides. And it doesn’t help that many traces run underneath components so I could not trace them.

My complaints aside, I was able to get far enough for some insights. The black wire is connected to the collector of a Fairchild Semiconductor (now onsemi) TIP122 power transistor, whose emitter is connected to the ground plane. Aha! Laser power is switched on the low side, explaining why I didn’t recognize voltage of red & black wires as power & ground wires.

So, what controls this TIP122 transistor? And what about the other two wires coming out of the laser module? Here I could uncover only part of the picture, but I know it centers around component U7, marked with Texas Instruments logo and labeled L358. The closest thing I found on TI website has an additional letter M: LM358 dual op-amp chip. It seems to fit, though. The V+ input pin is connected to 11.18V power like the laser module red wire, and the V- pin is connected to system ground. OUT1 connects to base of TIP122, so one op-amp on this chip is in charge of driving the laser power transistor. Laser module blue wire is connected to the other op-amp on this chip, pin IN2-. And this is where I got stuck. I couldn’t figure out the rest of this circuit, lost in the maze of traces.

My hypothesis is that L(M)358 is the heart an analog voltage control circuit utilizing closed-loop feedback provided by laser module blue wire to modulate laser power via TIP122 transistor. My comprehension isn’t enough to get further. Analog circuits using op-amps are still voodoo magic to me today. I hope I’ll learn enough in the future to return and decipher this circuit.

Though incomplete, this is enough understanding for me to know that I could ignore the blue and yellow wires if I don’t care about precise laser control. Putting power across red and black wires is enough to get a violet-blue laser dot. 3.7V will draw 20mA, values similar to non-laser LEDs. According to my OpenFL API experiment this would be slightly lower than 1mW of beam power. Which is generally regarded as relatively safe, low enough power that normal blink reflex is enough to prevent serious eye damage. 4.5V corresponds to the recommended maximum of 64mW, and 4.61V will push us all the way up to the not-recommended level of 80mW. I assume that ventures significantly into eye damage territory so if I must be careful with laser power levels if I should use it elsewhere.

Final step on my Form 1+ hardware tour: stepper motor controller.

FormLabs Form 1+ Laser Power During Print

I haven’t quite figured out how to control the laser module of a broken FormLabs Form 1+ resin laser 3D printer. I had thought getting programmatic control over the FormLabs OpenFL API would be key, but it wasn’t quite as illuminating as I had hoped. Though it’s still a step forward, giving me a table of wire voltages supplementing the on/off data points I obtained earlier. How can I obtain more data about operation of this laser? I have the electronics guts laid out on my workbench and voltage probes still in place so… I’ll run a print job!

Using the oscilloscope to watch voltages as the laser went about its business, it’s pretty clear that the red wire (channel 1 yellow line) is the power supply as it held constant. I see activity on the black wire (channel 4 green line) and blue wire (channel 3 blue line) that varies in intensity as the laser scanned across the shape. While they are at different voltage levels, they seem to flip between their individual set of two states in lockstep. It almost looks like a digital communication signal, but the voltage levels are too high for digital logic.

Zooming into these signals (100 milliseconds per grid down to 100 microseconds per grid) confirm that they are always moving in lockstep. Based on voltage levels, this represents the laser pulsing on and off rapidly, consistent with a laser tracing through multiple curves in a printed shape. The higher voltage levels here match the voltage levels I measured earlier for laser off. The lower voltage levels here are consistent with values in the range of tens of milliwatts of power.

Another thing I noticed in the zoomed-in view is the absence of PWM modulation artifacts. My own PWM circuits under an oscilloscope always show a noisy wave, expected for quick and dirty circuits built by electronics beginner like myself. Here we see the smooth analog voltage control of a circuit designed by people who knew what they were doing. I should take a closer look at the circuit board to see what I can learn.

FormLabs Form 1+ Laser Power via OpenFL

After FormLabs stoped supporting the Form 1/1+ printers, they released a set of tools collectively called OpenFL letting people play with the hardware. We can either stay within the realm of laser resin 3D printing or come up with something entirely different. After I successfully installed the toolset and established Python communication with the printer, I wanted to explore the laser module.

At the top of Printer.py I see two references to laser power: an audit toggle and a power ceiling of 64mW.

    AUDIT_LASER_POWER = True
    LASER_POWER_MAX_MW = 64

Looking for where the ceiling is used, I found this method:

    def check_laser_ticks(self, power):
        """ Raises if the power (in laser ticks) is above our safe threshold
        """
        mW = self.ticks_to_mW(power)
        if mW > self.LASER_POWER_MAX_MW:
            raise LaserPowerError('Requested power is dangerously high.')

From this method I learned laser power is measured in two different ways: “ticks”, which is a hardware-specific measure, and the more general units of “mW” (milliwatts). There are two methods to convert between them. The ticks_to_mW seen here, and its inverse mW_to_ticks. Reading those methods, I see that ticks is an uint16 (unsigned 16-bit integer) value so valid range is 0 to 65535. So what’s the maximum possible power via this API?

>>> p.ticks_to_mW(65535)
80.71

So 64mW is the recommended maximum, any higher may raise LaserPowerError but if we have the option to ignore that and turn the dial up to 80.71mW.

I also see that the conversion depends on a laser power lookup table presumably established with factory calibration and saved in nonvolatile memory. Using OpenFL we can see that table.

>>> p.read_laser_table()
[[0, 0, 0], [0.1, 0.02, 9.0], [0.2, 0.03, 12.0], [0.3, 0.03, 14.0], [0.4, 0.04, 16.0], [0.5, 0.05, 18.0], [0.6, 0.06, 19.0], [0.7, 0.07, 22.0], [0.8, 0.1, 24.0], [0.9, 0.23, 25.0], [1.0, 3.77, 26.0], [1.1, 8.22, 28.0], [1.2, 12.76, 29.0], [1.3, 17.34, 30.0], [1.4, 22.06, 32.0], [1.5, 26.73, 33.0], [1.6, 31.53, 34.0], [1.7, 36.33, 35.0], [1.8, 41.11, 36.0], [1.9, 46.0, 37.0], [2.0, 50.92, 38.0], [2.1, 55.92, 39.0], [2.2, 60.72, 40.0], [2.3, 65.81, 41.0], [2.4, 70.8, 41.0], [2.5, 75.79, 42.0], [2.6, 80.71, 43.0]]

Actually powering up the laser requires calling one of several methods, which accept input in some combination of machine coordinates or real dimensions. I chose to experiment using set_laser_mm_mW() which simultaneously updates galvanometer position and laser power. For my first test I set the laser to 1 milliwatt.

>>> p.set_laser_mm_mW(0, 0, 1)
Traceback (most recent call last):
  File "<stdin>", line 1, in <module>
  File "c:\users\me\openfl\OpenFL\Printer.py", line 502, in set_laser_mm_mW
    return self.set_laser_uint16(x, y, self.mW_to_ticks(mW))
  File "c:\users\me\openfl\OpenFL\Printer.py", line 485, in set_laser_uint16
    expect_success=True)
  File "c:\users\me\openfl\OpenFL\Printer.py", line 180, in _command
    r = self._wait_for_packet(wait, verbose=verbose)
  File "c:\users\me\openfl\OpenFL\Printer.py", line 195, in _wait_for_packet
    p = self.poll()
  File "c:\users\me\openfl\OpenFL\Printer.py", line 220, in poll
    self._process_raw(raw)
  File "c:\users\me\openfl\OpenFL\Printer.py", line 150, in _process_raw
    cmd = Command(self.packet[1])
  File "C:\Users\me\miniconda3\envs\openfl\lib\site-packages\enum\__init__.py", line 348, in __call__
    return cls.__new__(cls, value)
  File "C:\Users\me\miniconda3\envs\openfl\lib\site-packages\enum\__init__.py", line 663, in __new__
    raise ValueError("%s is not a valid %s" % (value, cls.__name__))
ValueError: 147 is not a valid Command

Hmm. There’s a problem with OpenFL Printer API class processing response packet from the printer. But the outgoing command apparently works, because I got a dim glow from the laser. Following that with p.set_laser_mm_mW(0, 0, 0) turned the laser back off along with another ValueError: 147. This is good enough for me to set up some voltage probes. The laser has four wires: red, black, blue, and yellow. Here are their voltages at various milliwatt settings, relative to yellow which is connected to ground.

Power (mW)RedBlackBlue
0 (OFF)11.208.674.89
111.207.403.75
1011.207.273.61
2011.197.123.52
3011.197.013.44
4011.186.913.36
5011.186.803.28
6011.186.713.24
7011.176.633.20
8011.166.553.14

These values weren’t as enlightening as I had hoped they would be, but maybe these snapshots will make more sense in the context of a normal print job.

FormLabs Form 1+ OpenFL API Connection

I had a longshot idea to revive the galvanometer control of a broken FormLabs Form 1+ resin laser 3D printer. It didn’t work and galvanometer remains broken. Because the printer also had a broken resin tray tilt motor and other smaller problems, I wasn’t trying to get it to print again. What I had in mind was to repurpose the optical core into a laser light show machine.

This was made possible because FormLabs opened up the Form 1/1+ for experimentation after they stopped supporting the hardware. Since they are no longer responsible if anything goes wrong, they freed the hardware for people to mess around with. This consisted of a special build of the PreForm software, which will flash a special (final?) edition of firmware. This firmware is willing to talk to a PC beyond accepting print jobs from PreForm. To make this communication easier, they released a Python library. All of these were posted on a GitHub repository under their “OpenFL” umbrella.

I really appreciate the fact FormLabs did this, exposing an API to control hardware independently of PreForm print jobs make it possible to do things completely outside the realm of printing. One of their examples turn the Z-axis stepper motor into a single-channel MIDI instrument making buzzy electromechanical music. The API also allows control of laser power and galvanometer position, which lead to my idea of turning the printer into a laser light show machine.

But first, I had to get it up and running. The first problem is that, as a seven-year-old Python library, it was written for Python 2 which is now discontinued. To create a backwards compatible Python environment, I used Miniconda to create a Python 2 environment called “openfl”

conda create --name openfl python=2

Following instructions in OpenFL repository I setup and installed Python dependencies. It allowed me to load OpenFL library but I immediately ran into an error.

Python 2.7.18 |Anaconda, Inc.| (default, Apr 23 2020, 17:26:54) [MSC v.1500 64 bit (AMD64)] on win32
Type "help", "copyright", "credits" or "license" for more information.
>>> from OpenFL import Printer as P
>>> p = P.Printer()
Traceback (most recent call last):
  File "<stdin>", line 1, in <module>
  File "OpenFL\Printer.py", line 62, in __init__
    self.dev = usb.core.find(idVendor=self.VID, idProduct=self.PID)
  File "C:\Users\me\miniconda3\envs\openfl\lib\site-packages\usb\core.py", line 1297, in find
    raise NoBackendError('No backend available')
usb.core.NoBackendError: No backend available
>>>

This “No backend available” error came from pyusb library, complaining about a missing dependency outside of Python: we need a compatible USB driver installed. Solving this error required the following chain of events:

  1. Read up on PyUSB at https://pyusb.github.io/pyusb/
  2. Which point me to LibUSB at https://libusb.info/
  3. Which pointed me to its Wiki for running on Windows at https://github.com/libusb/libusb/wiki/Windows#How_to_use_libusb_on_Windows
  4. Which recommended the Zadig utility at https://zadig.akeo.ie/

Zadig offered several options for USB drivers, I tried them in the order recommended by LibUSB.

  1. WinUSB (v6.1.7600.16385): nope, still got “No backend available” error
  2. libusb-win32 (v1.2.6.0): looks good!
Python 2.7.18 |Anaconda, Inc.| (default, Apr 23 2020, 17:26:54) [MSC v.1500 64 bit (AMD64)] on win32
Type "help", "copyright", "credits" or "license" for more information.
>>> from OpenFL import Printer as P
>>> p = P.Printer()
>>> p.state()
<State.MACHINE_READY_TO_PRINT: 3>
>>>

I’m in! Now to poke around and see what I can do with the laser.

FormLabs Form 1+ Electrical Failure Reproduced

I’ve taken apart a broken FormLabs Form 1+ laser resin 3D printer and laid out its entire electrical system on my workbench. Freed of most of its mechanical parts, it is a much more compact and easily explored layout. Ideal for me to try my long shot idea, which came to me when I started closely examining the damaged galvanometer control board and guessing at how it worked.

The hypothesis: root cause of failure may be a badly crimped connector, which is a common failure mode. It worked well enough to pass FormLabs quality assurance, but presented higher resistance than was desirable, wasting power as heat. Functionally it was probably fine, as this wire carried -24V which was converted to -15V DC by a voltage regulator. So if the extra resistance dropped a volt or two it would not have been noticed. But as time went on, this heat would have weakened and damaged things, raising resistance and temperature. Until one day things got hot enough to reach ignition temperature and started our electrical fire.

The examination: With the system powered up, I probed the front and confirmed -24V on the purple wire. Flipping the board over (an easy task now everything is laid out on workbench) I could access pins corresponding to the connector. I confirmed +24V and ground were as expected, and also confirmed only 0.6V DC instead of -24V DC on the final pin. To double-check, I also probed the input pin of L79 negative voltage regulator, and it also showed 0.6V DC. The -24V DC plane is not receiving -24V, consistent with the burned-out connector hypothesis.

The experiment: I cut the purple wire and soldered it directly to the connector pin on the back. If the connector was the only problem, this would bypass that connection and revive the galvanometer control board. If the connector is not the only problem, I have replicated the conditions leading to that electrical fire. I turned everything on and witnessed the following sequence:

  1. An orange glow at the base of the visibly burnt area. (Not in the connector.)
  2. Foul-smelling smoke from the new recreated fire.
  3. Heat melted solder and released the newly connected wire, breaking the connection and preventing any further damage.

The conclusion: I successfully replicated the conditions leading up to an electrical fire. Whatever went wrong on this board, it isn’t a bad connector. Or at least, not just a bad connector. This was an easy thing to try and I wanted to give it a shot. It would have been a great story if this had worked! I even had some ideas on what I would do with it.

FormLabs Form 1+ Internals on Workbench

I’ve been taking apart a broken FormLabs Form 1+ laser resin 3D printer because I wanted to learn as much as I can from a piece of hardware I probably wouldn’t have bought on my own. Also, it is taking up too much space. Once I separated the Z-axis subassembly from the rest of the printer chassis, I could place the entire electrical and electronics nervous system on my workbench. The printer wouldn’t print anything in this state, of course, but it thinks it could. I’m very amused to read “Ready to print” on the OLED status display.

My first experiment with this “benchtop printer” is to see what components are necessary to run through a print program. I knew some connections between components must have been open-loop, because the printer mainboard had no idea the galvanometer control board was fried nor that the resin tray tilt motor was damaged. What else is the mainboard unaware of? Here are my findings:

OK to disconnect:

  • GALVO X SIGNAL, GALVO X POWER, GALVO Y SIGNAL, and GALVO Y POWER. The galvanometers are a motor+sensor combination and requires closed-loop control with the galvanometer control board. However, the connection from printer mainboard to galvo control board is open loop.
  • TILT stepper motor is open-loop control, mainboard has no feedback on resin tray position.
  • LASER could be disconnected and still allow print program to run.
  • DISPLAY is one-way SPI communication.
  • LED wires for BUTTON is optional.

Needs to be connected:

  • INTERLOCK door safety is something the mainboard definitely checks. It can be bypassed by taping a magnet onto the sensor. Could also try connecting the sensor wire (blue) to ground (black) but I have not tried this.
  • Switch wires for BUTTON is needed for a confirmation press before printing process begins.
  • Z LIMIT and Z MOTOR are required to run through Z-axis homing procedure.

Laying out all the components on a workbench in running condition also lets me try a long shot idea: providing alternate negative voltage path for galvanometer control.

FormLabs Form 1+ Z-Axis Assembly

I think I can find new useful homes for several components of a broken FormLabs Form 1+ laser resin 3D printer. After carefully removing its laser optical core, I proceed to attempt salvaging its Z-axis actuator.

The Z-axis motion in this printer is driven by a stepper motor turning an Acme thread leadscrew. This concept is pretty commonly found in FDM 3D printers as well, but closer inspection unveiled a higher quality design. The first hint was the limit switch at the top. Cheap FDM printers use a microswitch, this printer uses an optical interrupter. Eliminating the flexible spring in a microswitch makes this limit switch more precise in marking its location. The print platform is mounted on a ball bearing carriage traveling on a guide rail, again more precise than the typical FDM printer usage of sleeves traveling on rods.

And finally, I noticed a detail significant in its absence: there is no shaft coupler between motor and leadscrew. A leadscrew as motor output shaft eliminates all problems introduced by couplers. No set screws to back out, no errors in concentricity between the two shafts, etc. Markings on the motor says LDO-42STH34-L291E. We can find LDO Motor’s page for their LDO-42STH line of 42mm hybrid stepper motors, but this particular model number is not listed. Searching for similar items revealed several other LDO motors with a leadscrew output shaft, all at significantly higher cost than generic NEMA17 stepper motors + leadscrew + coupler. Looks like this particular FormLabs motor variant is an engineering tradeoff of higher parts cost for higher precision.

However, all this precision means I have to make a decision on salvaging these parts. The linear rail, optical interrupter limit switch, and stepper motor are all mounted to the printer chassis. The chassis is constructed from several sheets of stamped sheet metal, folded and riveted together for rigidity. Good for optical stability, bad for me. If I remove each component separately, their relative precision alignment would be lost. If I want to remove the Z-axis as an intact sub assembly from the printer chassis, I have to perform the irreversible act of drilling out some rivets. After some thought I decided on the latter option.

Drilling out rivet heads would generate a lot of metal shavings. So before I got started with that destructive act, I wanted to remove the main mirror and get it away from scratch-inducing shavings.

The back side of the mirror has been glued to a metal plate with two embedded threaded rods. Removing two nuts freed the mirror assembly.

With the mirror stored safely away, it’s time to make some chips.

Roughly half an hour later, I’ve freed the Z-axis subassembly from all other pieces of stamped and riveted sheet metal.

I thought about grabbing my angle grinder to cut off the bottom, as it is not strictly related to the Z-axis assembly. But this is where the laser optical subassembly was mounted, and it’s also where the mirror was mounted. There’s a chance these pieces of sheet metal may yet be useful. Besides, it’s only minimally more than keeping the Z-axis itself. Even with this bottom portion, this subassembly is a lot less bulky than keeping the rest of the printer chassis together. And small enough for me to lay out everything on my workbench.

FormLabs Form 1+ Optical Core

Too many things have gone wrong with this old FormLabs Form 1+ laser resin 3D printer for me to think I could return to precision printing duty. A broken resin tray tilt motor was just the latest discovery added to that pile. But it’s such an interesting machine to take apart, filled with precision components that I don’t know how to use but couldn’t bear to pitch in the garbage. Top among this list is this laser optical core.

A precision machined piece of aluminum is home to four important optical components: The laser itself in a black cylinder, emitting a beam to strike two mirrors. Each mirror adhered to the end of two orthogonally mounted galvanometers. After bouncing off these two rotating mirrors, the beam strikes a small front-surface mirror directing the beam into the large center cavity. In that cavity is a much larger main mirror, who is angled to deflect the beam up into the resin tray to precisely harden some resin for the print.

Before I removed the core, I ran the optical path one last time. In place of the resin tray, I have placed a sheet of normal white office printer paper. I had no concept of the power level of this laser and wanted to see what it would do. The answer: no hole, no fire, no smoke, not even a little brown singe mark. Just a bright dot. I suppose it is possible that this laser isn’t driven at maximum power, but I am comforted to know that my initial fear of rampant laser destruction was misplaced. However, I will continue to assume it is powerful enough to cause eye damage and deserving of respect.

When removing this optical core, take care not to just blindly loosen every visible fastener. The three most visible fasteners are actually holding the laser and galvanometers in place. The galvanometer fasteners can be loosened in order to rotate the galvanometer to center their range of rotation and thus center the beam. I don’t know if similarly rotating the laser module would accomplish anything.

To remove the optical core, we actually need to unscrew the two deep set fasteners in opposing corners. These fasteners provide the force to hold the optical core in place, their orthogonally opposite corners host two alignment pins to locate the optical core on the printer chassis main spine.

At the moment I don’t know the electrical requirements to driver any of these three components, but I will try to keep this fragile optical core intact in case I can return with more knowledge about how to make them run. I also want to keep the Z-axis assembly, which is thankfully more robust than delicate optical components.

FormLabs Form 1+ Resin Tank Tilt Mechanism Damaged

I’ve been exploring several subsystems of a broken FormLabs Form 1+ laser resin 3D printer. After a rather disappointing session playing with its serial interface console, I’ve exhausted the list of electronics to explore and moving on to mechanical systems. First on the list: the resin tank tilting mechanism. I believe this is done to help with the peeling the partial print away from PDMS layer, but maybe more importantly, redistribute resin across the tank between layers. Tilt has stopped working on this printer, and I wanted to look for anything that might explain why.

Looking at the top part I see a leadscrew mechanism, but it wasn’t immediately obvious how it worked. Everything I see here seems to be rigidly fastened to something. I couldn’t rotate anything by hand. What was supposed to rotate on this mechanism driven by a stepper motor?

Once I could see the lower half of this mechanism, I saw why it failed: this white plastic portion has separated from the rest of the motor, no longer held by stamped sheet metal claws all around its perimeter.

Visible from the bottom is another problem: on either side of this motor are small hooks on the resin tray carrier. Each of which has a corresponding slot in the chassis. But there’s an alignment problem: the hook on the left side of this picture (front of the printer) looks good, but the right side (rear of the printer) hook is no longer aligned with its slot. This misalignment makes it very difficult to raise the resin tray back into place, and that stress might have contributed to white motor bottom pop out.

I saw no obvious explanation for the misalignment. There were no signs of distortion on the printer chassis, nor do I see any obvious problems with the tilt hinge. It was a surprise to see the hinge itself, though. With all the precision parts I’ve seen inside this laser instrument, it was jarring to see something resembling a cheap piano hinge I could get at the local hardware store.

Once I removed the motor, I could read its sticker:

LDO-35BYZ-B01-12    PM STEPPER
LDO MOTORS            20150320

20150320 is probably a date of manufacture, March 2015 is within range of Form 1+ production.

LDO-35BYZ-B01-12 led me to information page for LDO Motors company’s line of 35mm linear PM stepper motors. Where I learned the only rotating part is inside the motor enclosure, acting upon the leadscrew passing through motor centerline. This is very novel to me, as it means there’s nothing to rotate externally and risk tangling wires. This motor is designed so there is only a linear motion in the output shaft. Either the motor can remain still and impart a linear motion to the shaft, or the motor could move along a static shaft. A Form 1+ bolted motor to chassis and its threaded output shaft is attached to the end of the resin tray carrier. Unfortunately, something went wrong with the tray tilt mechanism, exceeding the designed forces of this motor and breaking it.

I pushed on the dislocated white portion and, to my mild surprise, it was willing to pop back into place. The motor resumed operating as a linear actuator. Of course, this part has now been weakened so it is no longer as capable as it was when new. If I should try to reuse this linear actuator in another project, I’ll have to use it where the physical pushes in the opposite direction and/or supplement its failed metal claws with an external brace.

Next step on my hardware tour: the optical core.

FormLabs Form 1+ Serial Console Disappointingly Uninformative

I had a lot of fun with the OLED dot matrix display from a broken FormLabs Form 1+ laser resin 3D printer. It exhibits a slight bit of burn-in from its career as printer status display, but after my exploration I’m confident I can put it to use. Now I wrap up my exploration of Form 1+ mainboard with the 6-pin header in the corner labeled CONSOLE.

Out of 6 pins, three were labeled G, T, and R. G was a good candidate for ground, and my meter confirmed it had continuity to the ground plane. T and R would be good candidates for “Transmit” and “Receive” wires of a serial port. I first connected it to my oscilloscope to confirm these are 3.3V signals, then I connected it to my FTDI USB to serial bridge to see what’s shown on that console. I received legible data when configured serial port as follows:

  • 115200 baud
  • 8 data bits
  • 1 stop bit
  • No party
  • No flow control

I had hoped I would see low level information on this serial link, starting with perhaps the firmware version number. Since it is labeled CONSOLE I had also hoped for an interactive command prompt to query status and maybe diagnostics commands. Sadly, that did not seem to be the case. Or if it is, it required magic keypresses that I don’t know. There was no response to anything I tried. (Escape, Control+C, the usual suspects.)

Here’s what I saw upon power-up, with the unique items highlighted.

Starting setup...
initializing USB
setting up user interface
setting up ui spi port
starting UI timer
powering up SD card
setting up laser...
initializing temperature sensor...
setting up motors
setting up SD card
setting up print block processor
setting up odometer
...setup complete.

After powerup I pressed front panel button for printer startup. I saw a very similar but slightly different set of text. The differences are highlighted:

Starting initialize.
setting up user interface
setting up ui spi port
starting UI timer
powering up SD card
setting up laser...
initializing temperature sensor...
setting up motors
setting up SD card
setting up print block processor
setting up odometer
...setup complete.
turning on power.
initialization done

Beyond that… nothing. Nothing while downloading a print job, nothing while it is printing. I had hoped this serial console would display a superset of status information shown on front panel OLED display, but this is more likely a development feature that’s severely limited when running customer facing firmware. Oh well, at least I looked. And now it’s time to take apart some mechanical bits.

FormLabs Form 1+ OLED Burn-In

I’ve been playing with the OLED dot matrix display from a broken FormLabs Form 1+ laser resin 3D printer. After I explored all the functional aspects and documented its pinout information, I thought I’d explore a side curiosity: is there any visible burn-in on this OLED panel?

A characteristic of OLED technology is that the longer an OLED element has been shining, the dimmer it becomes. Usage pattern is a huge part of whether OLED dimming becomes a problem. If an OLED screen constantly shows static information, certain pixels would be illuminated for disproportionate amount of time relative to their neighbors. In this scenario, constantly illuminated pixels age much faster than their neighbors, and their difference in brightness results in “burning in” the static image. For example, OLED panels used for watching television or movies have working fine for years. But those same panels would show burn-in after a few months if used as static display for information. Displaying 3D printer status is definitely towards the unfriendly side of the spectrum, which is why I was surprised when I learned FormLabs used an OLED here. Did they make a bad decision? Could I detect signs of burn-in on this Form 1+ display?

While running the Adafruit example sketch, I didn’t notice anything obvious. This would support the optimistic view that any burn-in is negligible. But since I had the SSD1305 API at hand, I added a bit of code for full-screen white which illuminated all pixels at max power. When I did this, I could see signs of burn-in, but it is subtle. It is certainly very difficult to capture in a photograph, as I’m also fighting OLED refresh rate at the same time as I’m trying to capture a low-contrast effect. The title image for this blog post shows an unmodified picture where the burn-in effect is barely visible.

This image has been modified to enhance contrast, making the burn-in a tiny bit more visible. For reference, the information shown by a Form 1+ while printing is in the format of:

Job: "[Filename]"
HH:MM:SS remaining
Layer X of Y

Unchanging text “Job”, “remaining” and “Layer” are visibly burned in. Remaining variable data end up in a more distributed blur. Pixels between lines of text are rarely illuminated, so those lightly used pixels show up brighter than the rest. Still don’t see it? Perhaps it would help to have a set of text overlaid in red:

The unknown variable is how long this printer operated before it retired. If this printer provided many years of service and this is all we see after years of constant display, then I would grudgingly admit burn-in is negligible. If this printer only printed a few jobs before dying, then this is horrible. With these pictures I can conclude OLED burn-in is real, but this incomplete data point is not enough to say whether OLED burn-in is a real problem of concern.

One thing I did notice, though: FormLabs chose an LCD module for their Form 2 printers’ front panel display. That might be the most telling sign. I have yet to see a Form 3 in person, but I would expect an LCD for that as well. Maybe an OLED status panel isn’t the greatest idea if it would eventually render the machine unusable. Perhaps there are other ways to obtain printer status information? Earlier I noticed what might be a serial port on the mainboard, so I’m going to look into that.

FormLabs Form 1+ OLED Pinout

I have a broken FormLabs Form 1+ laser resin 3D printer and I’m learning what I can from taking it apart. On its front panel is a small OLED dot-matrix display that I have been exploring. I have now successfully controlled that OLED module using an ESP8266 development board.

Confirming the speculation in this FormLabs forum thread, the OLED module is very similar to the Newhaven Display International NHD-2.23-12832UCB3. Both of their display areas are 2.23″ diagonal with 128×32 pixels of resolution. They both use a SSD1305 controller, but while Newhaven’s module provided a single row of 20 pins, FormLabs custom built their own circuit board connecting to the rest of the printer with a 10-wire IDC ribbon cable. Only 7 wires are actually used.

This OLED module is also very similar to Adafruit product #2675 Monochrome 2.3″ 128×32 OLED Graphic Display Module Kit but without Adafruit luxuries like 5V logic level shifter and power buffering capacitor.

This module only requires a power supply of 3.3V DC, because it has an onboard voltage boost converter to supply other voltages needed by OLED. All logic high signals are also 3.3V DC. Data communication is via SPI protocol with an additional command/data select input wire. When that wire low, the chip will interpret SPI traffic as commands and when high, SPI traffic will be sent to graphics frame buffer.

  1. Ground
  2. Vcc to supply 3.3V DC
  3. Command/Data select
  4. SPI Clock
  5. Reset (Active Low)
  6. SPI Data In (*)
  7. SPI Chip Select (Active Low)
  8. Unused
  9. Unused, but connected to mainboard I2C bus data line
  10. Unused, but connected to mainboard I2C bus clock line

(*) There is no SPI Data Out pin.


Now this pinout is documented, I will explore side curiosities like potential OLED burn-in.