Notes from ZFS Adventures for TrueNAS Replication

My collection of old small SSDs played a game of musical chairs to free up a drive for my TrueNAS replication machine, the process of which was an opportunity for hands-on time with some Linux disk administration tools. Now that I have my system drive up and running on Ubuntu Server 22.04 LTS, it’s time to wade into the land of ZFS again. It’s been long enough that I had to refer to documentation to rediscover what I need to do, so I’m taking down these notes for if when I need to do it again.

Installation

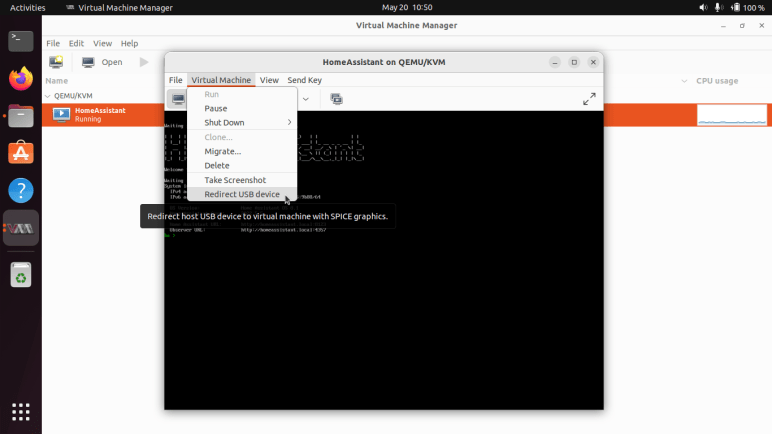
ZFS tools are not installed by default on Ubuntu 22.04. There seems to be two separate packages for ZFS. I don’t understand the tradeoffs between those two options, I chose to sudo apt install zfsutils-linux because that’s what Ubuntu’s ZFS tutorial used.

Creation

Since my drive was already setup to be a replication storage drive, I didn’t have to create a new ZFS pool from scratch. If I did, though, here are the steps (excerpts from the Ubuntu tutorial linked above):

  • Either “fdisk -l” or “lsblk” to list all the storage devices attached to the machine.
  • Find the target device name (example: /dev/sdb) and choose a pool name (example: myzfs)
  • “zpool create myzfs /dev/sdb” would create a new storage pool with a single device. Many ZFS advantages require multiple disks, but for TrueNAS replication I just output to a single drive.

Once a pool exists, we need to create our first dataset on that pool.

  • “zfs create myzfs/myset” to create a dataset “myset” on pool “myzfs”
  • Optional: “zfs set compress=lz4 myzfs/mydataset” to enable LZ4 compression on specified dataset.

Maintenance

  • “zpool scrub myzfs” to check integrity of data on disk. With a single drive it wouldn’t be possible to automatically repair any errors, but at least we would know that problems exist.
  • “zpool export myzfs” is the closest thing I found to “ejecting” a ZFS pool. Ideally, we do this before we move a pool to another machine.
  • “zpool import myzfs” brings an existing ZFS pool onto the system. Ideally this pool had been “export”-ed from the previous machine, but as I found out when my USB enclosure died, this was not strictly required. I was able to import it into my new replication machine. (I don’t know what risks I took when I failed to export.)
  • “zfs list -t snapshot” to show all ZFS snapshots on record.

TrueNAS Replication

The big unknown for me is figuring out permissions for a non-root replication user. So far, I’ve only had luck doing this on root account of the replication target, which is bad for many reasons. But every time I tried to use a non-root account, replication fails with error umount: only root can use "--types" option

  • On TrueNAS: System/SSH Keypairs. “Add” to generate a new pair of private/public key. Copy the public key.
  • On replication target: add that public key to /root/.ssh/authorized_keys
  • On TrueNAS: System/SSH Connections. “Add” to create a new connection. Enter a name and IP address, and select the keypair generated earlier. Click “Discover Remote Host Key” which is our first test to see if SSH is setup correctly.
  • On TrueNAS: Tasks/Replication Tasks. “Add” to create a replication job using the newly created SSH connection to push replication data to the zfs dataset we just created.

Monitor Disk Activity

The problem with an automated task going directly to root is that I couldn’t tell what (if anything) was happening. There are several Linux tools to monitor disk activity. I first tried “iotop” but unhappy with the fact it required admin privileges and that is not considered a bug. (“Please stop opening bugs on this.”) Looking for an alternative, I found this list and decided dstat was the best fit for my needs. It is not installed on Ubuntu Server by default, but I could run sudo apt install pcp to install, followed by dstat -cd --disk-util --disk-tps to see activity level of all disks.

Home Assistant OS in KVM Hypervisor

I encountered some problems running Home Assistant Operating System (HAOS) as a virtual machine on a TrueNAS CORE server, which is based on FreeBSD and its bhyve hypervisor. I wanted to solve these problems and, given my good experience with Home Assistant, I was willing to give it dedicated hardware. A lot of people use a Raspberry Pi, but in these times of hardware scarcity a Raspberry Pi is rarer and more valuable than an old laptop. I pulled out a refurbished Dell Latitude E6230 I had originally intended to use as robot brain. Now it shall be my Home Assistant server, which is a robot brain of sorts. This laptop’s Core i5-3320M CPU launched ten years ago, but as a x86_64 capable CPU designed for power-saving laptop usage, it should suit Home Assistant well.

Using Ubuntu KVM Because Direct Installation Failed Boot

I was willing to run HAOS directly on the machine, but the UEFI boot process failed for reasons I can’t decipher. I couldn’t even copy down an error message due to scrambled text on screen. HAOS 8.0 moved to a new boot procedure as per its release announcement, and the comments thread on that page had lots of users reporting boot problems. [UPDATE: A few days later, HAOS 8.1 was released with several boot fixes.] Undeterred, I tried a different tack: install Ubuntu Desktop 22.04 LTS and run HAOS as a virtual machine under KVM Hypervisor. This is the hypervisor used by the Linux-based TrueNAS SCALE, to which I might migrate in the future. Whether it works with HAOS would be an important data point in that decision.

Even though I expect this computer to run as an unattended server most of the time, I installed Ubuntu Desktop instead of Ubuntu Server for two reasons:

  1. Ubuntu Server has no knowledge of laptop components, so I’d be stuck with default hardware behavior that are problematic. First is that the screen will always stay on, which wastes power. Second is that closing the lid will put the machine to sleep, which defeats the point of a server. With Ubuntu Desktop I’ve found how to solve both problems: edit /etc/systemd/logind.conf and change lid switch behavior to lock, which turns off the screen but leaves the computer running. I don’t know how to do this with Ubuntu Server or Home Assistant OS direct installation.
  2. KVM Hypervisor is a huge piece of software with many settings. Given enough time I’m sure I could learn all of the command line tools I need to get things up and running, but I have a faster option with Ubuntu Desktop: Use Virtual Machine Manager to help me make sense of KVM.

KVM Network Bridge

Home Assistant instructions for installing HAOS as a KVM virtual machine was fairly straightforward except for lack of details on how to set up a network bridge. This is required so HAOS is a peer on my home network, capable of communicating with ESPHome devices. (Equivalent to the network_mode: host option when running Home Assistant Docker container.) HAOS instruction page merely says “Select your bridge” so I had to search elsewhere for details.

A promising search hit was How to use bridged networking with libvirt and KVM on linuxconfig.org. It gave a lot of good background information, but I didn’t care for the actual procedure due to this excerpt: “Notice that you can’t use your main ethernet interface […] we will use an additional interface […] provided by an ethernet to usb adapter attached to my machine.” I don’t want to add another Ethernet adapter to my machine. I know network bridging is possible on the existing adapter, because Docker does it with network_mode:host.

My next stop was Configuring Guest Networking page of KVM documentation. It offered several options corresponding to different scenarios, helping me confirm I wanted “Public Bridge”. This page had a few Linux distribution-specific scripts, including one for Debian. Unfortunately, it wanted me to edit a file /etc/network/interfaces which doesn’t exist on Ubuntu 22.04. Fortunately, that page gave me enough relevant keywords for me to find Network Configuration page of Ubuntu documentation which has a section “Bridging” pointing me to /etc/netplan. I had to change their example to match Ethernet hardware names on my computer, but once done I had a public network bridge upon my existing network adapter.

USB Device Redirection

Even though I’m still running HAOS under a virtual machine hypervisor, ESPHome could access USB hardware thanks to KVM device redirection.

First I plug in my ESP32 development board. Then, I open the Home Assistant virtual machine instance and select “Redirect USB device” under “Virtual Machine” menu.

That will bring up a list of plugged-in USB devices, where I could select the USB to UART bridge device on my ESP32 development board. Once selected, the ESPHome add-on running within this instance of HAOS could see the ESP32 board and flash its firmware via USB. This process is not as direct as it would have been for HAOS running directly on the computer, but it’s far better than what I had to do before.

At the moment, surfacing KVM capability for USB device redirection is not available on TrueNAS SCALE but it is a requested feature. Now that I see the feature working, it has become a must-have for me. Until this is done, I probably won’t bother migrating my TrueNAS server from CORE (FreeBSD/bhyve) to SCALE (Linux/KVM) because I want this feature when I consolidate HAOS back onto my TrueNAS hardware. (And probably send this Dell Latitude E6230 back into the storage closet.)

Start on Boot

And finally, I had to tell KVM to launch Home Assistant automatically upon boot. By checking “Start virtual machine on host boot up” under “Boot Options” setting.

In time I expect that I’ll learn the KVM command lines to accomplish what I’m doing today with Virtual Machine Manager, but today I’m glad VMM helps me get everything up and running quickly.

[UPDATE: virsh autostart is the command line tool to launch a virtual machine upon system startup. Haven’t yet figured out command line procedure for USB redirection.]

Home Assistant OS in TrueNAS CORE Virtual Machine

I started playing with Home Assistant in the form of Home Assistant Core, a docker container, for its low commitment. Once I decided Home Assistant was worthwhile, I moved up to running Home Assistant Operating System as a virtual machine on my TrueNAS CORE server. This move gained features of Home Assistant Supervisor and I found the following subset quite useful:

  • Easy upgrade and rollback for failed upgrades.
  • Add-on integration features, especially for ESPHome.
  • Ability to backup critical data in a compact *.tar file.

The backup situation is a tradeoff. When I ran Home Assistant Core docker container, I could map its data directory to my TrueNAS storage pool. It was a more robust data retention system, as I had configured it for nightly snapshots and regular backups to external media. However, this would take upwards of hundreds of megabytes especially when I’m flooding the Home Assistant database. In contrast, the data backup archive generated by Home Assistant Supervisor is tiny at only a few megabytes. I have ambition to eventually get the best of both worlds: a Home Assistant automation that triggers Supervisor backups, and then store those backup files on my TrueNAS storage pool. This should be possible, as people have created addons to perform automatic backups and upload to Google Drive. But right now I have to do it manually.

Unrelated to the backup situation, there were two significant downsides to running Home Assistant OS on a TrueNAS CORE virtual machine.

  1. The virtual machine does not have access to hardware. If ESPHome add-on could access USB, it could perform first-time firmware upload on ESP32/ESP8266 devices. Without hardware access, I have to perform initial upload some other way which is cumbersome. (Following uploads could be done via WiFi, a huge benefit of ESPHome.)
  2. There are various problems with the FreeBSD bhyve hypervisor running Linux-based operating systems. A category of them (apparently there are more than one) interferes with the ability for a Linux operating system to reboot itself. In practice, this means every time the Home Assistant OS updates itself and reboots, it would shut down but not restart. At one point, I could not perform manual shutdown from TrueNAS interface, so the horrible workaround was to reboot my TrueNAS server. After a few TrueNAS updates, I can now manually shut down and restart the VM. But it is still a big hassle to do this on every Home Assistant OS update.

Due to these problems, I would NOT recommend running Home Assistant OS as a TrueNAS CORE virtual machine. Issue #2 became quite annoying and, when my Home Assistant got stuck trying to reboot for an upgrade to Home Assistant OS 8.0, I decided it was time to try a different setup.

Power Control Board for TrueNAS Replication Raspberry Pi

Encouraged by (mostly) success of controlling my Pixel 3a phone’s charging, the next project is to control power for a Raspberry Pi dedicated to data backup for my TrueNAS CORE storage array. (It is a remote target for replication, in TrueNAS parlance.) There were a few reasons for dedicating a Raspberry PI for the task. The first (and somewhat embarrassing) reason was that I couldn’t figure out how to set up a remote replication target using a non-root account. With full root level access wide open, I wasn’t terribly comfortable using that Pi for anything else. The second reason was that I couldn’t figure out how to have a replication target wake up for the replication process and go to sleep after it was done. So in order to keep this process autonomous, I had to leave the replication target running around the clock, and a dedicated Raspberry Pi consumes far less power than a dedicated PC.

Now I want to take a step towards power autonomy and do the easy part first. I have my TrueNAS replications kick off in response to snapshots taken, and by default that takes place daily at midnight. The first and easiest step was then to turn on my Raspberry Pi a few minutes before midnight so it is booted up and ready to receive replication snapshot shortly after midnight. For the moment, I would still have to shut it down manually sometime after replication completes, but I’ll tackle that challenge later.

From an electrical design perspective, this was no different from the Pixel 3a project. I plan to dedicate another buck converter for this task and connect enable pin (via a cable and a 1k resistor) to another GPIO pin on my existing ESP32. This would have been easy enough to implement with a generic perforated prototype circuit board, but I took it as an opportunity to play with a prototype board tailored for Raspberry Pi projects. Aside from the form factor and pre-wired connections to Raspberry Pi GPIO, these prototype kits also usually come with appropriate pin header and standoff hardware for mounting on a Pi. Looking over the various offers, I chose this particular four-pack of blank boards. (*)

Somewhat surprisingly for cheap electronics supply vendors on Amazon, this board is not a direct copy of an existing Adafruit item. Relative to the Adafruit offering, this design is missing the EEPROM provision which I did not need for my project. Roughly two-thirds of the prototype area has pins connected as they are on a breadboard, and the remaining one-third are individual pins with no connection. In comparison the Adafruit board is breadboard-like throughout.

My concern with this design is in its connection to ground. It connects only a single pin, designated #39 in most Pi GPIO diagrams and lower-left in my picture. The many remaining GND pins: 6,9,14,20,25,30, and 34 appear to be unconnected. I’m not sure if I should be worried about this for digital signal integrity or other reasons, but at least it seems to work well enough for today’s simple power supply project. If I encounter problems down the line, I can always solder more grounding wires to see if that’s the cause.

I added a buck converter and a pair of 220uF capacitors: one across input and one across output. Then a JST-XH board-to-wire connector to link back to my ESP32 control board. I needed three wires: +Vin, GND and enable. But I used a four-pin connector just in case I want to surface +5Vout in the future. (Plus, I had more four-pin connectors remaining in my JST-XH assortment pack than three-pin connectors. *)

I thought about mounting the buck converter and capacitors on the underside of this board. There’s enough physical space between the board and the Raspberry Pi to fit them. I decided against it on concern of heat dissipation, and I was glad I did. After this board was installed on top of the Pi, the CPU temperature during replication rose from 65C to 75C presumably due to reduced airflow. If I had mounted components underneath, that probably would have been even worse. Perhaps even high enough to trigger throttling.

I plan to have my ESP32 control board run around the clock, so this particular node doesn’t have the GPIO deep sleep state problem of my earlier project with ESP8266. However, I am still concerned about making sure power stays on, and the potential problems of ensuring so.


(*) Disclosure: As an Amazon Associate I earn from qualifying purchases.