Maytag Dryer MDG9206AWA Motor Replacement

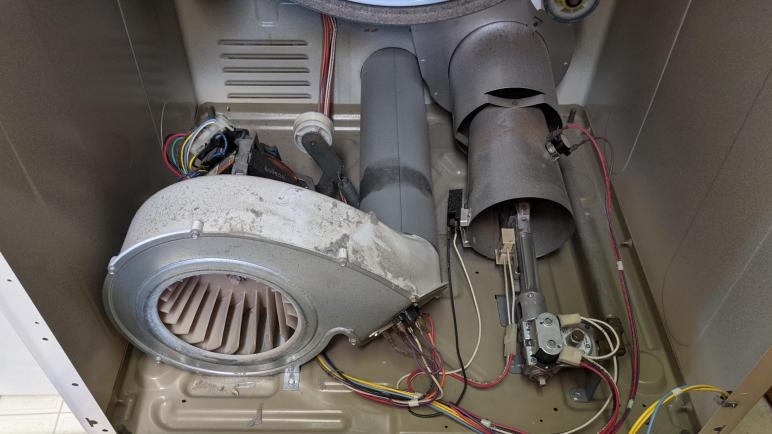
After verifying my clothes dryer’s motor couldn’t even turn its own shaft in the absence of load, I was confident replacing the motor assembly will restore my dryer to working condition. I started looking online for this motor part number and came up empty, and soon realized this was due to an obfuscated ecosystem of appliance repair parts. There is a wide variety of part numbers, and certain ones are supposed to replace certain other parts. I’m not in favor or such an opaque system and realized I need some kind of help to navigate it.

That’s when I snapped out of my online shopping indoctrination and started searching for a local resource. After all, washers and dryers have been around (and been failing) long before the advent of online shopping, surely I could find a local vendor of appliance parts. I expect them to mostly cater to local repair experts as they do their house calls, but a subset of these vendors should also be willing to sell at retail to DIY consumers like myself. I found Coast Appliance Parts Co. with a location near me and decided to visit them first.

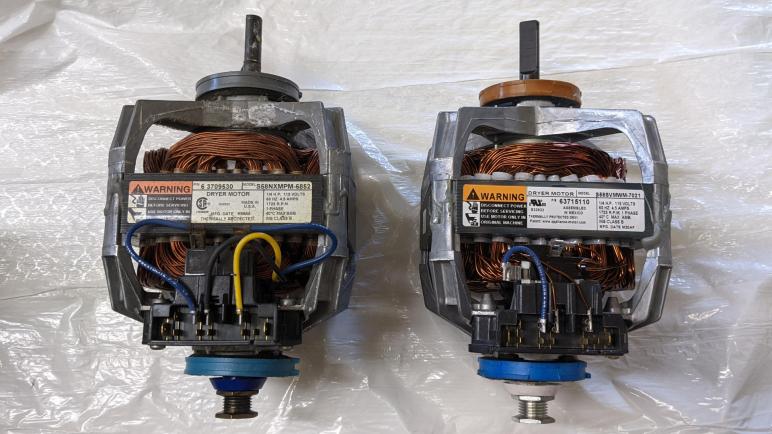
At the service counter, I gave my dryer model number MDG9206AWA and the store employee was able to put that into their computer system to retrieve some part numbers as replacements. Thankfully they were in stock so I bought a replacement motor assembly plus a replacement belt. Neither of which had a model number that matched the original item on my dryer, even though they were packaged in a way consistent with official replacement parts. Why appliance manufacturers use such a convoluted system I don’t know, but at least I have a way to deal with it.

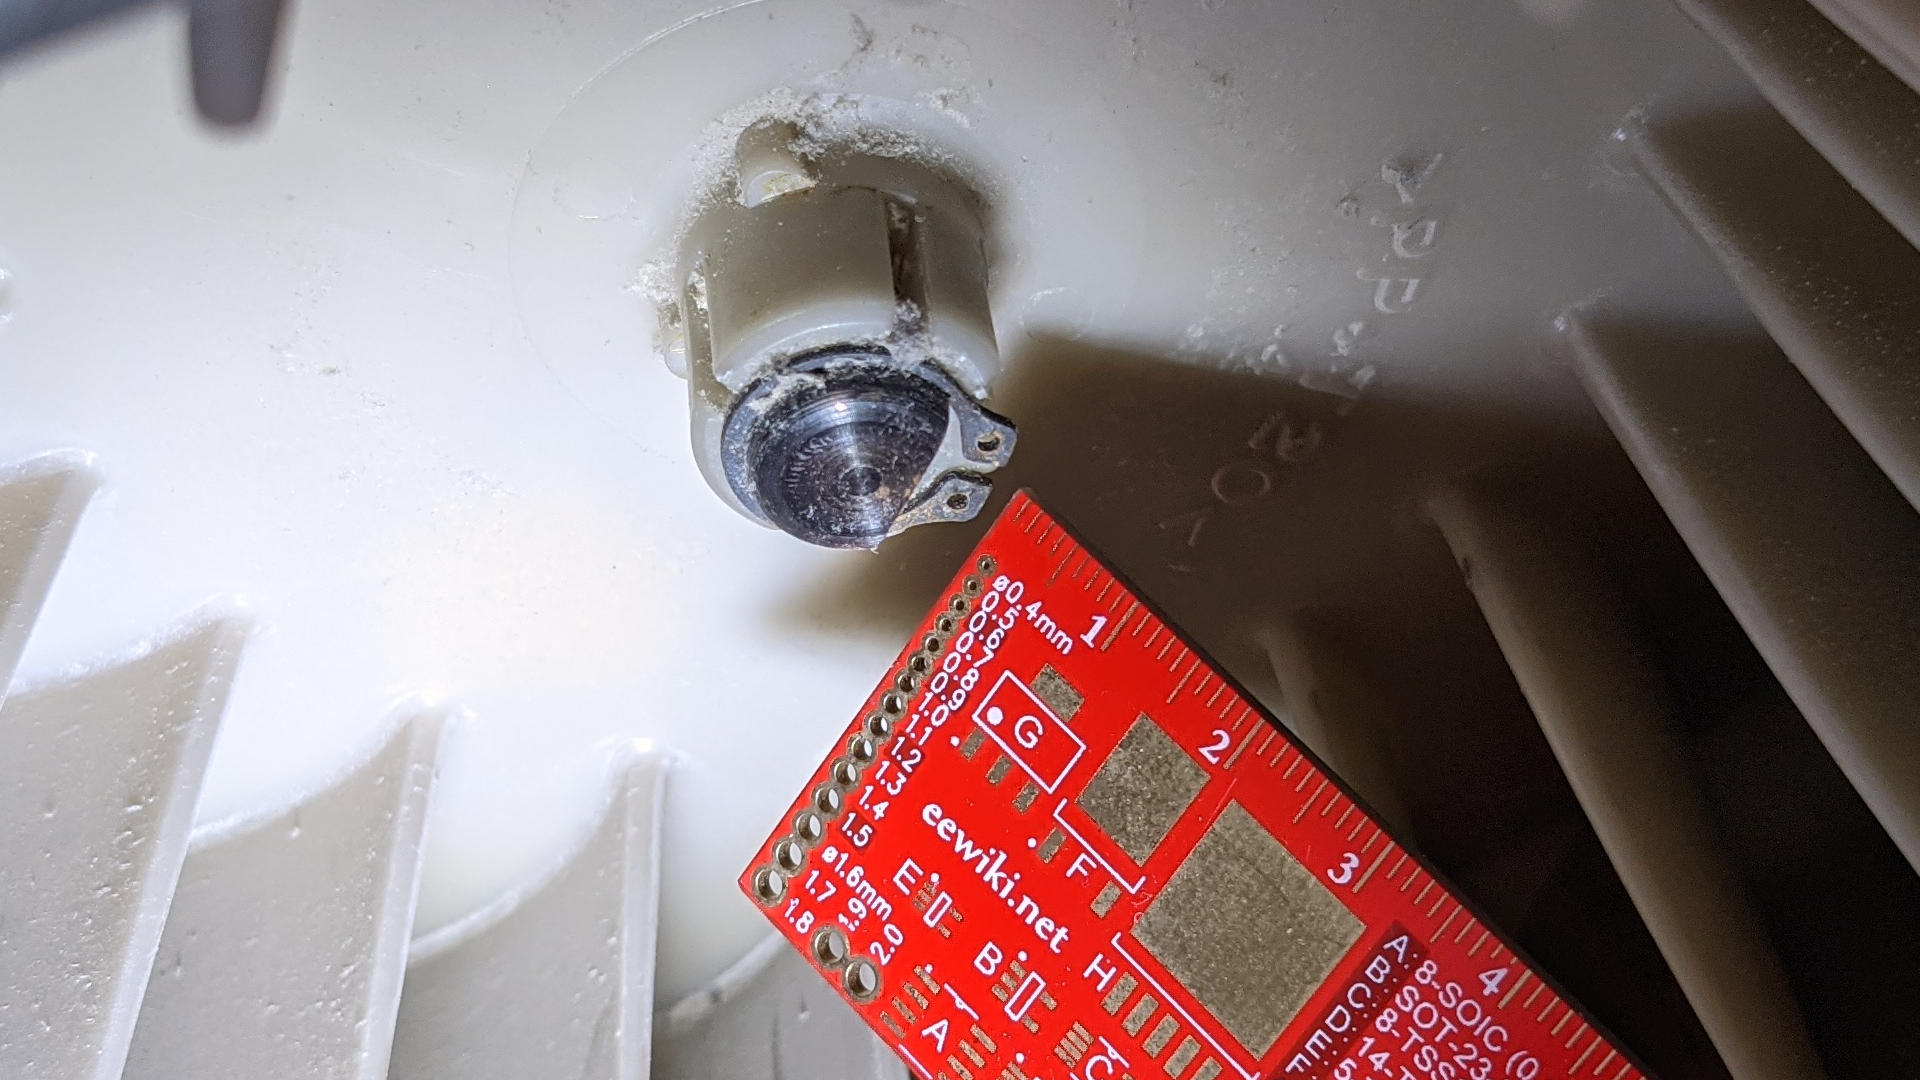
Fortunately, mismatching part number aside, both the motor and the belt seem to be straightforward replacements for their original counterparts. Once I installed the motor by itself I verified it could at least spin itself in the absence of a load, confirming the old motor assembly was indeed faulty. From there I could put everything back together in the reverse order of assembly, and my dryer was back up and running!

Now I can resume doing laundry at home, and also resume my quest to salvage LED backlights from old LCD panels.

Maytag Dryer MDG9206AWA Mechanical Base

I’m trying to fix my broken clothes dryer and I’ve successfully opened up the sheet metal enclosure. Once I removed the dryer drum, I could access all of the mechanical core mounted on its base. The right half of the base is occupied by natural gas ignition and combustion equipment. Since my hypothesis is that motor capacitor(s) have failed, I’ll start by ignoring that half of the base and focus on the left half.

My first test is to try to spin up this motor by itself, without the dryer drum. It failed to start rotating with the same awful buzzing noise even without the dryer drum or drive belt, thus confirming that the root failure has nothing to do with mechanical obstruction with the dryer drum.

More convinced now that the motor capacitor(s) are at fault, I was dismayed to find that they are integrated into the motor assembly and could not be replaced separately. I have to replace the entire motor assembly. This is possibly intentional. If the motor capacitor have failed due to age, it can be argued that other parts of the motor assembly are nearing the end of their life as well. If this is true, it makes sense to replace everything together, so I’ll optimistically (naively?) believe that hypothesis.

But that also meant I have to figure out how to remove the motor assembly. The motor shaft is connected on both ends. On the shaft facing me, it is connected to the air blower fan via a few retaining rings.

Retaining rings are a wonderful invention, holding tightly when installed and easily manipulated with the right tools. My problem? I don’t have a set of retaining ring pliers. That’s a tool I’ll have to buy for this project, which is fine as I always look forward to adding tools to my toolbox in both metaphorical and literal senses.

The far end of the motor shaft hosts the pulley which will turn the driver belt to spin the drum. Mounting this motor to the base plate are two sheet metal brackets. One just behind this pulley and the other one just behind the blower fan. Typically I could decipher how to install or remove a bracket by examining its shape, but I don’t recognize this particular bracket design.

I struggled with this bracket for some time, trying to figure out the magic touch to gently persuade it to release its grip on the motor. After some time of continuously failing I decided to seek help and found this YouTube video by RepairClinic.com. This video demonstrated no magic touch for gentle persuasion: I merely had to apply FAR more brute force than I had been willing to use. (“Be aware this may require some effort.“) I shrugged, applied a big whack as demonstrated in the video, and the bracket came loose. That works. Good enough for me to proceed with motor assembly replacement.

Maytag Dryer MDG9206AWA Disassembly

I’ve got a malfunctioning clothes dryer at home and I’ve decided to take a stab at fixing it myself. If I couldn’t fix it, I will have to hire a professional repair person. And if that should fail, I might have to replace the entire machine. But I am optimistic. Based on symptoms, I have a guess that the motor capacitors have failed. If that is true, it is a common age-related failure of motor appliances and thus I expected replacement parts to be available. But before that, I need to get inside the machine to validate my hypothesis.

Making my way to the dryer motor was an educational course in how Maytag engineers designed with sheet metal. I saw several signs that this machine was designed to be easy to service but without adding a lot of manufacturing cost to do so. My first lesson was that I wasted effort sliding the dryer out of its usual spot. All the parts I need to reach for this project was actually accessible from the front without moving the machine!

First I had to remove the door, whose fasteners held the lower front metal façade in place. Once that was removed I could access the assembly holding the front of the dryer drum, and the lint filter portion, of the air path. I noticed that several different fasteners were used and originally thought they served different purposes. But they were all used for fastening sheet metal together, which is fairly accommodating of loose tolerances. (Both a plus and a minus.) I eventually decided that the different screws were there to demarcate different stages of disassembly: it helps us see that only a subset was needed to remove a particular part. This way we don’t accidentally remove too many fasteners and have the machine completely fall apart on us.

In addition to self-tapping sheet metal screws, there were also a few stamped sheet metal hooks (dark metal in title image) that were used to hold large sections of sheet metal together. I was impressed at how much this design could accommodate loose tolerances yet still allow us to fasten top front corners of the machine together so it makes for a solid cube.

I had to remove the dryer drum on my way to access the motor, which also involved removing the belt that rotated the dryer drum. I took a close look at this decades-old belt and saw it was cracked with age with a fraying substrate. The belt is another common age-related failure. While it hasn’t failed yet, I plan to go ahead and replace it as well. It’s something I had to remove anyway on my way to the mechanical components of this machine.

Maytag Dryer MDG9206AWA Troubleshooting

I had made plans to pull LED backlights out of old LCD screens, and even bought a dedicated LED backlight tester to aid in my adventure. But before I could embark, daily life interrupted in the form of a clothes dryer that would no longer spin up. Since this problem has a very immediate effect on my life, it has priority over salvaging LED backlights. While I am not an experienced appliance repairperson, this is not my first time poking into my laundry machine. A few years ago I dug into the washing machine that paired with this dryer.

Symptom

When I press the Start button, I hear an electrical buzz that I associate with the dryer motor startup sequence. Typically this buzz would only last about one to two seconds before it fades and sounds transition to mechanical noises of the dryer drum spinning up. Once the drum starts spinning up, I could release the Start button and let the machine execute its selected drying cycle.

But now the buzz continues for as long as I hold down the start button, and the dryer does not transition to mechanical spinup noises. This is intermittent. Occasionally the drum would start as normal, but most of the time it would just buzz for as long as I hold the start button.

Process of Elimination

Electrical Power: since the dryer would occasionally spin up, I decided this was not a power failure issue. One of the more common reasons for the dryer to not start is a thermal fuse. But if that thermal fuse has blown, I would expect no buzzing noise and certainly no occasional spin-up.

Electrical Control: Due to the occasional spin-up, I also decided the control system is probably OK.

Mechanical: One hypothesis is that I have a mechanical obstruction somewhere, and depending on the position of the drum relative to the obstruction, the motor would have a harder time starting up. I spun the dryer drum by hand and detected no such obstruction.

Natural Gas: The heat source for the dryer is natural gas, but since the machine never makes as far as flame ignition I doubt that subsystem had anything to do with my problem.

Electromechanical: That left the motor as the prime candidate for this problem. Specifically, I suspect one or more of the motor capacitors have failed with age. They are critical to the motor startup sequence. The buzzing noise and inability to spin up hints at the starting capacitor.


I like the starting capacitor hypothesis, a target to look for as I open up this machine.

Maytag Top Load Washer (LAT8826AAM) Lid Switch + Fuse Module

Today’s distraction came courtesy of aging appliance. Specifically, the 20+ years-old Maytag top-loading clothes washer stopped working this morning. It has just started doing a load of heavy laundry that was out of balance and shut down when the tub started shaking. This itself has occurred before, we just had to redistribute the load and restart. Except this time pulling the knob failed to restart the machine. There was no sign of life, not even the power “ON” light.

Given that the machine acted as if it had no power, I first checked the house circuit breaker, verified the machine was plugged in, the easy things. After the simple checks were out-of-the-way, I started looking for a circuit breaker or a fuse built into the machine. A web search turned up several mentions of the lid switch which I initially ignored. During normal operation, an open lid would prevent the wash cycle from starting, but the power “ON” light would still be on. Since that light was dark, I had decided the lid switch couldn’t have been the problem.

That was the wrong decision.

The lid switch is actually a module that included the switch and a fuse. This fact didn’t sink in until I found this page, which described how to test continuity with a multimeter and cautioning that improper switch module installation may blow the fuse inside the module.

I removed the lid switch module from my washing machine, tested with my multimeter, and confirmed it was not behaving as it should. I am annoyed that Maytag did not design the fuse to be easily replaced. The whole module had to be replaced as a single unit: it was held together by fasteners that were clearly not intended to be removed. While I had the tools to remove them, it is a permanent removal.

Maytag Lid Switch

Once opened, the fuse was quickly found. The red arrow in the picture below points to a black piece (now broken in two pieces) that looks and feels like plastic but is electrically conductive.

When intact, this piece of fuse material holds the “LINE” terminal always in contact with the “MACHINE” terminal. When the washer lid is open, there is continuity between “NEUT”(RAL) to “MOTOR”. When the washer lid is closed, “NEUT” loses its connection to all other terminals, but “MOTOR” is put in contact with “LINE” and “MACHINE”.

The narrow neck of the fuse material is now broken, which also broke the usually always-on contact between “LINE” and “MACHINE”. When the washer lid is open, none of the terminals have continuity with any other terminal. When the lid is closed, “MACHINE” is in contact with “MOTOR” but that doesn’t do any good as “LINE” is disconnected.

Maytag Lid Switch Fuse

Now that I know how the module incorporates a fuse in addition to the lid switch, it was easy to rig up a quick test to see if the rest of the machine works. A successful test gives me the confidence a replacement module will bring the washing machine back up and running safely.

The next question is why the black piece broke. Was it from old age (innocent) or because there was a problem causing excessive amperage flow (worrisome)? The multimeter found no obvious short on the washing machine. And since the machine has been working for more than two decades, age is a plausible explanation. I’ll try the replacement module first. If the fuse blows again, I’ll have to dig deeper.

[2021 UPDATE: the washing machine has been running well for years after this replacement.]