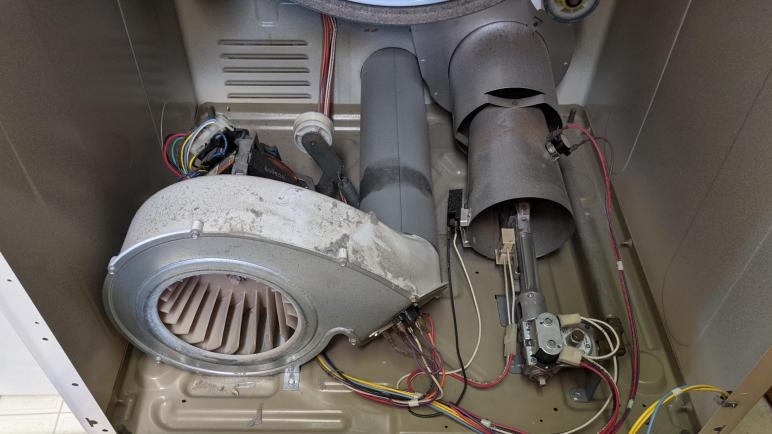
I’m trying to fix my broken clothes dryer and I’ve successfully opened up the sheet metal enclosure. Once I removed the dryer drum, I could access all of the mechanical core mounted on its base. The right half of the base is occupied by natural gas ignition and combustion equipment. Since my hypothesis is that motor capacitor(s) have failed, I’ll start by ignoring that half of the base and focus on the left half.
My first test is to try to spin up this motor by itself, without the dryer drum. It failed to start rotating with the same awful buzzing noise even without the dryer drum or drive belt, thus confirming that the root failure has nothing to do with mechanical obstruction with the dryer drum.
More convinced now that the motor capacitor(s) are at fault, I was dismayed to find that they are integrated into the motor assembly and could not be replaced separately. I have to replace the entire motor assembly. This is possibly intentional. If the motor capacitor have failed due to age, it can be argued that other parts of the motor assembly are nearing the end of their life as well. If this is true, it makes sense to replace everything together, so I’ll optimistically (naively?) believe that hypothesis.
But that also meant I have to figure out how to remove the motor assembly. The motor shaft is connected on both ends. On the shaft facing me, it is connected to the air blower fan via a few retaining rings.
Retaining rings are a wonderful invention, holding tightly when installed and easily manipulated with the right tools. My problem? I don’t have a set of retaining ring pliers. That’s a tool I’ll have to buy for this project, which is fine as I always look forward to adding tools to my toolbox in both metaphorical and literal senses.

The far end of the motor shaft hosts the pulley which will turn the driver belt to spin the drum. Mounting this motor to the base plate are two sheet metal brackets. One just behind this pulley and the other one just behind the blower fan. Typically I could decipher how to install or remove a bracket by examining its shape, but I don’t recognize this particular bracket design.
I struggled with this bracket for some time, trying to figure out the magic touch to gently persuade it to release its grip on the motor. After some time of continuously failing I decided to seek help and found this YouTube video by RepairClinic.com. This video demonstrated no magic touch for gentle persuasion: I merely had to apply FAR more brute force than I had been willing to use. (“Be aware this may require some effort.“) I shrugged, applied a big whack as demonstrated in the video, and the bracket came loose. That works. Good enough for me to proceed with motor assembly replacement.
