Compass Project Now a PWA

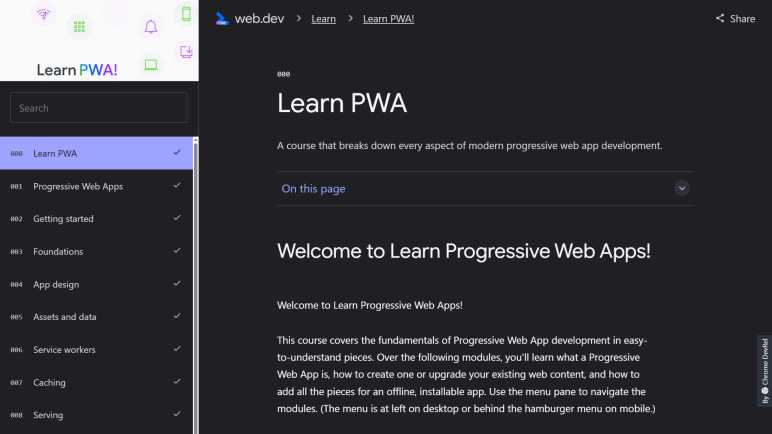
The full scope of PWA (Progressive Web App) is too much for me to comprehend with my limited web development skills. Fortunately, I don’t need to. PWA helper libraries exist, including some tailored to specific web frameworks. Reading over a developer guide for Angular framework’s PWA helper, I understood it offers basic PWA service worker functionality without much effort. Naturally, I had to give it a try and see how it turns my Compass project, a simple practice Angular web app, into a PWA.

Following instructions, I ran “ng add @angular/pwa” in my project and looked over the changes it made. As expected, there were several modifications to configuration JSON files on top of adding one of their own ngsw-config.json. Eight placeholder icon PNG files (showing the Angular logo) were added to the source tree, each representing a different resolution from 72×72 up to 512×512. Notably, the only TypeScript source code change was in app.module.ts to register service worker file ngsw-worker.js, and that service worker file is not part of the source tree where we can enhance it. And if there’s an extension mechanism, I don’t see it. This tells me behavioral changes are limited to what we can affect via settings in ngsw-config.json. For app authors that want to go beyond, they’d have to write their own PWA service worker from scratch.

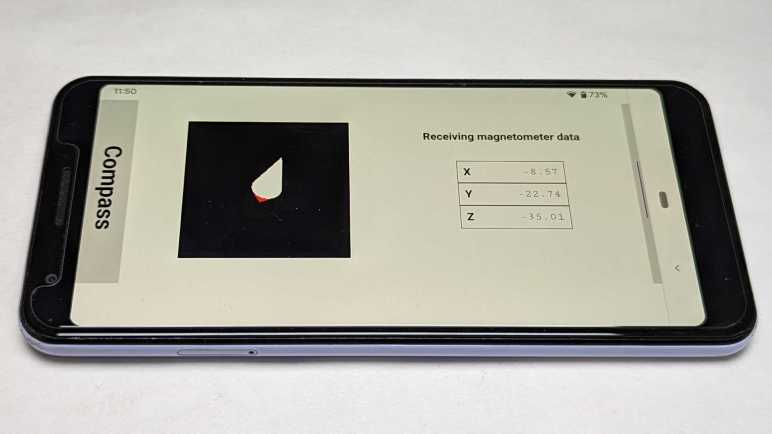
But I don’t have any ambition of code changes in this first run. I replaced those placeholder icon PNG files. Change them from the Angular logo to a crude compass I whipped up in a few minutes. Plus a few edits to the application name and cosmetic theme color. (Duplicated in two locations: the .webmanifest file and in index.html.) I built the results, deployed to GitHub Pages, and brought it up on my Android phone Chrome browser to see if anything looks different.

Good news: Android Chrome recognized the site is available as a PWA and offered the option to install it. (Adding yet another browser interface bar to the clutter…) I clicked install, and my icon in all its crudeness was added to my Android home screen.

Bad news: I tapped the icon, saw the loading splash screen (with an even bigger version of my crude icon in the middle) and then… nothing. It was stuck at the splash screen.

I killed the app and tried a second time, which was successful: my compass needle came up on screen after a brief pause. (1-2 seconds at most.) I returned to home screen, tapped the icon again, and it came up instantly. Implying the app was suspended and resumed.

A few hours later, I tapped the icon again. It was apparently no longer suspended and no longer available for resume, because I saw the splash screen again and it got stuck again. Killing the app and immediately trying again was successful.

The observed pattern is thus: Initial launch would get stuck at the splash screen due to an undiagnosed issue. Killing the stuck app and immediately relaunching would be successful. Suspend and resume works, but if a suspended app is terminated, we’re back to the initial launch problem upon relaunch.

Since it wasn’t possible to change any code in @angular/pwa I’m not sure what I did wrong. Following instructions for “Debugging the Angular service worker” I headed over to the debug endpoint ngsw/state where I saw it couldn’t download favicon.ico from the server. (Full debug output error message below.) I could see the file exists on the server, so I don’t understand why this PWA service worker could not download it. At the moment I’m at a loss as to how to diagnose this further. For today I’m going to declare a partial success and move on.

[UPDATE: I’ve figured it out. By default the PWA service worker assumes the app was deployed to server root, which in this case was incorrect. Since it is hosted at https://roger-random.github.io/compass/ I needed to run “ng deploy --base-href /compass/“]


Source code for this project is publicly available on GitHub

Appendix

Full error from https://roger-random.github.io/compass/ngsw/state

NGSW Debug Info:

Driver version: 15.2.8
Driver state: EXISTING_CLIENTS_ONLY (Degraded due to failed initialization: Failed to retrieve hashed resource from the server. (AssetGroup: app | URL: /favicon.ico)
Error: Failed to retrieve hashed resource from the server. (AssetGroup: app | URL: /favicon.ico)
    at PrefetchAssetGroup.cacheBustedFetchFromNetwork (https://roger-random.github.io/compass/ngsw-worker.js:479:17)
    at async PrefetchAssetGroup.fetchFromNetwork (https://roger-random.github.io/compass/ngsw-worker.js:449:19)
    at async PrefetchAssetGroup.fetchAndCacheOnce (https://roger-random.github.io/compass/ngsw-worker.js:428:21)
    at async https://roger-random.github.io/compass/ngsw-worker.js:528:9
    at async https://roger-random.github.io/compass/ngsw-worker.js:519:9
    at async https://roger-random.github.io/compass/ngsw-worker.js:519:9
    at async https://roger-random.github.io/compass/ngsw-worker.js:519:9
    at async https://roger-random.github.io/compass/ngsw-worker.js:519:9
    at async https://roger-random.github.io/compass/ngsw-worker.js:519:9
    at async https://roger-random.github.io/compass/ngsw-worker.js:519:9)
Latest manifest hash: ecc53033977c5c6ddfd3565d7c2bc201432c42ff
Last update check: 37s199u

=== Version ecc53033977c5c6ddfd3565d7c2bc201432c42ff ===

Clients: 

=== Idle Task Queue ===
Last update tick: 42s670u
Last update run: 37s668u
Task queue:


Debug log:

[37s320u] Error(Failed to retrieve hashed resource from the server. (AssetGroup: app | URL: /favicon.ico), Error: Failed to retrieve hashed resource from the server. (AssetGroup: app | URL: /favicon.ico)
    at PrefetchAssetGroup.cacheBustedFetchFromNetwork (https://roger-random.github.io/compass/ngsw-worker.js:479:17)
    at async PrefetchAssetGroup.fetchFromNetwork (https://roger-random.github.io/compass/ngsw-worker.js:449:19)
    at async PrefetchAssetGroup.fetchAndCacheOnce (https://roger-random.github.io/compass/ngsw-worker.js:428:21)
    at async https://roger-random.github.io/compass/ngsw-worker.js:528:9
    at async https://roger-random.github.io/compass/ngsw-worker.js:519:9
    at async https://roger-random.github.io/compass/ngsw-worker.js:519:9
    at async https://roger-random.github.io/compass/ngsw-worker.js:519:9
    at async https://roger-random.github.io/compass/ngsw-worker.js:519:9
    at async https://roger-random.github.io/compass/ngsw-worker.js:519:9
    at async https://roger-random.github.io/compass/ngsw-worker.js:519:9) Error occurred while updating to manifest 271c8a71bf2acb8075fc93af554137c2e15365f2
[37s229u] Error(Failed to retrieve hashed resource from the server. (AssetGroup: app | URL: /favicon.ico), Error: Failed to retrieve hashed resource from the server. (AssetGroup: app | URL: /favicon.ico)
    at PrefetchAssetGroup.cacheBustedFetchFromNetwork (https://roger-random.github.io/compass/ngsw-worker.js:479:17)
    at async PrefetchAssetGroup.fetchFromNetwork (https://roger-random.github.io/compass/ngsw-worker.js:449:19)
    at async PrefetchAssetGroup.fetchAndCacheOnce (https://roger-random.github.io/compass/ngsw-worker.js:428:21)
    at async https://roger-random.github.io/compass/ngsw-worker.js:528:9
    at async https://roger-random.github.io/compass/ngsw-worker.js:519:9
    at async https://roger-random.github.io/compass/ngsw-worker.js:519:9
    at async https://roger-random.github.io/compass/ngsw-worker.js:519:9
    at async https://roger-random.github.io/compass/ngsw-worker.js:519:9
    at async https://roger-random.github.io/compass/ngsw-worker.js:519:9
    at async https://roger-random.github.io/compass/ngsw-worker.js:519:9) initializeFully for ecc53033977c5c6ddfd3565d7c2bc201432c42ff
[37s110u] Error(Failed to retrieve hashed resource from the server. (AssetGroup: app | URL: /favicon.ico), Error: Failed to retrieve hashed resource from the server. (AssetGroup: app | URL: /favicon.ico)
    at PrefetchAssetGroup.cacheBustedFetchFromNetwork (https://roger-random.github.io/compass/ngsw-worker.js:479:17)
    at async PrefetchAssetGroup.fetchFromNetwork (https://roger-random.github.io/compass/ngsw-worker.js:449:19)
    at async PrefetchAssetGroup.fetchAndCacheOnce (https://roger-random.github.io/compass/ngsw-worker.js:428:21)
    at async https://roger-random.github.io/compass/ngsw-worker.js:528:9
    at async https://roger-random.github.io/compass/ngsw-worker.js:519:9
    at async https://roger-random.github.io/compass/ngsw-worker.js:519:9
    at async https://roger-random.github.io/compass/ngsw-worker.js:519:9
    at async https://roger-random.github.io/compass/ngsw-worker.js:519:9
    at async https://roger-random.github.io/compass/ngsw-worker.js:519:9
    at async https://roger-random.github.io/compass/ngsw-worker.js:519:9) Error occurred while updating to manifest 271c8a71bf2acb8075fc93af554137c2e15365f2

Notes on Angular “Service Workers & PWA” Guide

Reading through web.dev’s “Learn PWA!” guide was quite a lot of information to absorb, much of which has already leaked out of my brain. I’d need a lot more practice at designing and building web applications before I can understand and retain the full range of PWA capabilities. Fortunately, we don’t need to understand everything. We can start small, leveraging libraries that expose commonly desired functionality. There are general PWA libraries like Workbox, and most popular web app frameworks also have an optional PWA library. Angular’s take is introduced in “Service Workers and PWA“, one of Angular’s Developer Guides.

I was relieved to learn that Angular 15’s @angular/pwa library was exactly the “start small” option I had hoped for. Installing the library adds a service worker implementation of fundamental service worker tasks: cache the bundles and assets of an Angular app, serves them as needed while running as PWA, and updates those files if newer versions are found on the server. This is a small subset of all the features I saw covered in “Learn PWA!” but it’s enough to turn an Angular app into a PWA!

Underscoring the potential complexity of PWAs, the longest page in this Angular PWA developer guide is “Service worker in production” which talks about all the ways PWAs can go wrong and how an Angular developer can fix it. It’s possible the author of this guide just wants to be through, and I certainly appreciate honesty and detail. Much better than optimistically assuming nothing will go wrong. Still, seeing all the ways things can go wrong isn’t terribly confidence inspiring for a beginner.

If an Angular web app author wants to go beyond this basic service worker, I’m not sure if it’s built to be extensible or if said author is expected to write their own service worker from scratch. The developer guide didn’t say anything either way. Also unknown to me is whether trying to use a library like Workbox would risk collisions with the default service worker implementation. I saw no warnings about that, either.

I’m just going to start small and use this library to turn my Compass web app into a basic PWA without worrying about extra features.

Notes on web.dev “Learn PWA!”

Every browser imposes their own user interface cluttering up the screen, a fact of life for all web apps. This clutter motivated me to give my Compass web app a full screen option to get rid of those browser interface elements. It’s pretty good, but it requires the user to press that “Go Fullscreen” button. What if a web app can launch in full screen state, just like native apps? That’s one of many “native app like” upsides to a PWA (Progress Web App) so I started reading “Learn PWA!” published by the Google Chrome developer relations team at web.dev. The technology has promise but today’s landscape has a lot of differences across browser support that make a developer’s life difficult.

A core component of PWA is the “service worker”, a chunk of JavaScript associated with a web app but runs behind the scenes separately from the rest of web app code. It has the ability to intercept all network requests of a web app, acting like a web server to the rest of the web app but running without a server. This makes it possible for a PWA to run without a network connection, just like native apps could. Making server-like behavior possible are a series of technologies, most of which are usable independent of PWAs.

The service most surprising to me was IndexedDB API, a structured storage database available to web apps across most modern browsers. It is a NoSQL database along the lines of MongoDB, except running entirely within the browser. Wow! And here I thought web apps were still limited to cookies for data storage. However, like cookies, data stored in IndexedDB can be discarded by the user at any time. Therefore it is necessarily limited to short-term storage scenarios. Like a PWA running offline, tracking data to be uploaded to the server once connectivity is restored.

Since service workers run behind the scenes, outside the life cycle and scope of standard web app code, it can get tricky to debug problems. An entire section Tools and Debug is dedicated to discussion about it. Some of the tips are useful beyond PWAs, like port forwarding from development desktop to Android physical devices. I think this would have helped me with my Compass web app, with its device-specific hardware.

Speaking of device-specific behavior, PWA offers the promise of a single codebase that can run across multiple devices, but this course is realistic about the fact that current browser implementations vary widely and require platform-specific knowledge. This gets worse the further we get away from core behavior. In the Enhancements section, there were more about how iOS Safari differs from Android Chrome than there were about behavior they had in common. What a mess.

From this “Learn PWA!” guide I’ve learned that PWAs start with a relatively simple core set of features (caching and network call interception) but can get very complex very quickly for ambitious developers who want to advanced features. Going hand-in-hand with that power is the potential for things to go very, very wrong. The one that made me grimace is the fact a misbehaving service worker could intercept F5 (refresh) preventing us from loading updated code. Aack! There’s a lot to learn beyond this guide. The web.dev team offers a six-part hands-on PWA training course to supplement this guide, and of course there are other websites out there with additional resources.

It seems to me that PWA & related API were designed to offer maximum flexibility. Which is why a web app author is responsible for their own service worker so they can do exactly what they need in the context of their web app. However, in practice most web apps will be very similar. In order to minimize people copying and pasting code from random StackOverflow pages, the Chrome team has built the Workbox library to deliver code implementing popular behavior in a single library. This is useful. Furthermore, many web application frameworks have their own libraries for turning their applications into PWAs. Given my brief exposure to Angular, my next stop is to read up on Angular’s PWA library.

First Impressions: Proxmox VE vs. TrueNAS SCALE

I’ve spent a few hours each on Proxmox VE and TrueNAS SCALE, the latter of which is now hosting both my personal media collection and a VM-based Plex Media Server view of it. Proxmox and TrueNAS are both very powerful pieces of software with a long list of features, a few hours of exposure barely scratched the surface. They share a great deal of similarities: they are both based on Linux, they both use KVM hypervisor for their virtual machines, and they both support software-based data redundancy across multiple storage drives. (No expensive RAID controllers necessary.) But I have found a distinct difference between them I can sum up as this: TrueNAS SCALE is a great storage server with some application server capabilities, and Proxmox VE is a great application server with an optional storage server component.

After I got past a few of my beginner’s mistakes, it was very quick and easy to spin up a virtual machine with Proxmox interface. I felt I had more options at my disposal, and I thought they were better organized than their TrueNAS counterparts. Proxmox also offers more granular monitoring of virtual machine resource usage. With per-VM views of CPU, memory, and network traffic. My pet feature USB passthrough allows adding/removing USB hardware from a virtual machine live at runtime under Proxmox. Doing the same under TrueNAS requires rebooting the VM before USB hardware changes are reflected. Another problem I experienced under TrueNAS was that my VM couldn’t see the TrueNAS server itself on the network. (“No route to host”) I worked around it by using another available Ethernet port on my server, but such an extra port isn’t always available. Proxmox VM could see their Proxmox host just fine over a single shared Ethernet port.

I was able to evaluate Proxmox on a machine with a single large SSD that hosts both Proxmox itself and virtual machines. In contrast, TrueNAS requires a dedicated system drive and additional separate data storage drives. This reflects its NAS focus (you wouldn’t want to commingle storage and operating data) but it does mean evaluating TrueNAS requires a commitment at least two storage devices versus just one for Proxmox.

But storage is easy and (based on years with TrueNAS CORE) dependable and reliable with redundant hardware. This is their bread-and-butter and it works well. In contrast, data storage in Proxmox is an optional component provided via Ceph. I’ve never played with Ceph myself but, based on skimming that documentation, there’s a steeper learning curve than setting up redundant storage with TrueNAS. Ceph seems to be more powerful and can scale up to larger deployments, but that means more complexity at the small end before I can get a minimally viable setup suitable for home use.

My current plan is to skip Ceph and continue using TrueNAS SCALE for my data storage needs. I will also use its KVM hypervisor to run a few long-running virtual machines hosting associated services. (Like Plex Media Server for my media collection.) For quick experimental virtual machines who I expect to have a short lifespan, or for those that require Proxmox specific feature (add/remove USB hardware live, granular resource monitoring, etc) I’ll run them on my Proxmox evaluation box. Over the next few months/years, I expect to better able evaluate which tool is better for which job.

Plex Media Server in TrueNAS SCALE Virtual Machine

After trying and failing to use the default method to run Plex Media Server via TrueNAS SCALE’s “App” catalog, I’m falling back to a manual route: spinning up a virtual machine with Ubuntu Server 22.04 to run Plex Media Server with my own preferred settings. I suppose I could learn about Helm charts so I could write one to run Plex my way, but at the moment I’m not too motivated to do so.

Recently I had been running Plex in a Docker container, which resolved my old gripes about FreeNAS plug-ins and FreeBSD freshports versions of Plex falling out of date. Plex developers maintain the container themselves and it gets updated in sync with official releases. A really nifty feature of their Docker container is that it doesn’t really have Plex in it: it has code to download and run Plex. In order to pick up an updated version of Plex, I don’t have to pull a new container. I just have to stop and restart it, and it downloads the latest and starts running it.

One subtlety of running Plex in Docker is the warning I shouldn’t use a mapped network drive for server configuration data. I had thought it would be a good way to keep my Plex database constantly backed up on a TrueNAS ZFS redundant drive array, but I abandoned that plan after reading a scary disclaimer on the Docker repository README: “Note: the underlying filesystem needs to support file locking. This is known to not be default enabled on remote filesystems like NFS, SMB, and many many others. The 9PFS filesystem used by FreeNAS Corral is known to work but the vast majority will result in database corruption. Use a network share at your own risk.

I could install Docker Engine in my virtual machine for Plex, and repeat my configuration, but it seems weird to have nested virtualization mechanisms. (Docker inside KVM.) So this time I will run Docker as a service installed to my virtual machine, installed from Plex-maintained official repository. Migrating my Plex database started by finding the correct directory in both my existing Docker container volume and my new Ubuntu Server virtual machine at “/var/lib/plexmediaserver/“. Copying the files directly was not sufficient (Plex Media Service would fail to launch) because I forgot to update file permissions as well. That was fixed by running “chown -R plex:plex Library” on the library database directory tree.

One unexpected obstacle is that a VM running under TrueNAS SCALE couldn’t see the server itself. Doesn’t matter if I’m trying to use NFS mapping, SSH, or HTTP, the server address is unreachable and times out with the error “No route to host”. I confirmed this is not a general KVM issue, as my Ubuntu Desktop laptop with KVM and Proxmox VE had no such problems. I hypothesize it has something to do with how TrueNAS SCALE configured network bridge for virtual machines, but I don’t know enough Linux networking to know for sure. As a workaround, I could bind my virtual machine to the Realtek chipset Ethernet port integrated on my server’s motherboard. TrueNAS runs on an Intel NIC (network interface card) because FreeNAS didn’t support the Realtek onboard port years ago. Now under TrueNAS SCALE I have access to both ports, so I run the TrueNAS server on the Intel NIC and bind my virtual machines to motherboard onboard Ethernet. Not the most satisfying solution, but it uses what I have on hand and is good enough to inform my first impressions.

TrueNAS and Plex Media Server

A painless and uneventful TrueNAS migration from FreeBSD-based CORE to their newer Linux-based SCALE is the latest in a long series of successful operations with this line of software. I decided to build a machine for home storage about six years ago and chose TrueNAS (called FreeNAS at the time) and it has worked flawlessly as a storage appliance ever since. There has been no loss of data from software failures, and it has successfully recovered from multiple hard drive failures. Based on my experience, I can heartily recommend TrueNAS for reliable data storage.

In addition to simple and reliable data storage capabilities, FreeNAS/TrueNAS also has an application services side. I’ve had a bumpier relationship with those features. Among the data stored on my TrueNAS box is my personal music collection, and I’ve been using Plex as one of several ways I consume my media. Plex Media Server has thus been my guinea pig for TrueNAS application hosting and finding problems with each. I’ve tried using it as a FreeNAS Plugin (stale and infrequently updated), as a self-managed application inside a FreeBSD jail (less stale but still a significant delay), to a Docker container running inside an Ubuntu virtual machine (timely updates but bhyve hypervisor has problems with Ubuntu) and now that I’ve migrated to TrueNAS SCALE I have new options to try.

Plex Media Server is one of the options under TrueNAS SCALE’s “Apps” menu representing a collection of Helm charts. I have some vague idea this mechanism is related to Kubernetes, but I haven’t invested time into learning the details as I just wanted to use it as a point-and-click user. I tried to create an instance with “Enable Host Path for Plex Data Volume” option pointing to my existing media share. My attempt failed with the following error:

Error: [EINVAL]
chart_release_create.app
VolumeMounts.data.hostPathEnabled.hostPath: Invalid mount path. 
Following service(s) use this path: SMB Share, NFS Share

A bit of web searching found this is expected behavior: in order to avoid any potential problems with conflicting operations, helm charts will verify that each app has exclusive control to all volumes before proceeding. This is a reasonable thing to do for most applications, but unnecessarily cautious for media data on a read-only network share. And furthermore, it is not compatible with my media consumption pattern which requires leaving SMB and NFS sharing running. Thus, I add “Plex Helm Chart” to the running list of TrueNAS application service I’ve tried and failed.

I will now try a different approach: create a virtual machine for running Plex.

Successful TrueNAS CORE to SCALE Migration

I took a quick test drive of Proxmox VE and first impressions looked good. Including a feature that I considered important: USB passthrough (also known as USB device redirection) for virtual machines. It was something I had a chance to try earlier and really liked. Thinking back to that experiment, I remembered my motivation for investigating KVM hypervisor was because I had problems with the bhyve hypervisor of TrueNAS CORE and wanted to try something else.

Since I had TrueNAS already up and running, I looked into switching from TrueNAS CORE to TrueNAS SCALE. The difference between sibling products is that CORE was built on FreeBSD and SCALE was built on Linux. Moving to Linux also meant a change from bhyve hypervisor I’ve had problems with to KVM hypervisor that has worked well. However, when I last looked at TrueNAS SCALE, it was at version 22.02 (“Angelfish”) and it didn’t support USB passthrough. Checking the issues database after my Proxmox test drive, I saw that USB passthrough is now in 22.12 (“Bluefin”). This feature made it compelling enough for me to migrate.

TrueNAS documentation includes a page dedicated to this process: Migrating from TrueNAS CORE to SCALE. I found it interesting that the migration is only supported one-way: CORE to SCALE and not the reverse. This strongly hints that TrueNAS CORE is on its way out, so it is good that I have motivation to move now instead of being forced to later.

I only had a few minor tasks to prepare for the migration, as I hadn’t been using any of the TrueNAS features that would make migration challenging. The upgrade process itself was impressively seamless. The documentation page has paragraphs of information about upgrading using an ISO file or using a “Manual Update” file, but the easiest method was given only a single sentence: “The easiest method is to upgrade from the CORE system UI, but your system must have the CORE 13.0 major release installed to use this method.

I am running CORE 13 and this meant I go to the software updates page where I usually pick up system updates. There is a drop-down box where I can select an update train, and one of the options is to migrate to SCALE. I selected that option, confirmed, and within half an hour I was running TrueNAS SCALE. No fuss, no muss. All of my ZFS data volumes carried over, as did my network shares. That’s all I could ask for in a NAS migration. I was very impressed at how smooth it was.

After I confirmed all of my network shares were working as expected, I created a new virtual machine to test USB passthrough. Results were mixed. The good news is that USB passthrough exists and works. The bad news is that USB device configuration for virtual machines don’t seem to take place immediately. I needed to reboot the virtual machine before that USB device is visible and accessible by the VM.

This is fine for mainstream scenarios like USB license keys that stay plugged in. It doesn’t work so well for ESPHome where I want to plug in an ESP8266/ESP32 microcontroller and update it. Still, it’s better than nothing. Since I rarely perform the USB initial firmware flash, I guess having to reboot the VM isn’t a huge deal. But it does mean I’m going to hold off migrating my Home Assistant OS VM, I’ll migrate something else first to test the waters.

My First Proxmox VM

After using an old laptop to dabble with running virtual machines under KVM hypervisor, I’ve decided to dedicate a computer to virtual machine hosting. The heart of the machine are the CPU, memory, and a M.2 SSD all mounted to a small Mini-ITX mainboard. On these pages, they were formerly the core of Luggable PC Mark II, which was decommissioned and disassembled two years ago. Now it will run Proxmox VE (Virtual Environment) which offers both virtual machine and container hosting managed with a browser-based interface. Built on top of a Debian Linux distribution, Proxmox uses KVM as its virtual machine hypervisor which I’ve used successfully before.

Enterprise Subscription

I downloaded Proxmox VE 7.4, latest as of this writing, and its installation was uneventful. Its setup procedure no more complex than an Ubuntu installation. Once up and running, the first dialog box to greet me was a “You haven’t paid for an Enterprise subscription!” reminder. This warning dialog box would repeat every time I log on to the administration dashboard. Strictly speaking, a subscription is optional for running core features of Proxmox. A fraction of the Enterprise repository features are available by switching to the no-subscription repository, which has a far less comprehensive service level agreement. If I end up loving Proxmox and using it on an ongoing basis, I may choose to subscribe in the future. In the meantime, I have to dismiss this dialog every time I log on, even when I’m on the no-subscription repository. I understand the subscription is what pays the bills for this project so I don’t begrudge them for promoting it. A single dialog box per logon isn’t overly pushy by my standards.

ISO Images for Operating System Installation

My first impression of the administration interface is that it is very tightly packed with information. A big blue “Create VM” button in the upper right corner made it obvious how to create a new virtual machine, but it took some time before I figured out how to install an operating system on it. During VM creation there’s a dialog box for installation media, but I couldn’t upload Ubuntu Server 22.04 ISO on that screen. It took some poking around before I found I need to click on the Proxmox node representing my computer, click on its local storage, and at that point I could upload an ISO. Or, conveniently, I could download from an URL if I didn’t have an ISO to upload. I could even enter the SHA256 checksum to verify integrity of the download! That’s pretty slick. (Once I’ve found it.)

Helpful Help

After an installation ISO was on my Proxmox host, everything else went smoothly. This was helped tremendously by the fact every Proxmox user interface has a link to its corresponding section in online HTML documentation. I’ve learned to like this approach, because it lets me see that information in context of other related information in the same section. In contrast, clicking help in TrueNAS would give me just a short description. If that’s not enough, I’ve got to hit the web and search on my own.

USB Passthrough: Success

Once my virtual machine was up and running, I tested my must-have feature: USB passthrough. While the virtual machine is up and running, I can go into Proxmox interface and add a USB passthrough device. It immediately showed up in the virtual machine as if I had just hot-plugged the USB hardware into a port. Excellent! This brings it to parity with my existing Home Assistant VM setup using Ubuntu + Virtual Machine Manager and ahead of TrueNAS SCALE 22.02 (“Angelfish”) which lacked USB passthrough.

When I looked at TrueNAS SCALE earlier with an eye to running my Home Assistant VM, I found the TrueNAS bug database entry tracking the USB passthrough feature request. Revisiting that item, I saw USB passthrough has since been added to TrueNAS SCALE 22.12 (“Bluefin”). Well, now. That means it’s time for another look at TrueNAS SCALE.

Hello Proxmox Virtual Environment

Last time I played with virtualization, my motivation was to run Home Assistant Operating System (HAOS) within a hypervisor that can reliably reboot my virtual machines. I was successful running HAOS under KVM (kernel-based virtual machine) on an old laptop. A bonus feature of KVM was USB passthrough, allowing a virtual machine to access USB hardware. This allowed ESPHome to perform initial firmware flash. (After that initial flash, ESPHome can update wirelessly, but that first flash must use an USB cable.) Once I had a taste of USB passthrough, it has been promoted from a “bonus” to a “must-have” feature.

I wasn’t up for learning the full suite of command-line tools for managing KVM so I installed Virtual Machine Manager for a friendlier graphical user interface. Once everything was setup for HAOS, it was easy for me to add virtual machines for experiments. Some quick and fleeting, others lasting weeks or months. And when I’m done with the experiment, I could delete those virtual machines just as easily. I could install software within a VM without risk of interference from earlier experiments, because they were isolated in entirely different VMs. I now understand the appeal of having a fleet of disposable virtual machines!

With growing VM use, it was inevitable I’d start running into limitations of an old laptop. I had expected the processor to be the first barrier, as it was a meager Core i5-3320M with two hyperthreaded cores. But I hadn’t been running processor-intensive experiments so that CPU was actually fine. A standard 2.5″ laptop hard drive slot made for easy upgrades in SSD capacity. The biggest barrier turned out to be RAM: there was only 4GB of it, and it doesn’t make much economic sense to buy DDR3 SODIMM to upgrade this old laptop. Not when I already have more capable machines on hand I could allocate to the task.

This laptop screen has only 1388×768 resolution, which was a minor impediment. In its use as KVM host, I only ever have to look at that screen when I bring up Virtual Machine Manager to perform VM housekeeping. (Those I have yet to learn to do remotely with virsh commands over ssh.) For such usage, the screen is serviceable but also cramped. I frequently wished I could manage KVM remotely from my desktop with large monitor.

Now that I’m contemplating setting up a dedicated computer, I decided to try something more task-focused than Ubuntu Desktop + Virtual Machine Manager combination I have been using. My desire to dedicate a computer to host a small number of virtual machines under KVM hypervisor, managed over local network, led me to Proxmox Virtual Environment. I learned about Proxmox VE when an acquaintance posted about setting it up on their machine a few weeks ago. As I read through Promox website I thought “That would be interesting to investigate later.”

It is time.

Bolting SV200 Wheel to Stand

I wanted to play my driving game Forza Horizon 5 with a steering wheel controller and bought the cheapest option on Amazon. When delivered, I found on my doorstep a perfectly serviceable if basic wheel and pedal setup. A Superdrive SV200 wheel+pedal(*) is made almost entirely of plastic which is not very rigid but should be sturdy enough to last until I lose interest, or until I decide to upgrade to a better wheel, whichever comes first. But the simple lightweight construction also meant it’s hard to keep it in place. My old Xbox 360 steering wheel had a clamp for fastening to my IKEA LACK coffee table, Superdrive SV200 had four small suction cups which are better than nothing but not nearly good enough.

I thought about using bar clamps I had on hand but SV200 base had a sloped top surface making it difficult to clamp. I ruled out Velcro as not strong enough and I ruled out glue as too permanent. Then I considered removable metal fasteners like machine screws and bolts. A standard threaded bolt and nut would have the same problem as a clamp: the top surface is not flat.

Looking in my jar of salvaged fasteners, I thought this set might do the trick. Salvaged from a retired IKEA PELLO chair, the threaded nut is cylindrical to fit within a hole drilled in wood. It could also rotate to adapt to a SV200’s sloped top.

What shall I bolt my SV200 to? I’m not opposed to drilling holes in my IKEA LACK coffee table as they’re pretty cheap. But they’re also very thick and these salvaged PELLO bolts aren’t long enough. From experience I know they’re also a bit too light: when I have my Xbox 360 wheel clamped to my coffee table I could still move the whole thing (wheel + table) when I’m excited in the middle of playing. I looked around the house for something that is (1) the correct height, and (2) have some heft, and (3) have a thin metal top that I am willing to drill into for fastening a SV200. After a few days of coming up empty, I resigned to the conclusion that I would have to spend money and buy something.

I again looked to Amazon for the cheapest option and chose this stand. (*) Made of simple sheet metal welded to rectangular tubes, it was designed to be compatible with some popular Logitech wheels and can fold up when not in use. (Very useful.) There were holes predrilled presumably matching the advertised compatible Logitech wheels, but obviously not for a SV200.

One reason I chose a cheap SV200 was so I wouldn’t be afraid to open it up and make my own modifications. It was mostly empty inside as expected, so it wasn’t difficult to avoid existing components as I drilled some holes to match those already on the stand.

Cylindrical nuts of salvaged IKEA PELLA bolts worked exactly as I hoped they would. Now my SV200 is securely bolted to a cheap but sturdy and hefty stand. First few playing sessions were promising, I’ll spend more time and see how things go. If I choose to upgrade to a better wheel, I could buy one of the Logitech units that should bolt directly to this stand without drilling. But I think I’m more likely to open the SV200 back up for additional modifications.

(Though I confess the most likely outcome is that I lose interest and it will sit and collect dust.)


(*) Disclosure: As an Amazon Associate I earn from qualifying purchases.

Superdrive SV200 Wheel and Pedals

Playing Forza Horizon 5 on my Xbox Series X made me think about getting a steering wheel controller. (Again.) For this effort, I decided to start cheap. Before I spend a lot of money on this I need to know I enjoy a wheel more than a controller thumb stick and, more importantly, that I actually spend time driving with the wheel. If I actually do both and find the cheap wheel wanting, then I can justify spending more money on a better wheel. I bought the cheapest wheel I could find on Amazon that day, a Superdrive SV200. (*)

It is advertised to be compatible with almost everything out there (PC, Xbox One, Switch, PlayStation 3 and 4 but not 5) which had the unfortunate side effect of multiple labels on each button. The user is expected to figure out which labels applied to their setup, which is a bit annoying but inevitable at this end of the market. The wheel diameter is much smaller than typical of actual cars, but it’s big enough for me to grasp with both hands and more importantly not a tiny joystick with no resemblance to a steering wheel. Said wheel rotates through 180 degrees range of motion smoothly, but there’s quite a bit of play in the plastic mechanism allowing the wheel to flex a few degrees in every direction. Jury is still out on whether that flex is a problem. There are only two pedals. Their range of motion is small, but enough for me to modulate brake and throttle. Which makes them better than certain cheap analog potentiometers I’ve encountered in the past. But more importantly, the pedals feel sturdy enough I’m not worried about breaking them in the heat of a race.

Connectivity is via a USB cable, no wireless connection here. I thought maybe the electronics would present themselves as a USB HID controller of some sort, but it wasn’t quite that simple because I was expected to assemble a chain of devices by plugging my Xbox Core controller into the wheel. (Xbox –(USB Cable)–> SV200 –(USB Cable)–> Xbox controller.) I guess this was a way for SV200 to gain Xbox connectivity without paying Xbox licensing fees?

With Xbox controller plugged in to SV200, which is then plugged into the Xbox console, I brought up the controller information panel. It shows a single controller and not two. I wonder if the SV200 intercepts USB messages between the console and the controller? Whatever the mechanism was, it meant I could use the wheel and the Xbox thinks it’s coming from the controller. For feedback I get generic rumbling effects on the wheel instead of the controller as well. But not totally reliably: sometimes the controller starts rumbling instead of the wheel and I don’t know why. I just know it startled me whenever it happened.

SV200 appears to only convey controller level in-palm rumble, it is not a force feedback wheel and does not convey road texture and traction as expensive wheels advertise of doing. It also lacks the tactile trigger feedback of a standard Xbox One controller. In Forza Horizon, throttle trigger rumble signals traction control is active and brake trigger rumble for anti-lock brakes. I’ve come to appreciate that feedback and I might miss them when they’re gone. On the To-Do list: investigate whether more expensive peripherals include such feedback motors in their pedals.

Before I can decide how I feel about wheel flex or trigger rumbles, I have a more immediate problem. The SV200 is small and lightweight which is good at saving space but bad for staying still on my coffee table. The Xbox360 wheel had a sturdy clamp, but this wheel had only four small suction cups woefully inadequate for holding in place. I can’t really evaluate whether driving with this wheel is worth the effort when I’m constantly distracted working to keep the wheel in place. I need to fasten it more securely.


(*) Disclosure: As an Amazon Associate I earn from qualifying purchases.

Forza Horizon 5 Makes Me Want a Wheel Again

I’ve been a fan of the Forza Horizon series of games since the first one, where we cruised through highlights of Colorado, USA. I recently started playing the latest edition Forza Horizon 5 (*) taking place in a fictionalized Mexico. And as is typical when playing a driving game, I find it somewhat unsatisfying to use a standard (“Core”) Xbox gaming controller. I started thinking about getting a steering wheel controller again. I tried it once before in the Xbox 360 era, but that ended in a teardown treatment as I didn’t use my 360 anymore.

That disassembled steering wheel was a first-party Microsoft accessory with full Xbox 360 branding. For the Xbox One era (including current Xbox Series S|X) Microsoft decided against making a first-party steering wheel peripheral. Instead, that market has been delegated to the existing peripheral ecosystem. We have a whole spectrum of options starting from very inexpensive sets made by manufacturers I’ve never heard of, up through midrange offerings from mainstream peripheral makers like Logitech and Thrustmaster, up through serious simulation components that cost more than the Xbox console itself.

I decided to start all the way at the cheapest end of the spectrum for two reasons: One, I’ve already tried steering wheels once with the Xbox 360 wheel and didn’t use it as much as I thought I would. If history repeats itself at least I’ve wasted less money. And second, going cheap means I’ll be less intimidated about hacking into the wheel for my own customizations. I concede if I wanted a durable wheel to hack on, I should have kept my Xbox 360 wheel, but too late now.

The lowest Amazon bidder of the day was ~$60 for a Superdrive SV200. (*) Just a small wheel, a few buttons, and two minimalist pedals. Looking on Superdrive’s own website, it appears to be a French company which was a surprise. I didn’t know there were French companies in this space, good for them. The product it was still manufactured in China, and that part was no surprise.

I ordered one and waited for its arrival.


(*) Disclosure: As an Amazon Associate I earn from qualifying purchases.

Snow Globe Liqueur LED

This Christmas themed novelty product “Snowglobe Orange & Gingerbread Gin Liqueur” is an alcohol beverage packaged in a globular glass bottle resembling a snow globe. Contributing to the theme is a small quantity of edible gold flakes in the liquid that can float like snowflakes, illuminated by LEDs embedded in the base. I didn’t care about the alcohol, but I asked (and was given) the empty bottle afterwards so I could remove that LED circuit to see an example of low-cost disposable production.

Each press of the bottom toggles LED power on/off. There may be a sleep timer to turn off LED after some period, but I didn’t test that.

The LED circuit board is surrounded by a circle of soft foam, which is in turn glued to the bottle. It peeled off easily.

Four surface-mounted white LEDs are visible, labeled L1 through L4. Each pair (L1+L2, L3+L4) are in series. The two 3V coin-cell batteries are also in series for 6V power supply. Battery positive terminal is connected to both pairs of LED series at their anode (+) and control chip U1. Battery ground is connected to control chip U1 and nowhere else. U1 has six pins: two pins for power and ground, two for LED cathode (one for each pair), and two more for the switch.

Peeling circuit board away from foam, the two switch terminals are visible. Closing this circuit is the job of a small piece of conductive metal, here still held by the bottom sticker. The metal is a thin springy sheet stamped into a dome shape. Pressing and collapsing the dome closes the switch circuit. Releasing the dome lets it pop back up and open the circuit.

Anything that conducts electricity bridged across those circuit board contacts will toggle LED on/off.

This was designed to be thrown away along with the bottle once the alcohol has been consumed. I’ve tossed the bottle into glass recycle bin and I’m keeping the light, even though at the moment I have no use for a dim battery-powered LED circuit with push on/off.

Compass Project Version 1.0 Complete

Along with source code, GitHub code repositories have an “Issues” section for tracking problems. I’ve logged the outstanding problems and their workarounds for my Compass project. Since fixing them are outside of my control, I am going to declare version 1.0 complete. Now to wrap up before moving on to something else.

The primary goal of this project was to practice working with Angular framework, and that goal is a success. I knew going in that Angular wouldn’t be the best tool for the job: its architecture was designed to handle much larger and more complex web apps than my Compass. But I wanted a chance to practice Angular with something small, and Compass succeeded at that.

An entirely expected consequence of my initial decision is a web app far larger than it needs to be. I knew from earlier experiments a bare-bones Angular app doing nothing more than <body><h1>Hello World</h1></body> start at over 200 kilobytes. I wasn’t too impressed by that, but as a practical matter I accept this is not considered huge in today’s web world. I found an online tool https://bundlescanner.com/ which lists download sizes for the given URL, and most of the sites I visit weigh in at several megabytes. Even the legendarily lightweight Google home page downloads over 300 kilobytes. Judged in that context, 200 kilobytes of overhead are unlikely to be a dealbreaker by themselves. Not even in space-constrained situations, thanks to the fact it compresses very well.

Since it’s such a small app, I didn’t touch upon very much beyond Angular core. I created just two components, one (compass-needle) inside the other (capability-check) so there was no routing at all. (It is literally a ‘single-page application’). I created two services who distributed information via RxJS, but I didn’t need to deal with server communication over a network. It’s good to start small to get over beginner hurdles. My next Angular practice project can be more complex to expand my exploration frontier.

Unrelated to Angular, one thing I knew I needed to practice — and I got lots of it here — was CSS layout. This was the first project where I used media queries to react to portrait vs. landscape orientations, and it was great practice towards more responsive layouts in future projects. I know people can do great things with CSS, but I don’t count myself among them. I foresee a lot more hair-pulling in the future as I struggle to declare CSS rules to create what I have in my mind, but that’s the journey I know I need to take.

Compass Web App Workarounds

After giving my Compass web app the ability to go full screen, it’s working pretty much as I had imagined when I started this project. Except, of course, for the two problems that I believe to be browser bugs outside of my control. I’ve always known that real-world web projects have a lot of ugly workarounds for problems hiding across browser implementations, but I had thought I could avoid that by targeting a single browser. (Chrome on Android with experimental magnetometer API.) Sadly, no such luck. It is time to get hacking.

The vertical text issue is merely cosmetic and the easiest to fix. I want sideways-lr but it doesn’t work. Fortunately, vertical-lr is also a vertical text layout, just rotated in the opposite direction from the one I wanted. Because I only have a single line of text, adding transform: rotate(180deg) was enough to get the result I wanted. I believe there would be additional complications if there were more than one line of text, but that’s a problem I don’t have to deal with today. I opened a GitHub issue to track removing this workaround, but as a practical matter, there’s no real harm leaving this workaround in place even if sideways-lr starts working correctly.

The same could not be said of the magnetometer {referenceFrame: 'screen'} problem, where landscape-left receives the result for landscape-right and vice versa. While the workaround is the same, adding transform: rotate(180deg) to flip things around, I can’t leave this workaround the same way as I could vertical text. As soon as the upstream browser bug is fixed, my workaround rotation would cause the display to be wrong again. And even worse, there’s no way for me to determine within the app whether the workaround is applicable. I couldn’t issue a CSS media query for whether this bug is fixed! I don’t know of a graceful way to handle this, but at least I’ve opened an issue for it as well.

And finally for completeness, I opened an issue tracking the fact magnetometer API is a preview experiment. Because it is likely to change, this app could stop working at any time. I expect that magnetometer API would mature to become available across multiple platforms, not just Chrome on Android. Once adoption broadens, this app needs to be updated from experimental to standard API.

Compass Web App Going Full Screen

HTML started as a way to display text within a given width and whatever height is needed to accommodate that content, scrolling if necessary. My desire to create a single-page layout without scrolling feels like a perpetual fight to put a square peg in a round hole. I’ve seen layouts I like out in the world, so I believe it’s only a matter of practice to master all the applicable techniques. A tool I wanted to add to my toolbox is the ability to make my web app go full screen.

When my web app first loads up on Chrome browser for Android, I declared CSS layout to work within full viewport width and height. However, Chrome doesn’t actually show my app on the full viewport, because it has a lot of user interfaces in the way. A bar up top has the address and other related buttons, and a bar at the bottom has my open tabs and additional controls. Together they consume more than one third of overall screen space, far too much for tasks not related to my web app. Fortunately, this situation is only temporary.

As soon as I tap my app, both bars retreat. A small bar is left up top for the phone icons (clock, signal strength, battery) and a bar below reminding me I could drag to unveil more controls. I estimate they consume approximately one eighths of overall screen space. An improvement, but I can do even better by going full screen.

MDN page on fullscreen API makes it seem pretty straightforward, at least for updated browsers that support the official standard. The complication comes from its history: Going full screen was such a desirable browser feature that they were available in vendor-specific ways before they were standardized. To support such browsers, MDN pointed to the fscreen library which packaged all the prefixed variations together. Fortunately, a personal project like my Compass web app doesn’t need to worry about legacy browser support. Besides, they probably wouldn’t have the magnetometer API anyway.

After adding a button for triggering fullscreen request, I can make my app full screen and free of all browser UI. It doesn’t necessarily mean I have the entire screen, though. I noticed that on my phone (Pixel 7) my app was prohibited from the screen region where a hole was punched for the front-facing camera. When my app is fullscreen, that area is filled with black so at least it is not distracting even if it was unusable. Native Android apps can request to render into this “display cutout” area, but as far as I can tell browser apps are out of luck. That’s a relatively trivial detail I can ignore, but I have to devise workarounds for other problems out of my control.


Source code for this project is publicly available on GitHub

CSS Beginner Struggles: aspect-ratio and height

Reviewing CSS from web.dev’s “Learn CSS!” course provided a refresher on a lot of material and also introduced me to new material I hadn’t seen before. I had hoped for a bit of “aha” insight to help me with CSS struggles in my project, but that didn’t happen. The closest was a particular piece of information (Flexbox for laying out along one dimension, Grid for two dimensions) that told me I’m on the right track using Flexbox.

A recurring theme with my CSS frustration is the fact height and width are not treated the same way in HTML layout. I like to think of them as peers, two equal and orthogonal dimensions, but that’s not how things work here. It traces back to HTML fundamentals of laying out text for reading text in a left-to-right, top-to bottom languages like English. Like a typesetter, the layout is specified in terms of width. Column width, margin width, etc. Those were the parameters that fed into layout. Height of a paragraph is then determined by the length of text that could fit within specified width. Thus, height is an output result, not an input parameter, of the layout process.

For my Compass web app, I had a few text elements I knew I wanted to lay out. Header, footer, sensor values, etc. After they have all been allocated screen real estate, I wanted my compass needle to be the largest square that could fit within the remaining space. That last part is the problem: while we have ways to denote “all remaining space” for width, there’s no such equivalent for height because height is a function of width and content. This results in unresolvable circular logic when my content (square compass) is a function of height, but the height is a function of my content.

I could get most of the way to my goal with liberal application of “height: 100%” in my CSS rules. It does not appear to inherit/cascade, so I have to specify “height: 100%” on every element down the DOM hierarchy. If I don’t, height of that element collapses to zero because my compass doesn’t have an inherent height of its own.

Once I get to my compass, I could declare it to be a square with aspect-ratio. But when I did so, I find that aspect-ratio does its magic by changing element height to satisfy specified aspect ratio. When my remaining space is wider than it is tall, aspect-ratio expands height so it matches width. This is consistent with how the rest of HTML layout treats width vs. height, and it accomplishes the specified aspect ratio. But now it is too tall to fit within remaining space!

Trying to reign that in, I played with “height: 100%“, “max-height: 100%“, and varying combinations of similar CSS rules. They could affect CSS-specified height values, but seems to have no effect on height change from aspect-ratio. Setting aspect-ratio means height is changed to fit available width and I found no way to declare the reverse in CSS: change width to fit within available height.

From web.dev I saw Codepen.io offered ability to have code snippets in a webpage, so here’s a test to see how it works on my own blog. I pulled the HTML, CSS, and minimal JavaScript representing a Three.js <canvas> into a pen so I could fiddle with this specific problem independent of the rest of the app. I think I’ve embedded it below but here’s a link if the embed doesn’t work.

After preserving a snapshot of my headache in Codepen, I returned to Compass app which still had a problem that needed solving. Unable to express my intent via CSS, I turned to code. I abandoned using aspect-ratio and resized my Three.js canvas to a square whose size is calculated via:

Math.floor(Math.min(clientWidth, clientHeight));

Taking width or height, whichever is smaller, and then rounding down. I have to round down to the nearest whole number otherwise scroll bars pop up, and I don’t want scroll bars. I hate solving a layout problem with code, but it’ll have to do for now. Hopefully sometime in the future I will have a better grasp of CSS and can write the proper stylesheet to accomplish my goal. In the meantime, I look for other ways to make layout more predictable such as making my app full screen.


The source code for my project is publicly available on GitHub, though it no longer uses aspect-ratio as per the workaround described at the end of this poist.

Notes on web.dev “Learn CSS”

Designing portrait and landscape orientation layouts for my compass web app was the first time I applied my media query lessons. Despite browser bugs out of my control making the app largely useless in landscape mode, it was educational to get some hands-on exercise with CSS. With new appreciation for CSS as well as new questions about how things are supposed to work, I thought it was a good time for a refresher course. Instead of going through Codecademy’s CSS courses again, I decided to get a different perspective and go through “Learn CSS!” on web.dev.

This course was one of several on web.dev, which comes from Google Chrome’s developer relations team. I learned of this site by attending the completely online Google I/O developer conference in 2021 and had marked it as a resource to explore later. Today is the day! For interactive demonstrations, web.dev doesn’t have an in-browser development environment of Codecademy. It uses little pieces of embedded codepen.io playground instead. After this course, I have a slight preference for codepen because I could use it independently.

As of this writing, the course is split across 28 sections, each focused on a topic. There seems to be a podcast series related to this course, though the sections do not necessarily correspond one-to-one with podcast episodes. As a result of this organization, some material is duplicated across multiple sections. For example, 021 Animations had some obvious overlap with 025 Transitions. They tend to show up together, even though not all CSS transitions are animated and not all animations are for transitions. Given this commonality, they both warn to consider users who prefer not to have too many things moving onscreen. Stylesheets should query prefers-reduced-motion and cut back on the flashiness.

Side comments about prefers-reduced-motion is representative of a big difference between this course and the Codecademy course: This course reminds us that not everyone can use a computer the same way and implores us to keep the web accessible to all. So animation sections mention prefers-reduced-motion. Color sections reminds us to keep color-blindness in mind. And the Focus section explains how to make sure a site is usable by someone that has to navigate with tab instead of mouse or touchscreen. These are all good points.

Given my most recent layout experience, the most relevant sections started with 008 Layout. I was very amused by the brief history lesson at the start, where it mentioned early HTML layout were done with <TABLE>. I’m old enough to remember those days! I even used <TABLE> layout for my primitive SGVHAK Rover interface, much to the horror of some people. All of my web development education is part of my efforts to catch up to the latest tools like 009 Flexbox and 010 Grid. From my Google I/O 2021 notes, I also learned Chrome developer tools included a lot of layout debugging assistance. There was even a code lab touring CSS Grid debug tooling.

I’ve come across Flexbox and Grid in the Codecademy course, and it has been fuzzy when one tool would be better suited for another. This course has a rule of thumb that I find valuable: Flexbox is for laying out items along one dimension: our choice of row or column. Whereas Grid is for laying things out across two dimensions: we’re always dealing with both rows and columns.

Coming from the Chrome team, I was not surprised that some of this course gets into implementation details that I wasn’t sure was strictly relevant. In 004 Specificity they describe the point score algorithm for determining how a browser chooses between multiple applicable rules. Informative, but I don’t think it is important to memorize the scoring algorithm, or at least I hope not, because I don’t want to put in the time.

In all this course was packed of a lot of information, much of which were immediately useful for me. Plus other information that I might have to come back later to absorb. There are only a few things — like specificity point score — that I doubt would ever be useful. My future projects may yet prove me wrong, and the best way to know is to dive right back into working with CSS.

Compass Web App in Landscape Exposed Browser Bugs

I got my Compass web app deployed to GitHub Pages and addressed some variations in browser rendering. Once it was working consistently enough across browsers, I tackled the next challenge: creating CSS layout for landscape as well as portrait orientations. Built solely around media query for orientation, it was a great exercise for me to build experience with CSS layouts. Most of my challenges can be chalked up to beginner’s awkwardness, but there were two factors that seemed to be beyond my control.

Sideways Text

While in landscape orientation, I wanted my headline banner to be rotated in order to occupy less screen real estate. This is a common enough desire that CSS has provision for this via writing-mode. My problem is that my desired direction (top of word pointing to screen left) doesn’t seem to work, I could only get vertical text in the opposite direction (top of word pointing to screen right, 180 degrees from desired.) The MDN page for writing-mode had an example indicating it’s not my mistake. It has a table of examples in markup followed by two renderings. A bitmap showing expected behavior (here with my desired output circled in red):

And then the markup as rendered by Chrome 112 (with different behavior circled in red.)

Looking for a workaround, I investigated CSS rotate transform. The good news is that I could get text rotated in the direction I want with rotate(-90deg). The bad news is that only happens after size layout. Meaning my header bar is the sized as if the header text was not rotated, which is very wide and thus defeating the objective of occupying less screen real estate.

I guess I can’t get the layout I want until some bugs are fixed or until I find a different workaround. Right now the least-bad alternative is to use writing-mode vertical-lr, which rotates text the wrong way from what I wanted but at least it is vertical and compact.

Magnetometer Reference Frame

Landscape mode uncovered another browser issue. When initializing the magnetometer object, we could specify the coordinate reference frame. Two values are supported: “device” is fixed regardless of device orientation, and “screen” will automatically transform coordinate space to match screen orientation. The good news is that “screen” does perform a coordinate transform while in landscape mode, the bad news is the transform is backwards: each landscape orientation gives information appropriate to the other landscape orientation.

For reference, here’s my app in portrait mode and the compass needle pointing roughly north. For a phone, this is the natural orientation where “device” and “screen” would give the same information.

After rotating the phone, Chrome browser rotates my app to landscape orientation as expected. Magnetometer coordinates were also transformed, but it is pointing the wrong way!

Still Lots to Learn

These two issues are annoying because they are out of my control, but they were only a minority of the problems I encountered trying to make my little app work in landscape mode. Vast majority of the mistakes were of my own making, as I learned how to use CSS for my own layout purposes. Hands-on time makes concepts concrete, and such experience helps me when I go back to review documentation.


Source code for this project is publicly available on GitHub

Compass Web App Browser Variations

Once deployed to GitHub Pages (made easier by moving the project into its own GitHub repository) I could easily try my web app across more devices and browsers. This compass web app only really works on my Android devices with magnetometers, but the page would come up with placeholder data on every modern browser. And naturally, there are variations between browsers. The differences on iOS Safari weren’t surprising, but I was surprised at the differences between Microsoft Edge and Google Chrome as they both purportedly used the same Chromium engine.

The first and most obvious difference are update rates. All browsers would show compass needle moving in response to either real or placeholder data, but the update rate varies. On Microsoft Edge, the update rate would be on par with Chrome but would drastically slow down after several (~5) seconds without user interactivity. If I touch the needle, response rate picks back up for another few seconds before slowing down. I suspect this is a consequence of aggressive throttling of animation and/or timers in the goal of saving power.

Another difference are in page updates. One example on my is “{{magX | number:'1.2-2'}}” which is supposed to print the value of magX property to two decimal point precision. (Y and Z are handled the same way.) I update magX every time data is received, but that isn’t necessarily shown on screen. Chrome shows as expected but Edge never updates. There’s something different about how Angular runs its change detection between these two browsers. Until I understand how to work within the system, I can work around the problem by manually calling ChangeDetectorRef.detectChanges() to notify that new numbers need to be picked up.

Once I had portrait mode working more or less as intended, I started looking into landscape mode and found… uh… many more learning opportunities.


Source code for this project is publicly available on GitHub