A Pixelblaze is a small board who generates data signals for a color LED strip to display interesting dynamic patterns. These patterns are described via a program written in a web-based editor running on the Pixelblaze itself. It is a nifty little self-contained unit for projects that involve a large number of individually addressable LEDs. I have a prototype Pixelblaze V3 on hand for a candidate project. I’ll be using my blog here to publish a first draft of Pixelblaze general setup and configuration information, as well as documenting my work to apply a Pixelblaze to a specific LED project.
The first thing to do with a freshly unpacked Pixelblaze is to connect it directly to a computer’s USB port. A standard computer USB port will not provide enough power to drive a large LED strip, but it is a stable and known power source. It is useful for verifying a Pixelblaze was undamaged in shipping and for performing initial setup.
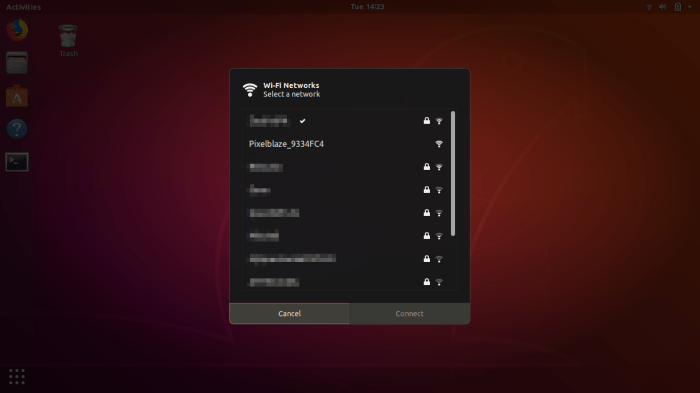
Less than a minute after being plugged in, a new Pixelblaze would show itself as an open WiFi access point our device could connect to.
![]()
Once connected, open a web browser and try to load any URL, we will be redirected to Pixelblaze WiFi Settings menu. The browser will complain there’s no internet access but this is expected: we’re just using this to connect to an actual WiFi access point. Select the network we want to use and login.
Optional: check the discovery service box. Because after this step is complete, Pixelblaze will not longer be an open access point: it would have joined the new network. To reconnect to Pixelblaze and resume setup, we will need to know its IP address. If this is not possible (or just inconvenient) check the discovery service box. This is an optional feature to let a Pixelblaze announce its address on a network.
![]()
Once Pixelblaze’s own WiFi access point disappears, our device can rejoin the original network and visit http://discover.electromage.com to see addresses for discovery-enabled Pixelblaze on the same network.
![]()
If discovery is not enabled and the Pixelblaze IP address is known, we can point our web browser to that address. Or if discovery is enabled, we can clicking “Open” from the Pixelblaze Discovery Service list. Once a Pixelblaze is configured for a WiFi network, the “Saved Patterns” menu is where it will start.
Change to Strip Settings menu to configure our Pixelblaze for our LED strip.
![]()
Name: This will show a Pixelblaze default name, we can optionally replace it with a friendlier one.
Brightness: This is a slider bar that defaults to 100% brightness. In the case of most LED strips, this will be a blindingly bright setting that consumes a lot of power. For our initial test and experimentation, we don’t need to blind ourselves or burn that much power. Move that slider lower: somewhere in the 10-20% range will still be easily visible.
LED Type: Change this to match the communication protocol used by the LED strip that the Pixelblaze will be driving. If the modules on a LED strip is not on the list, check online to see which of the listed modules are compatible and select that. Example: SK9822 LEDs are compatible with APA102, so we can select APA102 for LED strips that use SK9822 modules.
Pixels: Change this to match the number of modules on the LED display that the Pixelblaze will be driving. Example: a 5 meter long strip with 60 LEDs per meter will have a total of 5 * 60 = 300 pixels.
Data Speed: Leave this setting alone for now.
Color Order: Leave this setting alone for now.
Once the Strip Settings have been updated to match our intended LED output device, we shift our focus to hardware. Unplug the Pixelblaze from our computer, and warm up our soldering iron, it’s time to connect LED strip to Pixelblaze.
