I’m tearing apart an Amazon Fire tablet (SR043KL) with cracked front glass, and knowing full well this low-budget device would not have been designed to be easily serviceable. After I popped off the back shell, I quickly ran into things held by adhesives of one type or another. My first focus is to see if I can free the mainboard.
The easiest item to release is the battery connector. Two screws held a reinforcement metal plate and, once those two screws were removed, the battery connector popped free easily. On the right side of the battery, I had to peel off some tape to reveal a fairly standard connector for these ubiquitous Kapton yellow flexible circuit boards. The rear facing camera connector easily popped free, but peeling it away from double-sided tape holding it in place took more effort. On the upper-right corner was an enigma. I would eventually learn this was the cable for the touch digitizer glass panel, but after I freed the small connector nothing came loose. The large yellow square was held tight and I didn’t want to pry too hard in case it was soldered underneath to something. I left this for later.
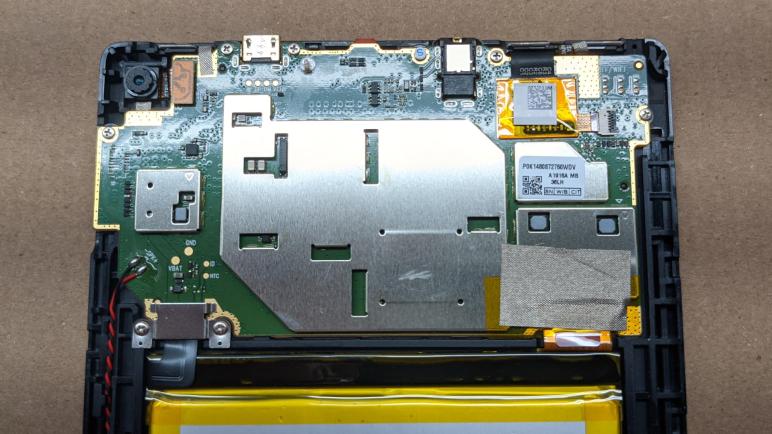
After I removed every visible screw, the mainboard remained stubbornly in place. Poking and prodding all around, I eventually noticed these two plastic claws.

Once freed from these claws, I could flip the mainboard over, still connected by the black touch digitizer cable I had yet to remove.

From here we can see metal reinforcement for the USB port and audio jack, each held down by two screws on either side of the corresponding socket. I think the red rubbery part is a cap over the microphone, next to the front-facing camera module. Springy metal fingers make contact with parts on the chassis. From left to right they are: power button (only two out of three contacts are used), the volume up/down buttons (only three out of four contacts used) and the WiFi/Bluetooth antenna. (All three contacts used.)
I had hoped there would be something interesting to see on this side of the board, but no luck. The opposite side is mostly hidden under soldered-on metal shielding, I think I need a heat plate to remove them nicely. For the moment, components on the mainboard would have to remain a mystery. So I set it aside and started working on a stubborn battery, accidentally severing the touch digitizer cable while doing so.

You only remove screen with heat gun or air blower at the top is a connector to screen on back top right is the unit that is connected prey the left side of tape and remove the connection easy if the unit separate from sçreen don’t worry on that area you see like a tape that keeps that unit in place easy to remove you have 2 so whent you put new screen it go thru that section don’t go crazy removing the board if battery Is drained leave in place remove old 2side tape and put new one instaletion is reverse easy take care 👍
LikeLike