Unity Without OpenGL ES 2.0 Is All Pink on Fire TV Stick

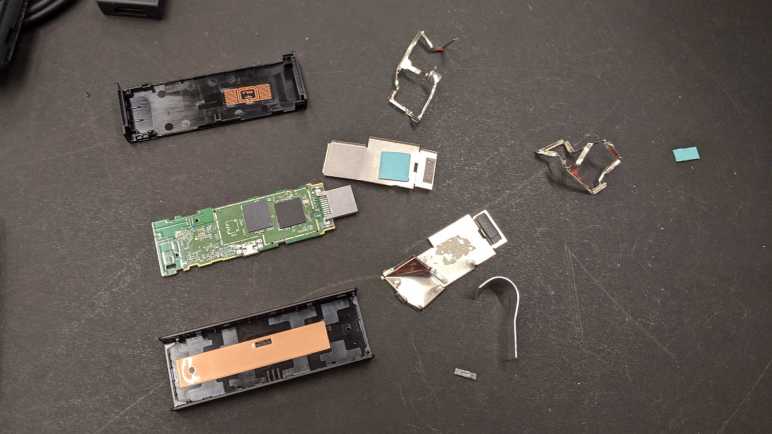
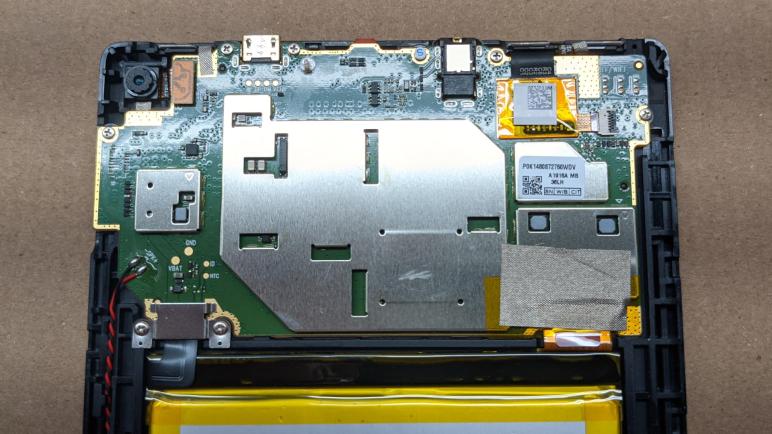
I dug up my disassembled Fire TV Stick (second generation) and it is now back up and running again. This was an entertaining diversion in its own right, but during the update and Android Studio onboarding process, I kept thinking: why might I want to do this beyond “to see if I could”? This was the same question I asked myself when I investigated the Roku Independent Developer’s Kit just before taking apart some Roku devices. For a home tinkerer, what advantage did they have over a roughly comparable Raspberry Pi Zero? I didn’t have a good answer for Roku, but I have a good answer for Fire TV: because it is an Android device, and Android is a target platform for Unity. Raspberry Pi and Roku IDK, in comparison, are not.

I don’t know if this will be useful for me personally, but at the very least I could try installing my existing Unity project Bouncy Bouncy Lights on the device. Loading up Unity Hub, I saw that Unity had recently released 2021 LTS so I thought I might as well upgrade my project before installing Unity Android target platform tools. Since Bouncy Bouncy Lights was a very simple Unity project, there were no problems upgrading. Then I could build my *.apk file which I could install on my Fire TV just like introductory Android Studio projects. There were no error messages upon installation, but upon launch I got a warning: “Your device does not match the hardware requirements of this application.” What’s the requirement? I didn’t know yet, but I got a hint when I chose to continue anyway: everything on screen rendered a uniform shade of pink.

Going online for answers, I found many different problems and solutions for Unity rendering all pink. I understand pink-ness is a symptom of something going wrong in the Unity graphics rendering pipeline, and it is a symptom that can have many different causes. Without a single solution, further experiment and diagnosis is required.

Most of the problems (and solutions) are in the Unity “Edit”/”Project Settings…”/”Player”/”Other Settings” menu. This Unity forum thread with the same “hardware requirements” error message suggests checking to ensure “Auto Graphics API” is checked (it was) and “Rendering Path” to Linear (no effect). This person’s blog post was also dealing with a Fire TV and their solution was checking “Auto Graphics API” which I am already doing. But what if I uncheck that box? What does this menu option do (or not do?)

Unchecking that box unveils a list of two Graphics APIs: Vulkan and OpenGLES3. Hmm, I think I see the problem here. Fire TV Stick second generation hardware specification page says it only supported OpenGL ES 2.0. Digging further into Unity documentation found that OpenGL ES 2.0 support is deprecated and not included by default, but we could add it to a project if we need it. Clicking the plus sign allowed us to add it as a graphics API for use in our Unity app:

Once OpenGL ES 2.0 is included in the project as a fallback graphics API, I could rebuild the *.apk file and install the updated version.

I got colors back! It is no longer all pink, and cubes that are pink look like they’re supposed to be pink. So the cubes look fine, but all color has disappeared from the platform. It was supposed to have splotches of color cast by randomly colored lights attached to each block.

Instead of showing different colors, it has apparently averaged to a uniform gray. I guess this is where an older graphics API gets tripped up and why we want newer APIs for best results. But at least it is better than a screen full of pink, even if the solution in my case was to uncheck “Auto Graphics API”. The opposite of what other people have said online! Ah well.

Reviving Previously Disassembled Fire TV Stick

Before I took apart a pair of Roku streaming devices, I did a quick investigation to see if there’s anything interesting I might be able to do with them via software realm. I found that while Roku did release an Independent Developers Kit, those old Roku were not compatible. Even if they were compatible with the IDK, though, I’m not sure they would have been compelling when I could play with a Raspberry Pi zero or Android-based hardware like Amazon’s Fire TV.

That train of thought reminded me that I have a Fire TV device, or at least I used to. My first HD digital flat-screen TV was before the age of internet connectivity features, so I tried plugging in a Chromecast. Dissatisfied, I tried a Fire TV streaming stick. I eventually ended up buying a new TV for its UHD resolution, along with bonus benefit of built-in Roku software. (Which is also incompatible with Roku IDK, but that was not a shopping requirement.) After my UHD upgrade both the Chromecast and the Fire TV sat unused a drawer until I brought them to the inaugural Disassembly Academy during Pasadena Connect Week. One of the participants took up my invitation to take things apart.

The whole thing was a single circuit board inside the plastic enclosure. There were no user controls at all, not even the single reset button or status LED of the Roku streaming stick. In a plastic bag I found the circuit board and the plastic enclosure, but the misshapen metal RF shields and attached heat dissipation pads visible in this picture are now gone. If I plug it in, I’m optimistic it will run unless overheating and/or RF interference causes problems.

I plugged it in and watch a successful boot sequence on screen, which led to the next problem: its corresponding remote-control unit was superficially intact, but the violence of enclosure disassembly meant nothing fit anymore. Specifically, the keypad no longer fit in the front faceplate, which also lost its fit so it could no longer press the circuit board against battery contact points.

I tried a few different ways to make it work again, eventually ignoring the faceplate and using my thumb to press circuit board directly against battery tray contacts. If I end up using this for more than a trivial test, I’ll solder a battery tray to the circuit board instead. For now, I just got it back up and running on the latest Fire TV software release. The “About” screen called itself a second-generation Fire TV stick, which is enough information for me to look up its specifications. It’s pretty close to the Roku equivalent streaming stick, with two major differences: I have a functional (if annoying) remote control, and I have the Android software development platform. I installed Android Studio and deployed a few “Hello World” type Android apps to the Fire TV stick just to prove the tooling pipeline worked. Then I tried installing something I built in Unity… and saw everything was pink.

Amazon Fire SR043KL Backlight Layers

I took apart an Amazon Fire tablet (SR043KL) retired by cracked touch digitizer glass, seeking to salvage its display backlight and I was successful. I am fascinated by the optical behavior of modern LED backlights, even those used in products with a low price target like this tablet. After fussing with light diffusers for my Glow Flow project, I have a great deal of appreciation and respect for how evenly these backlights distributed their LED light.

I had a lot of time invested in the earlier LG laptop backlight project and was timid about fully exploring all its backlight layers, fearing that I would break something. Now that I have a smaller backlight with lower stakes, I’m going to take the layers apart and see how they act and interact with each other.

[UPDATE: This Hackaday post A Hacker’s Introduction to DIY Light Guide Plates has more details about these backlight layers, as well as making custom plates out of acrylic sheets with a laser cutter.]

At first glance the layers for this backlight are arranged slightly differently from the LG laptop backlight. I’m too new into this field to guess what tradeoffs are involved. What I do know is that the bottom-most layer on the Fire backlight appears to be non-removable. When acting alone, I could see a dotted pattern almost like dithering.

Above this layer is a sheet of smooth matte translucent white that I would have expected to be the top layer, but here it is.

When in place, it blended the dotted pattern together into something smoother. I think this looks great as-is, but we have two more layers to make it even better.

The third layer looks wild, with the optical characteristics I associate with Fresnel lenses and lenticular lenses, but this pattern looks different and I wished I knew the right name for it so I could read more about it.

When installed, it imparted a bit of pattern along with a rainbow-like sheen.

The fourth and final layer also has that optical property, but dialed back a bit. It also has a matte top finish similar to the second layer.

When in place, we have our backlight, providing an impressively even illumination across the entire area with all light provided by a row of LEDs on just one edge.

Speaking of those LEDs, I count eighteen of them. Given that they start illuminating at around fifteen Volts, my guess is that we’re looking at three parallel strings of six LEDs each. I don’t have anything to accurately clamp current at 3*20=60mA (my bench power supply current limit is only guaranteed to be +/- 10mA) but I estimate that would be somewhere near eighteen volts which makes this barely over one watt at maximum brightness. Pretty neat!

I’m setting this aside for later use. Emily Velasco has said she has a project idea that might make use of a small backlight, so it might go to her instead. If it does, I’m sure we’ll get something really weird and cool out of it because that’s what Emily builds. But in case this backlight isn’t what she needs, I can salvage others so we have alternatives.


UPDATE: Emily Velasco used this backlight in a mini X-ray film viewer.

Amazon Fire SR043KL Display Disassembly

I have taken apart an Amazon Fire tablet (SR043KL) and retrieved the prize I sought: an intact display assembly under the cracked digitizer glass. Though presence or absence of cracks in the LCD wouldn’t have mattered for my project anyway. My objective is actually the backlight behind it.

Just like the LG laptop display I disassembled earlier, this display module is held on all edges by thin precision black tape. Peeling back the tape, I had hoped to find a LED backlight driver as I did on the laptop display, but not this time. There are a few small passive components here, but the backlight driver must be on the mainboard hidden under one of those metal shields.

Lacking an easily accessible LED driver, the next objective is to hunt for the backlight LED circuit itself. I expected them to be the largest traces relative to the other components, and I see two exposed contacts already labelled with + and -. Hmm… could it be that easy? I could do a quick test: since these two points were already exposed, soldering some wires to them were straightforward.

In order to see if the LEDs glow, I peeled back more of the tape. Slowly increasing the voltage, I started seeing a glow at around 15V. Wow, it’s really was that easy.

I have no idea how to drive this LCD array, and I have no intention to learn. My objective for today is the LED backlight. So after I peeled away all black tape around the perimeter, I sliced the high density LCD pixel data ribbon in order to separate the two parts.

There isn’t much more to be said about the LCD array. I was able to peel off the polarizer film, this time without cracking any glass, but using acetone to clean off the adhesive once again caused the film to disintegrate. That’s two strikes against acetone, I’ll have to try something else next time.

I have to put more thought into polarizer film recovery, but that’s only a mild distraction from my fascination with the backlight and its sheets of optical magic.

Amazon Fire SR043KL Screen Removal

Tearing down an Amazon Fire tablet retired due to a broken screen, I removed everything I can from the back hoping to find something that would help me release the front. This was unlikely but I held out hope…. hope that has now been dashed. There are no secret back door entrances, I have to fight the double-sided adhesive strips protecting the front door. For me, this is the least enjoyable part of electronics teardowns. There’s no clever puzzle-solving in tearing glued pieces apart, it’s just brute force messy nastiness.

I have not yet developed the knack to do this gently. If the touch digitizer glass wasn’t cracked before, I’m sure it would have cracked after I tried to pry it free. Thankfully it was already cracked, so this was merely even more cracked. And I’m thankful for the clear packing tape I applied earlier, they were able to hold most of the pieces together. If you are planning to tackle this task and wanted to see how much glue you’ll need to fight, this pictures should help.

What was my reward for all this work? The intact display screen module underneath the (now extremely cracked) touch digitizer glass. I had feared it was held by its own adhesives, but the Amazon engineers apparently decided the adhesive on touch digitizer is enough to keep both of these components in place. The screen was held by only a few thin strips of tape, and here I am thankful I removed the battery earlier as it allowed me to push from the back and pop it free.

There was a side bonus here: the tablet chassis held two small magnets. Probably for a tablet screen cover accessory, but now I want to free them. The good news is that I don’t care about preserving the tablet chassis, the bad news is that magnets are brittle and can break under stress. I misjudged how thick they were and broke one. But now I knew they were thin and only held by a strip of double-sided tape, I was able to use a thin blade and cut the other free while keeping it intact.

Once the magnets were recovered, there was nothing else I wanted from this tablet chassis frame and it will head towards landfill while I examine my prize: the LCD module.

Amazon Fire SR043KL Battery and Digitizer Cable

After I moved the mainboard more-or-less out of the way, my next objective was to remove the glued-in battery. This is not just annoying, it is potentially dangerous as lithium polymer pouch batteries like these aren’t very fond of gross physical abuse. And they have a history of protesting their displeasure with a fireworks show in your face! There were two ways forward: I could leave it alone and hope it doesn’t block anything important, or I can remove it now to uncover whatever is underneath and remove a point of volatility from the project. I decided to remove it.

The battery is pretty much surrounded on all sides, but I saw Amazon engineers left a small opening as an entry point. Here it is marked after the fact.

I didn’t see an applicable tool in my iFixit repair toolkit, so I cut apart a piece of thermoformed plastic packaging for a thin and flexible spatula to dig in. I found the bottom strip of tape, and after that I was freed, I could work my way around to free the battery from the remaining three strips. That is a total of four strips of double-sided tape, one for each edge of the battery.

Thankfully the battery did not explode in my face, but I’m not entirely sure it came out unscathed, either. There were some very definitely flexing as I pulled it freed from these four tape strips, because at the time I didn’t know exactly where they all were. Perhaps with a bit of hindsight I could free the battery while putting less stress on it, but I could at least document my findings so maybe the next person who sees this can treat their battery better.


During all of this yanking and pulling of battery removal, I flexed the touch digitizer cable one too many times and it broke. Oops. Well, at least now the mainboard has been completely freed from the case.

Earlier I thought this Kapton-covered segment might have been soldered to the board and didn’t want to pull too hard. Now that I’m no longer worried about damaging this already-damaged part, I stabbed a flat tool in there to release the bond. It turns out there was no soldering, just a piece of tenacious double-sided tape.

There were a few other trivial items accessible from the back of the tablet, including the external speaker, microphones, and switches for external buttons. I was moderately curious about these items, but I had actually hoped to find something that would help me release components on the front side of the tablet. Alas, I found nothing, which meant there’s only one thing to do: start fighting glue.

Amazon Fire SR043KL Mainboard

I’m tearing apart an Amazon Fire tablet (SR043KL) with cracked front glass, and knowing full well this low-budget device would not have been designed to be easily serviceable. After I popped off the back shell, I quickly ran into things held by adhesives of one type or another. My first focus is to see if I can free the mainboard.

The easiest item to release is the battery connector. Two screws held a reinforcement metal plate and, once those two screws were removed, the battery connector popped free easily. On the right side of the battery, I had to peel off some tape to reveal a fairly standard connector for these ubiquitous Kapton yellow flexible circuit boards. The rear facing camera connector easily popped free, but peeling it away from double-sided tape holding it in place took more effort. On the upper-right corner was an enigma. I would eventually learn this was the cable for the touch digitizer glass panel, but after I freed the small connector nothing came loose. The large yellow square was held tight and I didn’t want to pry too hard in case it was soldered underneath to something. I left this for later.

After I removed every visible screw, the mainboard remained stubbornly in place. Poking and prodding all around, I eventually noticed these two plastic claws.

Once freed from these claws, I could flip the mainboard over, still connected by the black touch digitizer cable I had yet to remove.

From here we can see metal reinforcement for the USB port and audio jack, each held down by two screws on either side of the corresponding socket. I think the red rubbery part is a cap over the microphone, next to the front-facing camera module. Springy metal fingers make contact with parts on the chassis. From left to right they are: power button (only two out of three contacts are used), the volume up/down buttons (only three out of four contacts used) and the WiFi/Bluetooth antenna. (All three contacts used.)

I had hoped there would be something interesting to see on this side of the board, but no luck. The opposite side is mostly hidden under soldered-on metal shielding, I think I need a heat plate to remove them nicely. For the moment, components on the mainboard would have to remain a mystery. So I set it aside and started working on a stubborn battery, accidentally severing the touch digitizer cable while doing so.

Amazon Fire SR043KL Teardown Begins

Encouraged by my success salvaging an useful backlight from a cracked laptop screen, I pulled out another cracked screen from my pile of retired electronics destined for teardown. Today’s subject: an Amazon Fire tablet, model SR043KL which appears to translate to the now-obsolete 7-th generation(*) of the product line.

The primary goal of these devices are to put an Amazon shopping portal into our hands, and thus the hardware cost has been subsidized in the expectation of future sales. This was made quite explicit with the bargain “With Special Offers” edition that display more ads than the standard edition. As a side effect, there is little economic incentive to repair these devices. For example, a replacement touch digitizer glass panel(*) for this tablet costs roughly $25, which is half of the normal price for a new Fire tablet(*). Which, by the way, nobody should pay $50 for because Amazon frequently puts them on sale for less.

I got this tablet from a friend who saw no reason to try to fix something when just the parts cost is at least half the cost of a replacement. And he’s not alone. The demand for repair information is so minimal that not even our trusted resource iFixit offers much help. No teardown, no repair guide, and only a few questions on the forums. For a “better than nothing” resource I poked around to find a teardown guide for a different Fire tablet to get a rough idea of what to expect.

With memories of shattered glass fresh in my mind, my first priority was to put some clear packing tape over the screen. Reducing the likelihood of flying shards of glass if it should break apart under stresses of my prying. Given the lack of serviceability typical of devices built to low price targets, I expect a lot of prying on glued-in parts.

Using trusty tools from iFixit I started digging into the seam between the bright yellow plastic and the front face black plastic.

I would not have been surprised if the colorful backshell was glued in, but thankfully it was not. Merely held by plastic clips all around the perimeter that I could pop free.

The internal volume is dominated by the battery, which is pretty typical of tablets. The battery connector is reliably held in place by two screws that I could release to unplug the battery, but the battery itself is glued in place. Over on the right just above the battery is the screen display cable, but it is held down by tenacious tape. The rear-facing camera looked like it might easily pop out, but it is also held down by tape. The black ribbon cable in the upper right is for the touch digitizer, and it is held down by tenacious double-sided tape. And I see a speaker in the lower left, which is held by… you’ll never guess…

In summary, once we pop off the back cover, there’s little else that can be done without doing something irreversible. Almost everything else would require tearing some adhesives loose. I decided to start with the system mainboard.


(*) Disclosure: As an Amazon Associate I earn from qualifying purchases.