I’m learning more and more about ESPHome and Home Assistant, most recently I was happy to confirm that ESPHome code was very considerate about flash memory wear. Another lesson I’ve learned is the use of “templates” (or “lambdas”). It is a mechanism to insert small pieces of C code, letting me add functionality unavailable from ESPHome configuration files. Here I’m using it to do something I’ve wanted to do ever since I learned about sensor filters. It expands on an existing ESPHome feature to calculate an aggregate sensor value from multiple samples. We could choose from aggregation functions like “minimum” or “maximum” or “sliding window average”. Now, with the template mechanism, I could track minimum and maximum and average.
First, I needed to declare two template sensors. They let template code send data into the ESPHome (and therefore Home Assistant) sensor reporting mechanism. I will use this to report the highest (maximum) and lowest (minimum) power values. (Hence units of “W” or Watts.)
sensor:
  - platform: template
    name: "Output Power (Low)"
    id: output_power_low
    unit_of_measurement: "W"
    update_interval: never # updates only from code, no auto-updates
  - platform: template
    name: "Output Power (High)"
    id: output_power_high
    unit_of_measurement: "W"
    update_interval: never # updates only from code, no auto-updates
The power sensor is configured to report sliding window average, which will take multiple samples and report the average to Home Assistant. The reporting event is on_value, but there’s also on_raw_value which is triggered on each sample. This is where I can attach a small fragment of C code to track the minimum and maximum values seen while the rest of ESPHome tracks the average.
    power:
      name: "Output Power"
      filters:
        sliding_window_moving_average:
          window_size: 180
          send_every: 120
          send_first_at: 120
      on_raw_value:
        then:
          lambda: |-
            static int power_window = 0;
            static float power_max = 0.0;
            static float power_min = 0.0;

            if (power_window++ > 120)
            {
              power_window = 0;
              id(output_power_low).publish_state(power_min);
              id(output_power_high).publish_state(power_max);
            }

            if (power_window == 1)
            {
              power_max = x;
              power_min = x;
            }
            else
            {
              if (x > power_max)
              {
                power_max = x;
              }
              if (x < power_min)
              {
                power_min = x;
              }
            }
The hard-coded value of 120 represents the number of samples to take before I report. When I have the sensor configured to take a sample every half second, 120 samples translates to one minute. (If the sensor is sampling once a second, 120 samples would be two minutes, etc.)
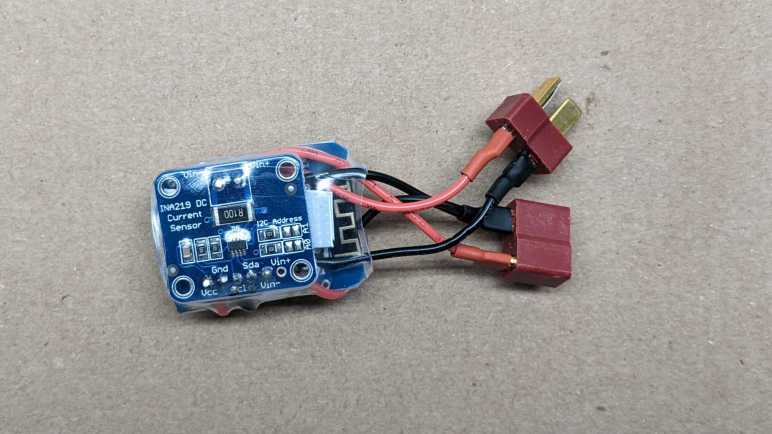
I discard the very first (zeroth) data sample to work around a quirk with ESPHome INA219 sensor support: the very first reported power value is always zero. I don’t know what’s going there but since zero is a valid reading (solar panel generates no power at night) I couldn’t just discard a zero power reading whenever I see it. Hence I reset power_max and power_min when power_window is one, not zero as I tried first.

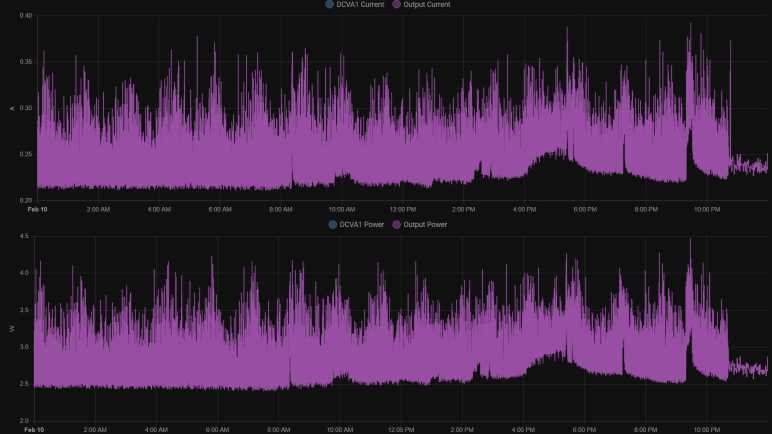
Here is a plot of all three values. The average value in purple, the maximum in cyan, and the minimum in orange. Three devices were represented in this power consumption graph. The HP Stream 7 is always on through this period, and we can see its power consumption fluctuates throughout the day. Around midnight, the Raspberry Pi powered up to take a replication snapshot of my TrueNAS storage array and I shut it off shortly after it was done. And in the morning, after the solar monitor battery is charged (not shown on this graph) at about 10AM, the Pixel 3a started charging until just after noon.
For the Raspberry Pi, power consumption average hovered around 6W, but the maximum spiked a little over 10W. Similarly, the Pixel 3a charging averaged less than 6W but would spike up to 8W. The average value is useful for calculations regarding things like battery capacity, and the maximum value is necessary to ensure all components are staying within their maximum operating limits. And for now, the minimum value is merely informatively and not used, but that might change later.