Inspiration From Droids of Star Wars

Today is the fourth day of the month of May, which has grown into “Star Wars day” due to “May the Fourth” sounding like that film’s popular parting line “may the Force be with you.” A quick search confirmed I’ve never explicitly said anything about Star Wars on this blog and that should be corrected.

By the time I saw Star Wars, I had already been exposed to popular science fiction concepts like space travel, interstellar commerce, and gigantic super-weapons. And the idea of a cult that promises to make their followers more special than regular people… we certainly didn’t need science fiction for that. So none of those aspects of Star Wars were especially notable. What left a lasting impression was R2-D2.

R2-D2 had its own expression of duty and loyalty. Companion to humans, and a Swiss Army knife on wheels. A character that managed to convey personality without words or a face. R2-D2 was the most novel and compelling character for me in the film. I wouldn’t go far as to say R2-D2 changed the path of my life, but there has definitely been an influence. More than once I’ve thought of “does this help me get closer to building my own R2” when deciding what to study or where to focus.

I was happy when I discovered there’s an entire community of people who also loved the astromech droid and banded together to build their own. But that turned to disappointment when I realized the dominant approach in that community was focused on the physical form. Almost all of these were remote-controlled robots under strict control of a nearby human puppeteer, and little effort was put into actually building a capable and autonomous loyal teammate.

I can’t criticize overly much, as my own robots have yet to gain any sort of autonomy, but that is still the ultimate long-term goal. I love the characters of R2-D2 and the follow-on BB-8 introduced in the newest trilogy. Not in their literal shape, but in the positive role they imagined for our lives. This distinction is sometimes confusing to others… but it’s crystal clear to me.

Oh, I thought you loved Star Wars.

Star Wars is fine, but what I actually love are the droids.

I still hope the idea becomes reality in my lifetime.

Samsung 500T Disappointments

I pulled out my old Samsung 500T to see if it could run ESA’s ISS tracker. It could, and quite well, so I think the role might be the best use of this machine. Because it has proven to be a huge disappointment in so many other ways.

I knew of the machine when it launched alongside Windows 8. This was when Microsoft also launched the original ARM-powered Surface tablet to demonstrate what’s possible by using ARM chips: look at how thin and light they are! Samsung & friends launched the 500T as counterpoint: just as thin and light as the Windows RT tablets, but with an Intel CPU for full x86 compatibility. Judging by the spec sheet, it was a spectacular device to undercut and humiliate the “Windows on ARM made thin and light possible” story.

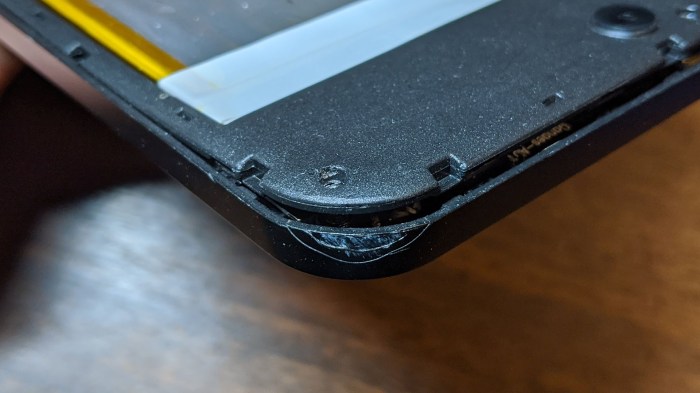
But that’s only on the spec sheet and not on the price tag. The 500T was expensive and Surface tablets sold for far less. Due to that fact, I didn’t get my 500T until much later when it showed up as a secondhand refurbished unit on Woot. When it arrived, I was sure there was something wrong with the machine. Maybe it somehow slipped past testing in refurbishment? It was completely unusable, taking several minutes to boot and user commands took many seconds (5-10) to respond or were ignored entirely. I went online and found a firmware update, which took all night to apply and upgraded performance from “disastrous” to “merely horrible”.

The screen was another cool feature that didn’t panned out. Not just a touchscreen for fingers, it was also a pen digitizer. Compatible with passive Wacom stylus used by the much thicker Surface Pro tablet, the 500T also had a tiny stylus holder built in. It held the promise to be a digital sketchpad with pressure sensitivity making it superior to a contemporary iPad. But slow system response killed that dream. Who wants to sketch on a pad when strokes don’t show up until a few seconds after we draw it?

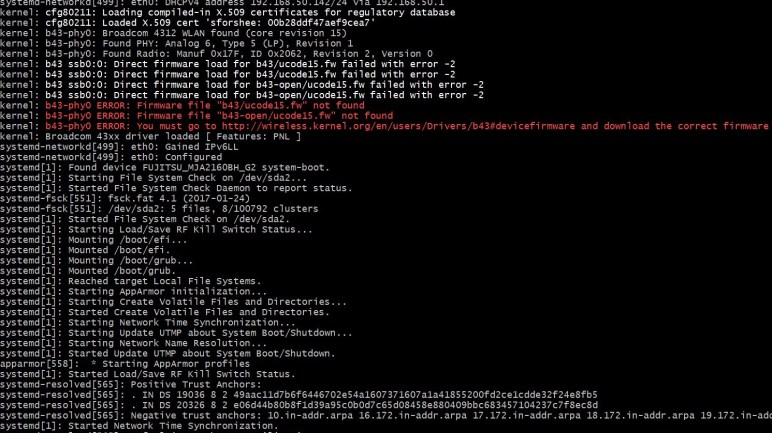
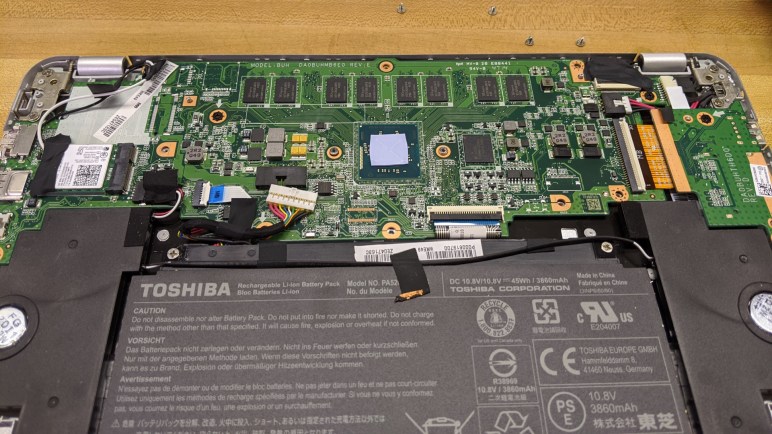
Judging by Windows Task Manager, this device’s major implementation flaw was its eMMC flash storage, constantly showing 100% activity. The Atom CPU was not exactly a stellar performer, but it wasn’t the reason for delay as the 500T was constantly waiting to read from or write to storage. Generally ruining user experience across the board.

Not to let Intel entirely off the hook, though, as its Atom Z2760 CPU turned out to be a long term liability as well. This CPU was part of Intel’s Clover Trail family, and they had problems running Windows 10 features newly introduced in 2016. Intel had discontinued that line and declined to do anything about it, so Microsoft blocked Clover Trail devices from advancing beyond Windows 10 build 1607. They will still receive security fixes until January 2023, but features are stuck at July 2016 levels forever.

All of the above are things that I might be able to overlook as unfortunate result of things outside Samsung’s control. The eMMC storage might have performed well when new but degraded with time as solid state storage sometimes do. (The TRIM command could help, but they had to make use of it.) And Samsung had no way of knowing Intel would just abandon Clover Trail.

But let’s talk about what Samsung have chosen to install on the machine. As is typical of machines around that age, there was the usual useless bucket of trials and discount offers. There are also Samsung features that duplicate existing Windows functionality, others thinly veiled advertisement for Samsung products, and more. The worst part? I could not get rid of them. I thought they would be gone once I wiped and installed Windows 10, but they were bundled with critical device drivers so I had no choice but to reinstall them as well. Holding device drivers hostage to force users to accept unrelated software is consistent with Samsung’s anti-user behavior I saw across the board.

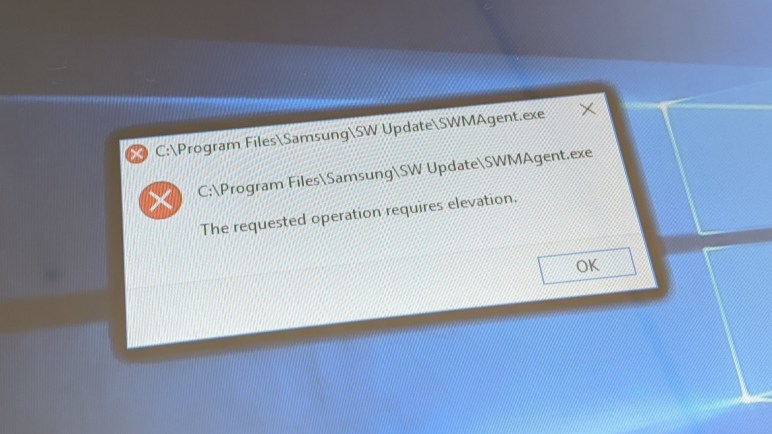
The image at the top of this post is just one example. SWMAgent.exe appears to be some sort of Samsung software update engine (What’s wrong with Windows Update?) and it asks for elevation. If the user declines to grant elevated privileges, the software is supposed to respect that choice and go away. But not Samsung! We see a black border visible around that dialog box, which might look strange at first glance. Windows 10 adds a subtle dark shadow to dialog boxes, why this ugly black thing? It is because we’re not looking at a single SWMAgent.exe dialog box, but a huge stack of of them. Each popping on top of the last, and another one added every minute or so. The thick black border is a result of that subtle dark shading stacked deep and combining, because Samsung would not take no for an answer.

I don’t need that in my life. The upside of this machine being disappointing was that I had no motivation to put up with it. Into the unused bin it went, and I haven’t bought a Samsung computer since.

ESA ISS Tracker on Samsung 500T

Setting aside the HP Stream 7 as unsuitable for my current project, we reach the final piece of x86 Windows hardware in my pile of unused devices: the Samsung 500T. I guess 500T was a shorthand for its full designation XE500T1C, though I don’t think it made the name roll off the tongue much easier.

This device has a 11.6 inch diagonal touchscreen. It was designed for Windows 8 and launched at around the same time. Its primary focus is on tablet workloads, but can become a convertible tablet/laptop like the HP Split X2 with purchase of an optional keyboard base. Since the keyboard is optional, the 500T has more peripherals packed along its edges. Not just the microSD expansion slot like the HP but also a full-size type A USB and micro HDMI connectors. HP delegated the latter tasks to its included base, which has two type A USB ports and a full sized HDMI connector.

As a piece of Windows 8 hardware like HP Split X2 and HP Stream 7, the 500T has a Windows license in embedded hardware. Thus I was also able to install Windows 10 erasing the existing installation of Windows 8 which was protected by a password I no longer remember. Once device drivers were installed, all features functioned as expected including the ability to run on plug-in power and charge its battery.

That capability was inexplicably nonfunctional in my HP Stream 7. Which meant unlike the HP Stream 7, I could run this display continuously on wired power around the clock. And showing the ESA HTML live space station tracker might be the best way to make use of this hardware. It would be a better end than collecting dust, as my past experience of this tablet has failed to live up to its potential and generally soured me on buying any more computers from Samsung.

HP Stream 7 Hardware Internals

I opened up my HP Stream 7 because I wanted to see if I could run it without the battery. The answer is no, but since I had it open anyway it is an opportunity to look over the mechanical design of this little tablet. The general electrical architecture is not surprising, similar to most tablets majority of interior volume was allocated to the battery and a PCB smaller than the battery held most of the electronics.

The mechanical engineering, however, showed evidence of more attention than I would have expected in an entry level design that must have been designed for cost. The rearmost removable plate to access microSD slot was nothing special, but as soon as I started looking at the next layer I was impressed by how rigid it was with only a few clips and screws. This attention to mechanical design carried across a few other elements.

HP Stream 7 05 reinforcement plate

This metal plate had two of the enclosure screws dedicated to holding it in place. This plate is immediately adjacent to the micro USB power port and the headphone jack. It reinforces the part of the PCB most likely to see mechanical stress, reducing the chances that a clumsy user would tear out these plugs by accident. Unfortunately while the mechanical engineers did great work, somebody dropped the ball on the electrical front. The headphone jack is so noisy as to be unusable, a trait highlighted in reviews so I know it’s not just this unit.HP Stream 7 06 side switches

For the side buttons, I had expected to see sideways switches on the main PCB. I’ve seen those small surface mount buttons before and they are at risk of breaking if the mechanical design doesn’t redirect stress elsewhere. But they are cheap, so we keep seeing them, and they keep breaking off in poorly designed devices. But there’s no such cost-cutting shortcut for this stout tablet. Its buttons are on a separate PCB mounted such that it can take the force face-on instead of letting the force shear off a sideways switch. This adds parts count, and adds steps to assembly, which adds cost, in order to give us more durable buttons. I appreciate it.

HP Stream 7 07 solder and pads why

Behind the switch is this puzzling field of copper pads and solder. Pads and solder like this are usually for surface mount electronics components, but this large field is completely devoid of hardware. I have no idea why this is here or what it does. My best guess is that this serves as some sort of thermal heat sink, but I don’t feel it is a very good guess.

HP Stream 7 08 flash sound touch display cable

Lower down we see a SK hynix chip with “NAND” label, presumably the onboard flash memory storage. Adjacent to that chip is the microSD slot where the user can add more storage. Adjacent to those chips I see the crab I associate with RealTek audio chips. Two flexible PCBs round out the bottom. One of these is probably for touch and the other for display.

HP Stream 7 09 speaker

At the very bottom, a small speaker that is actually quite sizable for such a tiny tablet, but there are fundamental handicaps to sound quality at such sizes. I’m thankful for the speaker, but I would have much rather have had a better headphone jack.

Overall I feel the mechanical design on this tiny tablet is pretty good. Too bad its electrical and computational performance isn’t up to the mechanical design. And after this little detour through the world of hardware design, I return to trying the ESA ISS Tracker on other machines. Next on the list: Samsung 500T.

HP Stream 7 Battery Disconnect Test

I dusted off my HP Stream 7 tablet to see if it might be suitable for an always-on status display. I encountered some battery power management issues and wanted to see if I could try running it without a battery. Every Windows x86 laptop I’ve ever owned was happy to run without battery power and since my current intent is for a wired 24×7 display screen, I didn’t need the battery anyway.

HP Stream 7 00 back plate intact

This experiment was made possible by the design of the device. Relative to almost every other piece of modern portable electronics, the HP Stream 7 is easy to open up. The back plate can be opened without tools, just follow the gap they designed and start prying plastic clips apart.

HP Stream 7 01 back plate removed

This was how users could access its microSD slot for adding more storage space. And given how the battery is clearly visible when the back is removed, I thought it was also to enable easy battery replacement. My assumption was wrong! The battery appears to be glued in place and WARNING: BATTERY IS NOT REMOVABLE printed on the battery. Curiously that was printed with a dot matrix printer, implying this specific battery is not always non-removable, perhaps it is removable from another device but that won’t help us here today anyway so let’s move on.

HP Stream 7 02 bashed corner

I don’t remember ever dropping this tablet, but one corner tells a tale of my neglect.

HP Stream 7 03 inner plate removed

If I want to try running this device without battery, I will need to access its battery connector which is hidden underneath the next piece of plastic. That piece is fastened quite well by a large number of plastic clips, backed up by small screws. Together they created a pretty durable enclosure for this tablet while still being removable. There was nothing tricky about opening up this device. Once the second back plate was removed, the battery connector was accessible.

HP Stream 7 04 battery is not removable

Once exposed the connector easily popped free. I pressed the power button and… nothing. Unlike laptops, this device refuses to run without a battery. This makes it less useful for the current project. Nevertheless, such ease of access to durable internals has raised my opinion of this tablet. And since I had it open, I might as well look around a little more.

HP Stream 7 Power Problems

I wanted to see if I can employ my unused HP Stream 7 as an International Space Station tracker at home, displaying ESA’s HTML application. The software side looks promising, but I ran into problems on the hardware side. Specifically, power management on this little tablet currently seems to be broken.

The first hint something was awry is the battery runtime remaining estimate. It is unrealistically optimistic as shown in the screen image above: 46% battery may run this little tablet for several hours, but there’s no way it would last 4 days 4 hours. At first I didn’t think it was a big deal. Battery-powered devices that I’ve dusted off would frequently give wildly inaccurate initial readings on battery. It is common for power management module to require a few charge-discharge cycles to re-calibrate.

In the case of my tablet, a few battery cycles did not help. Battery estimates remained wildly inaccurate after multiple cycles. But I was willing to ignore that estimate, since battery life is not a concern in a project that intends to run tethered to power around the clock. The bigger problem was the tablet’s behavior when plugged in.

HP Stream 7 plugged in not charging

Once power is plugged in, the battery life estimate disappears and (plugged in) was added to the description. This is fine, but I had expected to see something about charging the battery and there was nothing. Not “charging”, not “2 hours until full”, not even the occasionally infuriating “not charging”. There is a complete lack of information about charging in any form.

Still I wasn’t worried: if the tablet wants to run off plug-in power and not charge the battery, that’s fine by me. In fact I am happy to leave the battery at around 50% charge, as that is the healthiest level for long term storage of a lithium chemistry battery. But that’s not the case, either: the tablet will run mostly on plug-in power, but still slowly drain the battery until it was near empty, at which time the tablet would power down.

Only after shutting down did this tablet begin to charge its battery. Now I am worried. If I can’t run this tablet on plug-in power alone, requiring a battery that can’t be charged while it is turned on, that combination would make it impossible to build an around-the-clock ISS tracker display.

What I wanted to do next was to poke around with the hardware of this tablet and see if I can run it without the battery. Fortunately, unlikely most modern compact electronics, the HP Stream 7 can be opened up for a look.

ESA ISS Tracker on HP Stream 7

After I found that Amazon Fire HD 7 tablet was unsuitable for an always-on screen to display ESA’s HTML live tracker for the International Space Station, I moved on to the next piece of hardware in my inactive pile: a HP Stream 7. This tablet was an effort by Microsoft to prove that they would not cede the entry-level tablet market to Android. In hindsight we now know that effort did not pan out.

But at the time, it was an intriguing product as it ran Windows 10 on an Intel Atom processor. This overcame the lack of x86 application compatibility of the previous entry level Windows tablet, which ran Windows RT on an ARM processor. It was difficult to see how an expensive device with a from-scratch application ecosystem could compete with Android tablets, and indeed Windows RT was eventually withdrawn.

Back to this x86-based tablet: small and compact, with a screen measuring 7″ diagonally that gave it its name, it launched at $120 which was unheard of for Windows machines. Discounts down to $80 (when I bought it) made it cheaper than a standalone license of Windows software. Buying it meant I got a Windows license and basic hardware to run it.

But while nobody expected it to be a speed demon, its performance was nevertheless disappointing. At best, it was merely on par with similarly priced Android tablets. Sure we could run standard x86 Windows applications… but would we want to? Trying to run Windows apps not designed with a tablet in mind was a pretty miserable experience, worse than an entry level PC. Though to be fair, it is impossible to buy an entry level PC for $120 never mind $80.

The best I can say about this tablet was that it performed better than the far more expensive Samsung 500T (more on that later.) And with a Windows license embedded in hardware, I was able to erase its original Windows 8 operating system (locked with a password I no longer recall) and clean install Windows 10. It had no problems updating itself to the current version (1909) of Windows 10. The built-in Edge browser easily rendered ESA ISS tracker, and unlike the Kindle I could set screen timeout to “never”.

That’s great news, but then I ran into some problems with power management components that would interfere with around-the-clock operation.

ESA ISS Tracker on Kindle Fire HD 7 (9th Gen)

I wanted to play with old PCs and that’s why I tried ESA’s ISS Tracker on a HP Mini and Dell Latitude X1. But if I’m being honest, the job of a dedicated display is better suited to devices like tablets. They are designed for information consumption and are not hampered by the overhead of input devices like keyboards. I was not willing to dedicate my iPad to this task: it is too useful for other things. But I do have a pile of older devices that haven’t lived up to their promise.

Top of this pile (meaning most recent) is an Amazon Kindle Fire HD 7 tablet 9th generation (*) purchased during holiday sale for a significant discount. If there isn’t a sale today, wait a few weeks and another will be along shortly. I ended up paying roughly 20% of what I paid for my iPad, and I had been curious how it would perform. The verdict was that it had too many annoyances to be useful and I ended up not leaving it collecting dust. At 20% of the price with 0% of utility, it was not a win.

But maybe I could dedicate its screen for a live ISS tracker? I brought up Silk web browser and launched the ESA site. Switching to full screen mode unveiled a problem: Kindle never removes its device navigation buttons from the bottom of the screen. The triangle/circle/square obscures part of ISS tracker’s display.

I wondered if this behavior applied to native Kindle apps as it did full screen web pages, so I searched through the Amazon Kindle app store for an ISS tracker and found ISSLive (*) for experimentation. The answer: yes, the navigation bar is overlaid on top of native applications just as it did on web pages.

Kindle Fire HD 7 running ISSLive

But that was only visually annoying and not an outright deal breaker. That would be Kindle’s sleep behavior. There is no option to keep the screen display active. The user can choose from one of several time duration for the tablet to wait before it turns off the display and goes to sleep, but there is no “Never go to sleep” option.

Kindle Fire HD 7 Always Sleeps

The Kindle Fire HD 7 will not be suitable as a dedicated ISS tracker screen, so I’m moving on to the next device in the unused pile for investigation: a HP Stream 7.


(*) Disclosure: As an Amazon Associate I earn from qualifying purchases.

ESA ISS Tracker on Dell Latitude X1

My failed effort at an ISS Tracker web kiosk reminded me of my previous failure trying to get Ubuntu Core web kiosk up and running on old hardware. That computer, a Dell Latitude X1, was also very sluggish running modern Ubuntu Mate interactively when I had tried it. I was curious how it would compare with the HP Mini.

The HP Mini has the advantage of age: it is roughly ten years old, whereas the X1 is around fifteen years old. When it comes to computers, an age difference of five years is a huge gulf spanning multiple hardware generations. However, the X1 launched as a top of the line premium machine for people who were willing to pay for a thin and light machine. Hence it was designed under very different criteria than the HP Mini despite similarity in form factor.

As one example: the HP Mini housed a commodity 2.5″ laptop hard drive, but the Dell Latitude X1 used a much smaller form factor hard drive that I have not seen before or since. Given its smaller market and lower volume, I think it is fair to assume the smaller hard drive comes at a significant price premium in exchange for reduction of a few cubic centimeters in volume and grams of weight.

Installing Ubuntu Mate 18.04 on the X1, I confirmed it is still quite sluggish by modern standards. However, this is a comparison test and the Dell X1 surprised me by feeling more responsive than the five years younger HP Mini. Given that they both use spinning platter hard drives and had 1GB of RAM, I thought the difference is probably due to their CPU. The Latitude X1 had an ULV (ultra low voltage) Pentium M 744 processor, which was a premium product showcasing the most processing power Intel can deliver while sipping gently on battery power. In comparison the HP Mini had an Atom processor, an entry-level product optimized for cost. Looking at their spec sheet comparison shows how closely an entry level CPU matches up to a premium CPU from five years earlier, but the Atom had only one quarter of the CPU cache and I think that was a decisive difference.

Despite its constrained cache, the Atom had two cores and thermal design power (TDP) of just 2.5W. In contrast the Pentium M 733 ULV had only a single core and TDP of 5W. Twice the cores, half the electrical power, the younger CPU far more power efficient. And it’s not just the CPU, either, it’s the whole machine. Whereas the HP Mini 110 only needed 7.5W to display ESA ISS Tracker, the Latitude X1 reports drawing more than double that. A little over 17W, according to upower. An aged battery, which has degraded to 43% of its original capacity, could only support that for about 40 minutes.

Device: /org/freedesktop/UPower/devices/battery_BAT0
native-path: BAT0
vendor: Sanyo
model: DELL T61376
serial: 161
power supply: yes
updated: Thu 23 Apr 2020 06:19:06 PM PDT (69 seconds ago)
has history: yes
has statistics: yes
battery
present: yes
rechargeable: yes
state: discharging
warning-level: none
energy: 11.4663 Wh
energy-empty: 0 Wh
energy-full: 11.4663 Wh
energy-full-design: 26.64 Wh
energy-rate: 17.2605 W
voltage: 12.474 V
time to empty: 39.9 minutes
percentage: 100%
capacity: 43.0417%
technology: lithium-ion
icon-name: 'battery-full-symbolic'
History (rate):
1587691145 17.261 discharging

Putting a computer to work showing the ESA tracker is only using its display. It doesn’t involve the keyboard. Such information consumption tasks are performed just as well by touchscreen devices, and I have a few to try. Starting with an Amazon Kindle Fire HD 7.

Aborted Ubuntu Core Web Kiosk Adventure with HP Mini (110-1134CL)

I haven’t figured out how to get WiFi working on this HP Mini (110-1134CL) under Ubuntu Core 18, but that’s not the main objective of my current investigation so I’m moving on with wired Ethernet. What I wanted to do was to build an Ubuntu Core powered web kiosk appliance to show the ESA Live ISS Tracker web page. I thought this would be a pretty easy exercise, all I had to do is follow the steps I did earlier to build an kiosk appliance running on a Dell Inspiron 11 3180.

Nope! The tutorial I followed earlier is gone, its URL https://tutorials.ubuntu.com/tutorial/ubuntu-web-kiosk now forwards to https://ubuntu.com/tutorials/electron-kiosk which is a tutorial to build an ElectronJS application into a snap. I don’t have the ESA ISS Tracker in an ElectronJS app (yet) so I poked around trying to figure out what happened to the tutorial.

Both the earlier Chromium tutorial and the current Electron tutorial are built on top of the Mir Kiosk shell. I found a good collection of information on this page proclaiming itself “Configuring Mir Kiosk, a Masterclass.” That thread did mention the chromium-mir-kiosk snap used in the now-gone tutorial, but that no longer seems to run. I only get a blank screen instead of the earlier basic web kiosk.

Apparently that snap was always intended to be a short term tech demo and there was no effort to maintain it to keep it updated with latest versions of systems. This thread claimed replacement is wpe-webkit-mir-kiosk, but there’s a problem for my situation: there’s no 32-bit (i386) snap that would run on this old HP Mini’s CPU. They only had pre-built binaries for 64-bit (amd64) processors

It appears if I want to put the ESA ISS Tracker on this HP Mini as an Ubuntu Core appliance, I will need to learn how to build it into an ElectronJS application and compile a binary that would run on i386 architecture. I’m not sure how much work that will be yet, but if I put it up on Snap store I’m sure there are people who would appreciate it.

Which occurred to me… what if it is up there already? I had forgotten to check the easy thing first. I searched on the store and unfortunately didn’t see anyone who has done the work I specifically had in mind. I did find a snap termtrack that tracks ISS as well as other satellites, but there were two problems: First, it is a terminal (text mode) application so isn’t as graphically interesting. And second, it doesn’t have an i386 binary available, either. Darn.

$ snap install termtrack
error: snap "termtrack" is not available on stable for this architecture (i386) but exists on other architectures (amd64).

Oh well, so much for a low effort ESA HTML ISS tracker built on Ubuntu Core. Which reminded me to look at how it works on my other Ubuntu Core kiosk failure: the Dell Latitude X1.

Ubuntu Core WiFi Woes on HP Mini (110-1134CL)

Last time I played with Ubuntu Core, I followed through their tutorial for building a simple minimalist web kiosk whose state is wiped clean upon every reboot. At the time I had no idea why I would ever want to build such a thing, but now I have my answer: build an “appliance” for displaying ESA’s HTML Live International Space Station Tracker.

I had put Ubuntu Server and Ubuntu Core on this HP Mini (110-1134CL) earlier for a quick look to verify it works well for command line based usage. One thing I didn’t notice earlier was the fact Ubuntu Core only recognized the wired Ethernet port and not the WiFi hardware. It’s nice to have WiFi if I’m want to set up an ISS display away from my wired networking infrastructure.

I saw some red text flash by quickly upon boot. I had to retrieve the message after startup with the journalctl command to see what it complained about.

b43-phy0: Broadcom 4312 WLAN found (core revision 15)
b43-phy0: Found PHY: Analog 6, Type 5 (LP), Revision 1
b43-phy0: Found Radio: Manuf 0x17F, ID 0x2062, Revision 2, Version 0
b43 ssb0:0: Direct firmware load for b43/ucode15.fw failed with error -2
b43 ssb0:0: Direct firmware load for b43-open/ucode15.fw failed with error -2
b43-phy0 ERROR: Firmware file "b43/ucode15.fw" not found
b43-phy0 ERROR: Firmware file "b43-open/ucode15.fw" not found
b43-phy0 ERROR: You must go to http://wireless.kernel.org/en/users/Drivers/b43#devicefirmware and download the correct firmware for this driver version. Please carefully read all instructions on this website.

I like error messages that point me to instructions telling me what to do. Unfortunately http://wireless.kernel.org/en/users/Drivers/b43#devicefirmware is no longer a valid URL and returns a HTTP 404 error. Searching the web for combinations of “Broadcom WiFi b43 Linux driver” led me to this forum post by someone asking for help. A helpful response pointed to this Debian support page, and from there to Linux kernel information. Apparently there is a licensing issue, requiring extra steps to install these driver packages. Those extra steps are where I got stuck with Ubuntu Core as it only accepts software modules in the form of snaps.

First we need to identify the exact hardware to see if it is in the b43 or b43legacy package. The command is lspci -nn -d 14e4: but lspci is not part of Ubuntu Core. Flailing, I tried to snap find lspci and came up empty.

If I had been able to determine which hardware I had, I could look it up on this chart which determines if I should sudo apt install firmware-b43-installer or its legacy counterpart sudo apt install firmware-b43legacy-installer. But again Ubuntu Core does not allow installation of software via apt, only via snap.

For the moment I’m stuck on getting WiFi for Ubuntu Core on this HP Mini, but that is not the biggest obstacle: my showstopper is that the tutorial kiosk has gone away.

ESA ISS Tracker on HP Mini (110-1134CL)

I thought it might be fun to turn an obsolete computer into an International Space Station tracking monitor running full time somewhere in the house. I didn’t want to write the software myself from scratch, and a search for something that I could put on various hardware found a web-based HTML live ISS tracker published by the European Space Agency.

My first test platform is a HP Mini (110-1134CL) from my NUCC trio of machines looking for projects. As the least capable machine in the bunch, I thought it was the best candidate. I reinstalled Ubuntu Mate 18.04 on this machine for the first round of experimentation. Earlier I established Ubuntu Mate was unusable slow on this machine for interactive usage, but maybe it will be enough for passive ISS tracking display.

With Ubuntu Mate installed, putting the site on screen was straightforward. Firefox (which comes installed as part of standard Ubuntu) can be launched with a full screen --kiosk option. That command line is what I used for a systemd service, similar to how Google prescribed launching AIY Voice apps on startup. I had to modify the AIY executable with the Firefox command line, and that was enough for the ISS tracker to be automatically launched on boot. I still had to manually click the full screen button for now, one of the to-do items I might investigate fixing later.

I was not sure if a modern web application might be too much for this old piece of hardware to handle, but once up and running the ISS tracker is pretty lightweight on processor demands according to htop. To double check, I researched how to retrieve a laptop’s power consumption under Linux and found this page listing several options. I chose upower to tell me how much power the laptop believes it is drawing from its battery pack.


UPower says HP Mini 110 only needs 7.5 watts

Looks like running ISS tracker takes about seven and a half watts. That’s not bad, on par with a digital picture frame. Using this to calculate the cost of energy consumption: (7.5 Watts) * (24 hours) * (30 days) = 5.4 kilowatt-hours per month. I’m being billed roughly $0.25 per kilowatt-hour on my electrical bill, so running this laptop as ISS tracker 24×7 would cost me about $1.35 a month in electric power.

I’m willing to entertain that amount as-is, but I was curious if I could drop that even further. What if I could replace Ubuntu Mate with an even simpler operating system? Would that further drop power consumption? I played with the web kiosk demo for Ubuntu Core before, so I thought I’d revisit the experiment with this HP Mini 110-1134CL.

HTML Live ISS Tracker by ESA

While looking for a web-based space station tracker as alternative to the Raspberry Pi-based ISS-Above, I found NASA’s Spot the Station and embedded on that page is a live ISS Tracker by ESA. I’ve found this ESA component embedded in several other ISS-related web sites. It is the “ISS Tracker” tab of the High Definition Earth Viewing Experiment page on UStream.tv. And the ESA has a “Where is the International Space Station?” page that also has this tracker embedded. This tracker is nifty and popular enough for a closer look.

Most of the embeds show two parts to this tracking component. The top part has an ISS track overlaid on top of a global view, and the bottom part is a Google Maps component showing the “For development purposes only” text that is shown when there’s a problem with the API key. I originally thought these were two separate items because I only saw the ISS track embedded on the ESA “Where is the ISS” page and I saw the Google error on a different ISS tracker web site. But bringing the ESA tracker up on its own web site showed they are both part of the same thing. I would like to understand how the “Where is the ISS” page managed to embed the global view component without the Google Maps part.

The default view is also quite tiny, but it doesn’t have to stay that way. We get the best view when we press the full screen icon just to the right of the Metric / Imperial switch. This drops the problematic Google Maps portion and fills the screen with global view. Despite the tiny default low resolution view, the graphics scale quite well and look pretty good even full screen on an 4K display.

I would like to know how to jump straight to this screen without user input, but there are deliberate barriers against public web sites going full screen without user input. Such a mechanism is too easy to be abused by malicious people creating spoofs. If I want to display HTML content fullscreen, I’ll have to find some other way to present it. One possibility is to use ElectronJS turning it into a native app (which doesn’t have the same restrictions as a browser for public sites) and create a window with fullscreen set to true.

These programming details will need to be sorted out if I want to make a project out of it. In the immediate future, I can experiment by manually pushing the full screen button to see how the site behaves on obsolete PC hardware.

Searching For Web-Based ISS Tracker

When NASA and SpaceX announced a target date of May 27th 2020 for Crew Dragon’s second demonstration mission, it was a big deal for space fans especially those in the United States. If successful, this would be the first crewed flight launching from US since retirement of NASA’s space shuttle. I count myself as a space fan, and the announcement got my mind thinking about space again.

The destination for this planned test flight is the International Space Station (ISS) flying over our heads. An object of fascination for space fans, there’s plenty of merchandise available including a LEGO set (#21321) that I had the pleasure to participate putting together at a gathering before we all went into isolation.

There’s no shortage of ISS information available online, either. My personal favorite way to have a screen dedicated to ISS in my home is ISS-Above. I have a license that I run on-and-off depending on whether I have a Raspberry Pi and screen to spare at the moment. Given the flexibility of Raspberry Pi hardware for use in other projects, availability is thin.

What’s more commonly available in my house are obsolete computers. Unfortunately ISS-Above is tied to the Raspberry Pi so I must look elsewhere for a PC-friendly solution. Some of my old machines are running Windows 10 of some variant. The rest have lost their Windows licenses and are running Linux. The easiest common denominator for all of these platforms is a web browser.

Searching online for a web-based ISS tracking counterpart to ISS-Above, I found NASA’s “Spot the Station” website. It has a few interesting resources but not exactly what I’m looking for. One part of the site is a “Live ISS Tracking Map” which replicates my favorite subset of ISS-Above functionality and thus a good place to start. Looking at its HTML, I quickly realized it was an embedding of another page hosted by the European Space Agency (ESA) and available at its own URL. This is an excellent starting point for more exploration.

Converting Power Input of USB-C Car Charger

The first introduction of USB-C into my life was my Nexus 5X cell phone. Intrigued by the promise of faster charging possible with USB-C, I bought a few additional chargers including this car charger sold by Monoprice.

MP USBC conversion 00 user end

This particular model is no longer carried by Monoprice, probably because there’s a flaw in the design. After several months, it became difficult for it to make good electrical contact with the standard car power socket that originally started as a cigarette lighter.

MP USBC conversion 01 plug end

My hypothesis is that there’s poor electrical conduction in the system, causing energy to be lost as heat that started melting the surrounding plastic. Eventually seizing up the spring-loaded mechanism so it is stuck.

MP USBC conversion 02 melty closeup

I first tried cutting the metal free from melted plastic and had no luck. This plastic is extremely durable.

MP USBC conversion 03 tough to cut

I then tried attacking the problem from the other end, and felt sheepish because the face plate is only held by friction and popped off easily.

MP USBC conversion 04 faceplate pops open

Looking inside, I could see two screws for further disassembly.

MP USBC conversion 05 two screws visible

Once they were removed, it was easy to pull the guts and lay them out.

MP USBC conversion 06 components laid out

There is a thin spring behind the contact showed heat darkening, consistent with hypothesis of too much power carried within that thin metal causing heating. My experiment of the day would be to replace that connector system, and the easiest type on hand is a commodity JST-RCY connector which is good for at least 3 amps and very commonly handling peak power higher than 3A in remote-control aircraft.

MP USBC conversion 07 JST-RCY soldered on

The first soldering effort was bad. The positive wire easily soldered to where the spring used to be, but the original ground contact is a huge piece of metal my soldering iron could not bring up to proper temperature for a good solder joint. For the second attempt I found another ground on the PCB to solder to, keeping the two wires tight enough so I could thread it through the partially melted hole where the spring-loaded positive contact used to be.

MP USBC conversion 08 JST-RCY threaded through

I reassembled the device without the original spring or its contact. I won’t be able to use it with a car power socket anymore but I should be able to keep using it to charge USB-C devices from other ~12V DC power sources.

MP USBC conversion 09 reassembled

Wheel Drive Motor Gearbox Swap for JPL Open Source Rover

It’s a lot of fun to run the JPL Open Source Rover across rough terrain, seeing its rocker-bogie suspension system at work. But it is possible to play too rough and break some gears in the wheel drive gearbox. Some rover builders on the forum who ran into this problem decided they wanted sturdier motors and upgraded all six drive motors to something bigger and beefier. I understand this upgrade was done for the JPL-owned example as well. But that can be an expensive proposition.

If a rover is not strictly required to traverse rough terrain, we can decide to stay with kinder gentler terrain. Returning to the official parts list we see they are Pololu’s item number 4888, 172:1 Metal Gearmotor LP 12V with 48 CPR Encoder. As of this writing, $35 each. The easy solution is to buy more of them but I hunted for a less expensive proposition.

My first question is: “Can we make replacement gears?” and I quickly decided it was not practical. These gears are too small for consumer grade FDM 3D printers to handle and demands more strength than 3D-printed plastic can deliver. I don’t have a machine shop with metal gear cutting equipment.

The next question is: “Can we buy replacement gears?” And I had no luck here as I didn’t know how to navigate the manufacturing industry landscape to find who might be willing to sell small numbers of these gears to individual consumers.

Following that: “Can we buy replacement gearboxes?” The best I found was a company selling them with a minimum order quantity of 1000. I suppose I could buy a pallet and go into business selling replacement gearboxes to rover builders, but that’s not my idea of entrepreneurship today. (UPDATE: While sharing this information to OSR forums, I found a vendor on Amazon(*) selling them at $16 each. For lowest cost, I also found a company on Alibaba willing to sell individual gearboxes as samples at $2.79 each.)

What’s left? Well, Pololu’s product chart shows item 3256 is the same motor and gearbox, but without the encoder. As of this writing, these are $20 each, a significant discount for not buying another encoder.

It offers a lower cost alternative to direct replacement. I had two broken gearboxes on hand. They correspond to the two front wheels on a rover that took too big of a drop off a curb. I bought two #3256 gearmotors without encoder, and swapped their gearboxes out with the rover’s two #4888 gearmotors with encoders, bringing the rover back up and running.


(*) Disclosure: As an Amazon Associate I earn from qualifying purchases.

Key Press Timeline For Entering and Exiting Developer Mode on Toshiba Chromebook 2 (CB35-B3340)

When I got my hands on this Toshiba Chromebook 2 (CB35-B3340) its primary screen was cracked and unreadable. I was happy when I discovered I could use it as a Chromebox by an external HDMI monitor, but I quickly found the limitation of that approach when I tried to switch the device into developer mode: those screens were only visible on the screen I couldn’t read.

Google has published instructions for putting a Chromebook into developer mode, but they weren’t specific enough for use with an unreadable screen. It doesn’t say how many menus are involved, and it doesn’t say how much time to expect between events. Probably because these details vary from device to device and not suitable for a general document.

I looked around online for information from other sources and didn’t find enough to help me navigate the procedure. Most irritating are the sites that say things like: “And from this point just follow the on screen prompts” when the whole point was I couldn’t read those prompts at the time.

Now that I’ve installed a replacement screen, I can see what happens and more importantly, I can now document the information I wished I was able to find several weeks ago. The most surprising part to me was that it took roughly seven minutes to transition into developer mode, but less than a minute to transition out of it. Since all user data are erased in both of these transitions, I’m curious why the times are so different.

In any case, I’ve captured the process on video (embedded below) and here is the timeline for putting a Toshiba Chromebook 2 into developer mode even if the screen is not readable. Times are in (minutes:seconds)

  • Preparation: power down the device.
  • (0:00) While holding down [ESC] + [REFRESH], press [POWER].
  • (0:15) Press [CONTROL] + [D] to enter developer mode
  • (0:25) Press [ENTER] to confirm
  • (0:36) Press [CONTROL] + [D] to confirm
  • (6:52) Two beeps warning user the Chromebook is in developer mode.
  • (7:25) Chrome OS booted up into developer mode and ready to be mirrored to external monitor.

Following power-ups while in developer mode:

  • (0:00) [POWER] button as normal (no other keys needed)
  • (0:10) Press [CONTROL] + [D] to bypass 30-second developer mode warning screen, also skipping the two beeps.
  • (0:20) Chrome OS booted up into developer mode and ready to be mirrored to external monitor.

Exiting Developer Mode:

  • Preparation: power down the device.
  • (0:00) [POWER] button as normal
  • (0:08) Press [SPACE] to re-enable OS verification.
  • (0:15) Press [ENTER] to confirm
  • (0:48) Chrome OS booted up into normal mode and ready to be mirrored to external monitor.

Life with a Chromebook

Ever since I started looking at this Toshiba Chromebook 2 (CB35-B3340) I had been focused on how I can break out of constraints imposed by Chrome OS. Although I had occasionally acknowledged the benefits of a system architecture focused on the most popular subset of all computing activities, I still wanted to know how to get out of it.

Now that my research got far enough to learn of a plausible path to removing all constraints and turning this Chromebook into a normal Ubuntu laptop, I’m satisfied with my available options and put all that aside for the moment. I took the machine out of Chrome OS Developer Mode so I could experience using a Chromebook for its original intended purpose and seeing how well it fills its designated niche.

Reviewing all the security protections of Chrome OS during the course of my adventure made me more willing to trust one. If I didn’t have my own computer on hand and needed to use someone else’s, I’m far more likely to log into a Chromebook than an arbitrary PC. Chrome OS receives frequent updates to keep it secure, raising the value of continued support. Since my original session to fast forward through four years of updates, I’ve received several more just in the few weeks I’ve been playing with this machine.

On the hardware side, this lightweight task-focused machine has lived up to the expectation that it would be more pleasant to use than a bulky jack of all trades convertible tablet of similar vintage. Its secondhand replacement screen‘s visual blemishes have not been bothersome, and the keyboard and trackpad had been responsive to user input. Its processing hardware is adequate, but not great. During light duty browsing the estimated battery life stretches past eight hours. But if a site is loaded down with ads and tracking scripts, responsiveness goes down and battery life estimate quickly nosedives under 4 hours.

The biggest disappointment in processing power comes from the display department. This machine was the upgraded model with a higher resolution 1920×1080 panel instead of the standard 1366×768. The higher resolution made for more pleasantly readable text, but constantly updating those pixels was too much for the machine to handle. It couldn’t sustain web video playback at 1080p. Short clips of a few seconds are fine, but settling down to watch something longer would be frustrated with stutters unless the video resolution was lowered to 720p.

And finally, there’s the fact that when the network connection goes down, a Chromebook becomes largely useless. This is unfortunately more common than I would like at the moment as I’m having trouble with my new router. In theory Google offers ways for web sites to remain useful on a Chromebook in the absence of connectivity (like Progressive Web Apps) but adoption of such techniques has not yet spread to the sites I frequent. So when the router crashes and reboots itself, the Chromebook becomes just a picture frame for showing the “No internet” error screen. This is not a surprise since network connectivity is a fundamental pillar of Chrome OS, but it is still annoying.

All things considered, a Chromebook is a nice lightweight web appliance that makes sense for the right scenarios. Its focused scope and multilayered security provisions mean I would heartily recommend one for the technically disinclined. If they learn enough technology to find Chrome OS limiting, there’s always Mr. Chromebox. If I should buy one for my own use, I would want a high resolution panel, and now I also know to get a more powerful processor to go with it.

Chrome OS Alternatives On Toshiba Chromebook 2 (CB35-B3340)

If I couldn’t solve the challenges getting ROS up and running with Ubuntu 18 under Crouton in Chrome OS, there is yet another option: erase Chrome OS completely and install Ubuntu in its place. I understand this would remove the developer mode warning and menu, and the software startup can go straight into ROS via an Ubuntu service just like any other Ubuntu machine.

The internet authority for this class of modification is Mr. Chromebox. I don’t know who this person is, but all my web searches on this topic inevitably points back to some resource on https://mrchromebox.tech. Starting with the list of alternate operating system options for a Chromebook. Ubuntu is not the only option, but for the purposes of a robot brain, I’m most interested in the option of a full UEFI ROM replacement allowing me to install Ubuntu like any other UEFI computer.

In order to install Mr. Chromebox’s ROM replacement, the hardware must on the list of supported devices. Fortunately the Toshiba Chromebook 2 (CB35-B3340) is represented on the list under its Google platform name “Swanky” so it should be eligible for the firmware utility script that makes the magic happen.

Before running the script, though, there are some hardware modifications to be made. Firmware replacement can undercut security promises of a Chromebook, even more than developer mode, so there are protections that require deliberate actions by a technically capable user before the firmware can be replaced. For “Swanky” Chromebooks, this hardware write-protect switch is in the form of a screw inside the case that makes an electrical connection across two contacts on the circuit board. Before the firmware can be replaced, that screw must be removed and the two pads insulated so there is no longer electrical contact.

Having a hardware component to the protection makes it very difficult for a Chromebook to be compromised by software bugs. Yet the screw + PCB design is a deliberate provision allowing modification with just simple hand tools. Such provisions to bypass hardware security is not found in many other security-minded consumer hardware, for example gaming consoles. I appreciate Google’s effort to protect the user, yet still offer the user an option to bypass such protection if they choose.

For the moment I am not planning to take this option, but it is there if I need it. In the near future I took this opportunity to get some first hand experience living with a Chromebook with its originally intended (non developer) use.

First Few Issues of ROS on Ubuntu on Crouton on Chrome OS

Some minor wrong turns aside, I think I’ve successfully installed ROS Melodic on Ubuntu 18 running within a Crouton chroot inside a Toshiba Chromebook 2 (CB35-B3340). The first test is to launch roscore, verify it is up and running without errors, then run rostopic /list to verify the default set of topics are listed.

With that done, then next challenge is to see if ROS works across machines. First I tried running roscore on another machine, and set ROS_MASTER_URI to point to that remote machine. With this configuration, rostopic /list shows the expected list of topics.

Then I tried the reverse: I started roscore on the Chromebook and pointed another machine’s ROS_MASTER_URI to the IP address my WiFi router assigned to the Chromebook. In this case rostopic/list failed to communicate with master. There’s probably some sort of networking translation or tunneling between Chrome OS and an installation of Ubuntu running inside Crouton chroot, and that’s something I’ll need to dig into and figure out. Or it might be a firewall issue similar to what I encountered when running ROS under Windows Subsystem for Linux.

In addition to the networking issue, if I want to embed this Chromebook into a robot as its brain, I’ll also need to figure out power-up procedure.

First: upon power-up, a Chromebook in developer mode puts up a dialog box notifying the user as such, letting normal users know a Chromebook in developer mode is not trustworthy for their personal data. This screen is held for about 30 seconds with an audible beep, unless the user presses a key combination prescribed onscreen. How might this work when embedded in a robot?

Second: when Chrome OS boots up, how do I also launch Ubuntu 18 inside Crouton chroot? The good news is that this procedure is covered in Crouton wiki, the bad news is that it is pretty complex and involves removing a few more Chromebook security provisions.

Third: Once Ubuntu 18 is up and running inside Crouton chroot, how do I launch ROS automatically? My current favorite “run on bootup” procedure for Linux is to create a service, but systemctl does not run inside chroot so I’ll need something else.

And that’s only what I can foresee right now, I’m sure there are others I haven’t even thought about yet. There’ll be several more challenges to overcome before a Chrome OS machine can be a robot brain. Perhaps instead of wrestling with Chrome OS, I should consider bypassing Chrome OS entirely?